It alls started with a gazebo that went on sale on Amazon. We don’t have a covered porch, and we can’t use an awning because we are in a funny little windy area, so fabric awnings just shred. I thought it would be nice to have a covered area for packages, and trying to get my keys out, so I started watching the $1500 gazebo, and last winter it went on sale for $800. I bought it instantly.
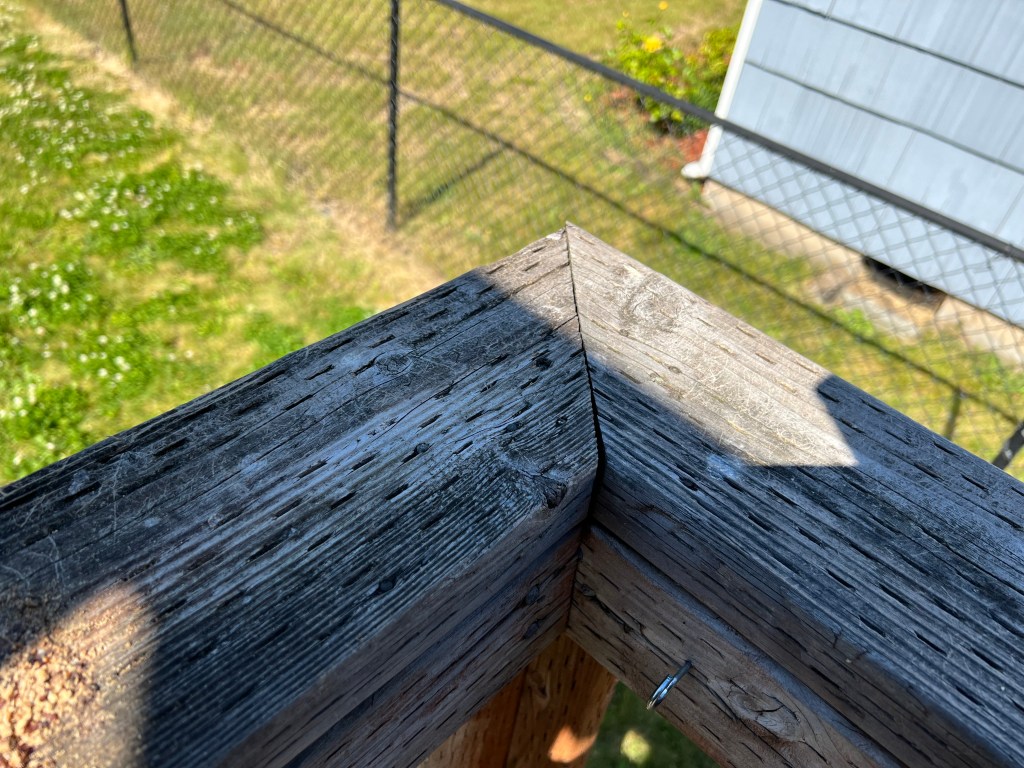
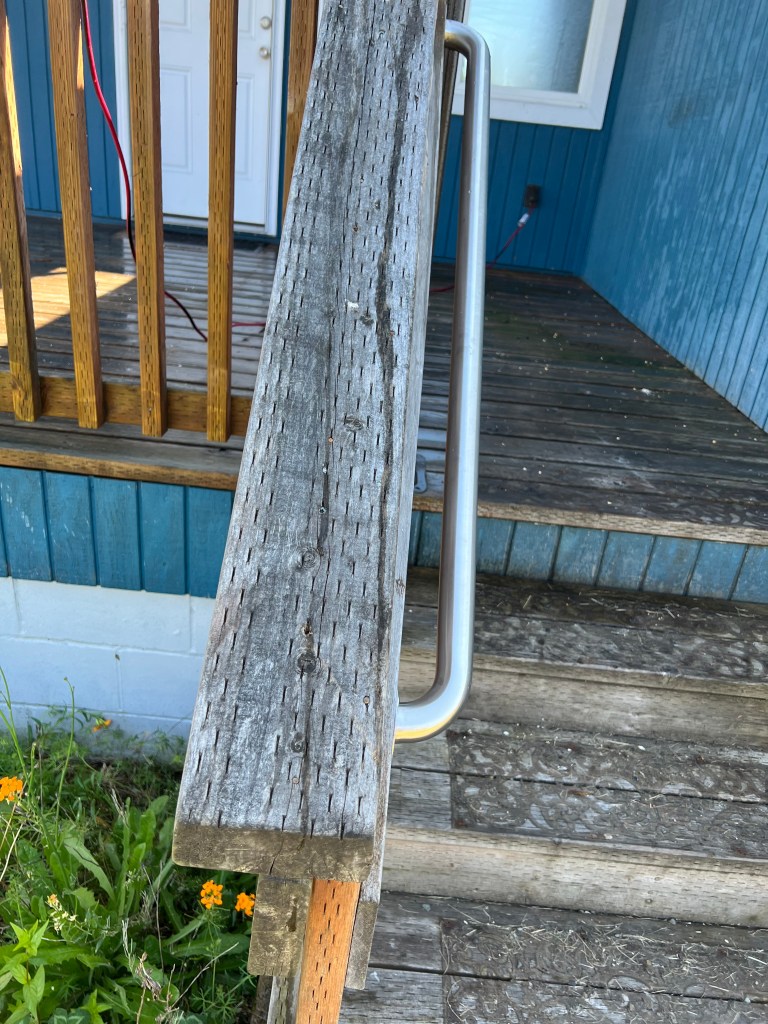
We started putting it together, then realized that the deck was a disaster. It was made with lumber that, as far as I can tell, was never stained or painted. This meant every time it rained, which is a lot here, the wood would swell up, and moss would grow on it, and in winter it would freeze into an ice rink.
We got as far as putting the gazebo frame together, before we realized it would be harder to move it around with the roof on if we wanted to fix the deck, so we paused and I started looking for a solution to our crumbling deck.
We just got a HVAC installation for our new heat pump to the tune of $26,000, so there is no way we could get a new deck put in. It’s not happening until the HVAC is paid off because we are broke!
Then I saw this YouTube video:
https://www.youtube.com/watch?v=8eQhrVbOp_4&list=WL&index=11
This guy had a 30 year old deck that looked about as bad as mine, and he used a product called Restore-A-Deck. Not an affiliate, just the product in question.
I figured the $300 kit they sell was a lot cheaper than a new deck and decided to take the risk on it.
It’s got a few steps.
- Pressure wash the deck.
- Scrub the deck with the deck cleaner solution.
- Rinse
- Spray it down with the brightener solution.
- Rinse
- Apply 2 coats of stain.
I did the first 5 steps in one day, then the last staining step in another day, a week later.
After the first cleaning and prep for the steps I was shocked at how clean the deck was.
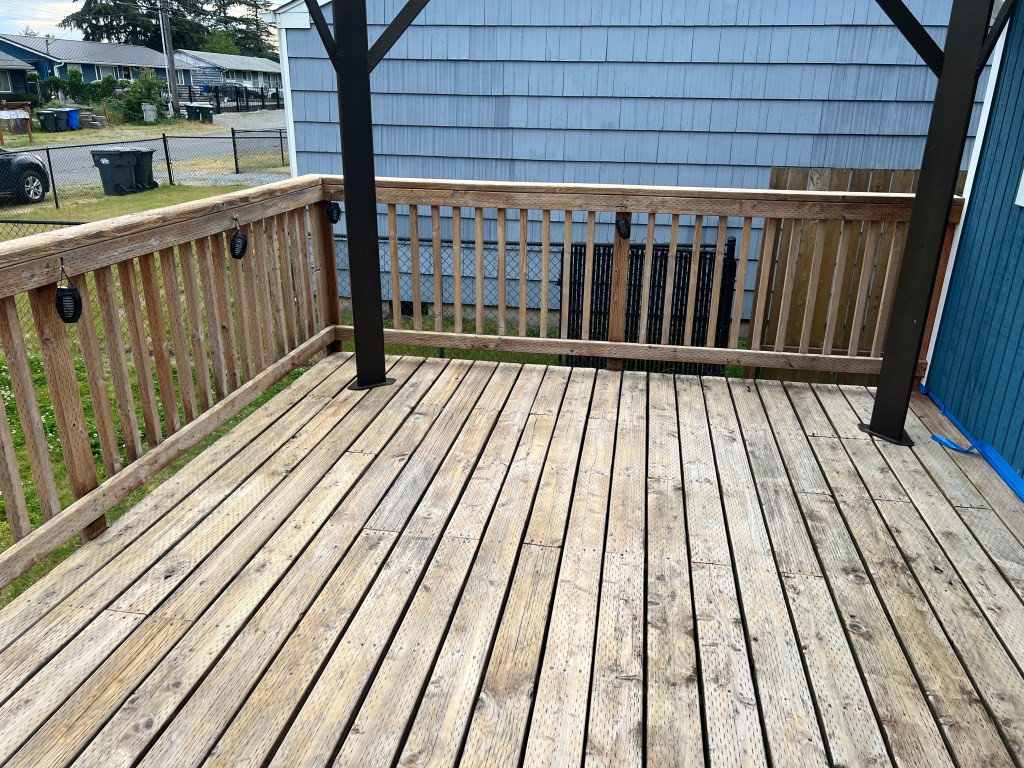
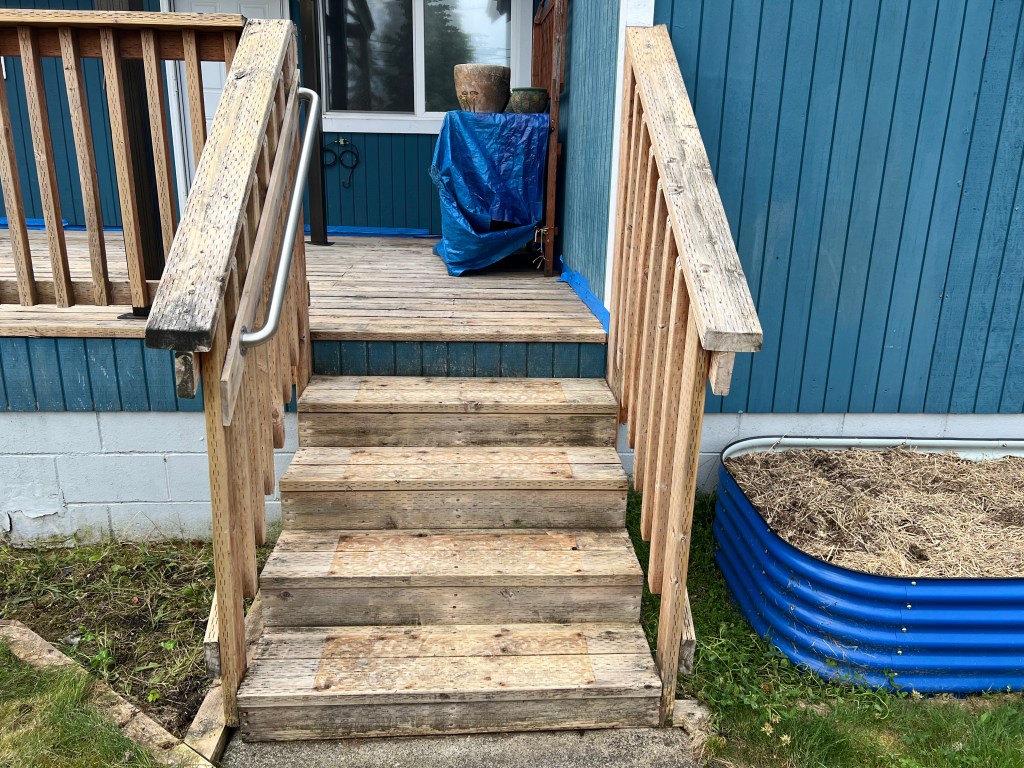
No amount of scrubbing, power washing, or brightening got rid of all the staining and dark spots. It appears a lot of the staining was there to stay. However, I was shocked at how clean it did get. I never expected it to look even that good. It gave me a lot of hope that the products would work.
I took another step and used 80 grit sand paper and sanded the top of the railings because they were in such terrible shape. That was a quick job, and I am glad I did it. I also used some wood filler on some of the cracks, but unlike the guy from the video, the wood filler stained up with the wood and didn’t stand out much more than any of the other weird stains.
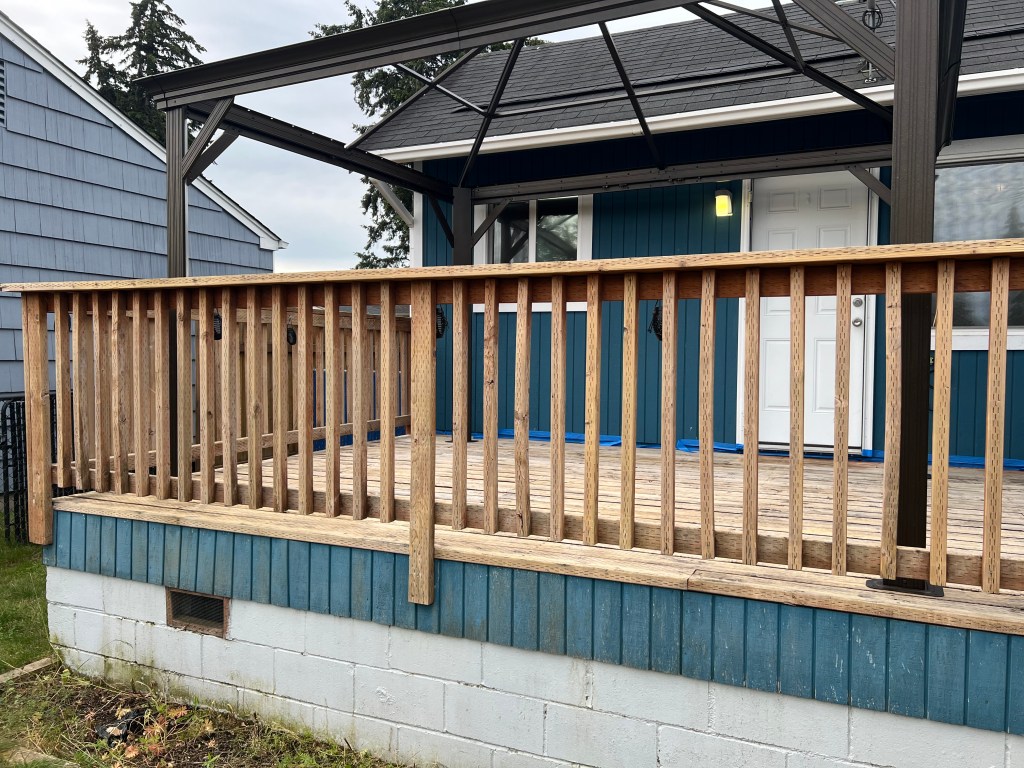
I finally picked a day without rain, and stained it. It took forever to do the railings. The first coat took me 1.5 hours to do the rails, and 30 minutes to do the actual deck board application. The second coat took half the time because not so much stain soaked into the wood.
The results were stunning.
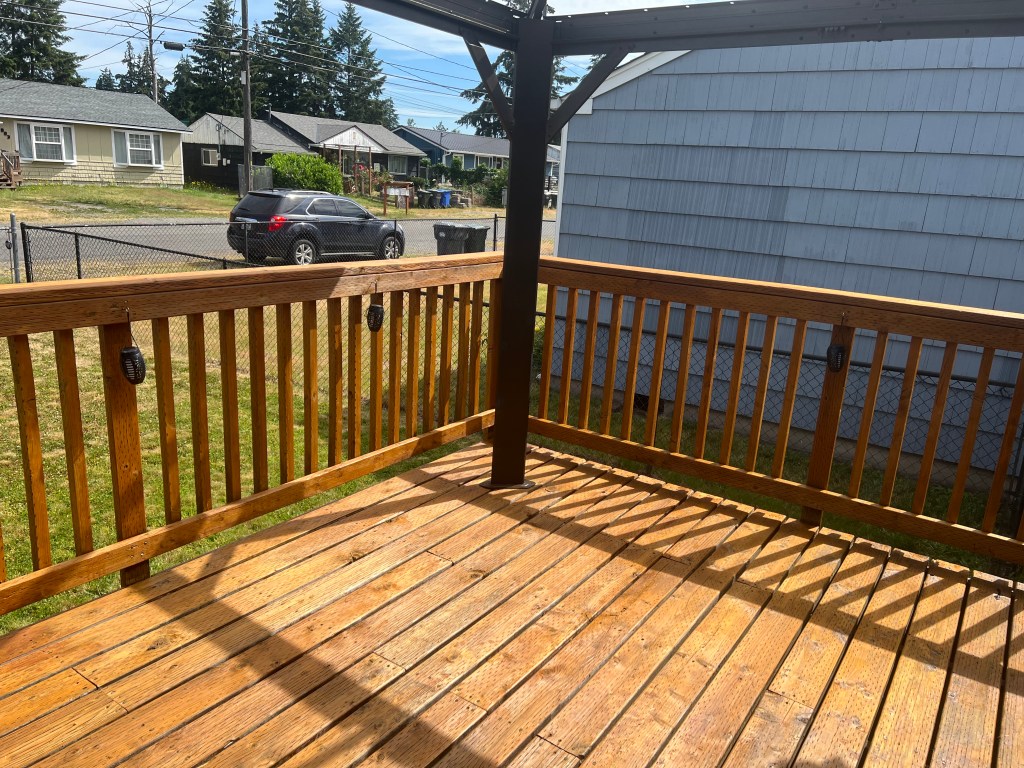
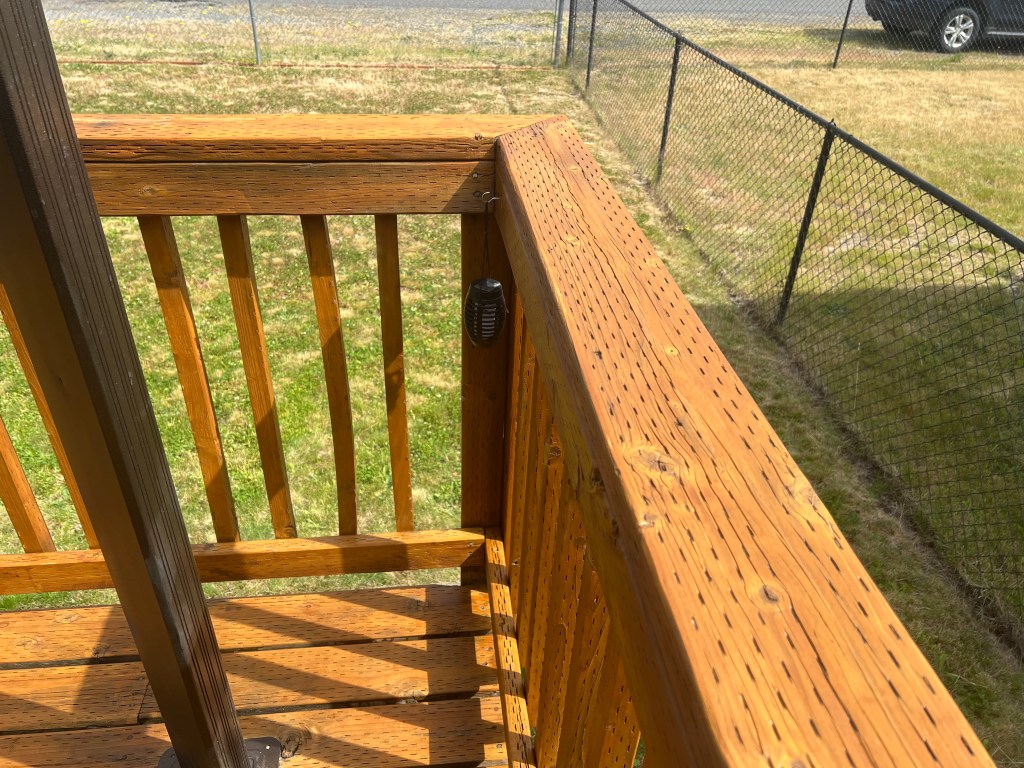

It’s got some spotting and streaks, and dark spots that never came out to begin with, but it looks 1000% times better. I am sure a professional without a failing set of collar bone joints could have done way better, but I don’t think most folks will notice at all.
Additionally, the wood no longer feels raw. It feels like there is a water proof coating on it. It feels nice to touch, and no longer will give you splinters.
Even better, I only used half the supplies to do this, so I have enough do to the tiny back deck as well. . . In a month or two. . . When I am no longer hurting from this project.
My hope is I get at least 5 years out of this, and push the replacement down the road. It will have to be replaced eventually, but stalling for time will get us out of debt for the HVAC.
This means we can finally put the roof on the gazebo and have a rain free space to sit, get our keys, and get our deliveries. I even plan to put a couple chairs and a table out so my wife and I can sit and drink coffee (me hot chocolate!) in the mornings.
