Last month my wife had a pretty credible cancer scare, and an emergency surgery. It was enough that 3 doctors told us to prepare for the worst. Luckily, it turned out to be a gallbladder issue and the inflammation was so bad they thought it was shelf sign, which is a metastasized set of cancer cells, and no cancer was actually in evidence.
It did mean she spent a week in the hospital, and when they removed her gallbladder it took them three different attempts to get it out, as it was one of the worst the surgeon had seen. This surgery resolved 2 decades of issues she’s had, and we are very grateful it’s finally fixed and she’s on the mend.
This means, I really have gotten nothing much done. My own surgery, disability, and then worrying about my wife? Yeah, I spent a lot of time reading monster romance novels, and laying in bed hoping for the best.
I did get some green onions planted though, and my rhubarb is going wild. My strawberries survived and seem to be thriving.
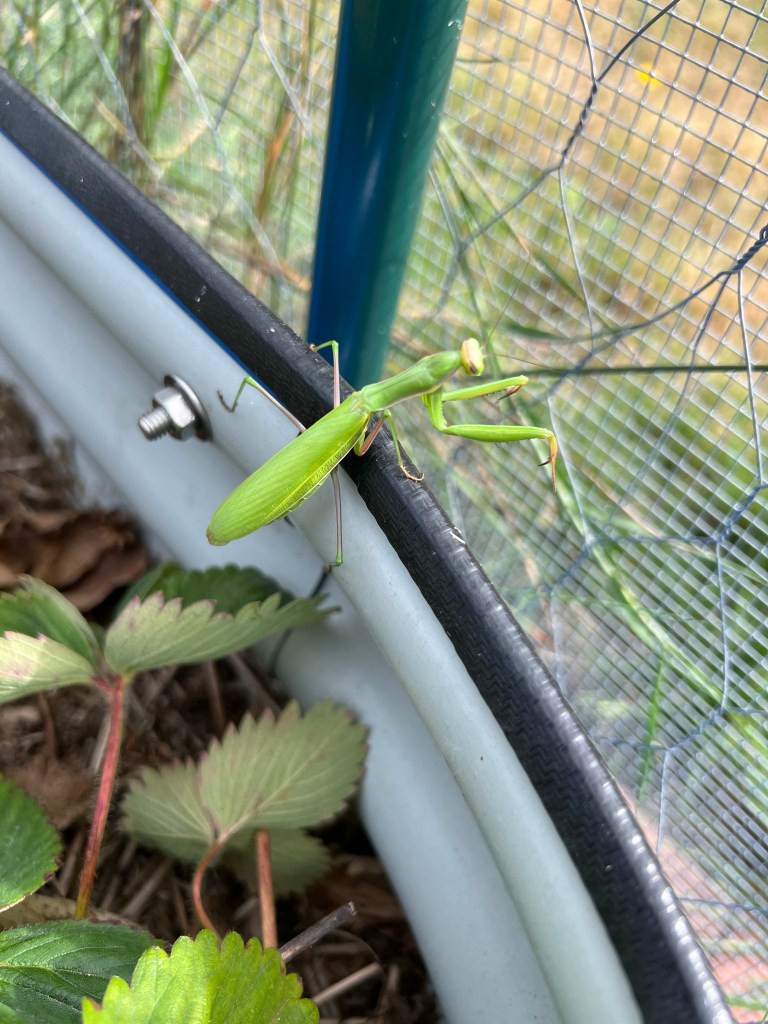
This morning I found a little friend in my strawberry patch.
Large preying mantis.
I wonder if she got in when she was small, and then got trapped. Not that she doesn’t have ample food, but the wire cage is too small for her to get out. She seemed happy though.
My wife was thrilled as she hadn’t realized they exist around here.
I am starting my planning for next spring. I need some soil, but I have compost ready from last year, and all I have to do is plant.
I will also be putting in a timer based irrigation system, so I don’t have to worry so much about getting everything watered. That’s particularly on my mind since I am watering some green onions I planted last week by hand.
I am very grateful my wife is fine, recovering, and healthy. I can now look towards my future garden plans.
We have had a helluva time here this year. I had surgery surgery, then my wife had an emergency hospitalization, where we were told she had cancer, shelf sign, which is a sign for metastasized cancer, and two docs and a surgeon told us to prepare for the worst.
However, my wife is okay, and pathology came back in our favor. No cancer! However, she has to have surgery and remove her gallbladder, and let’s just say the last 6 months have been a lot of worry!
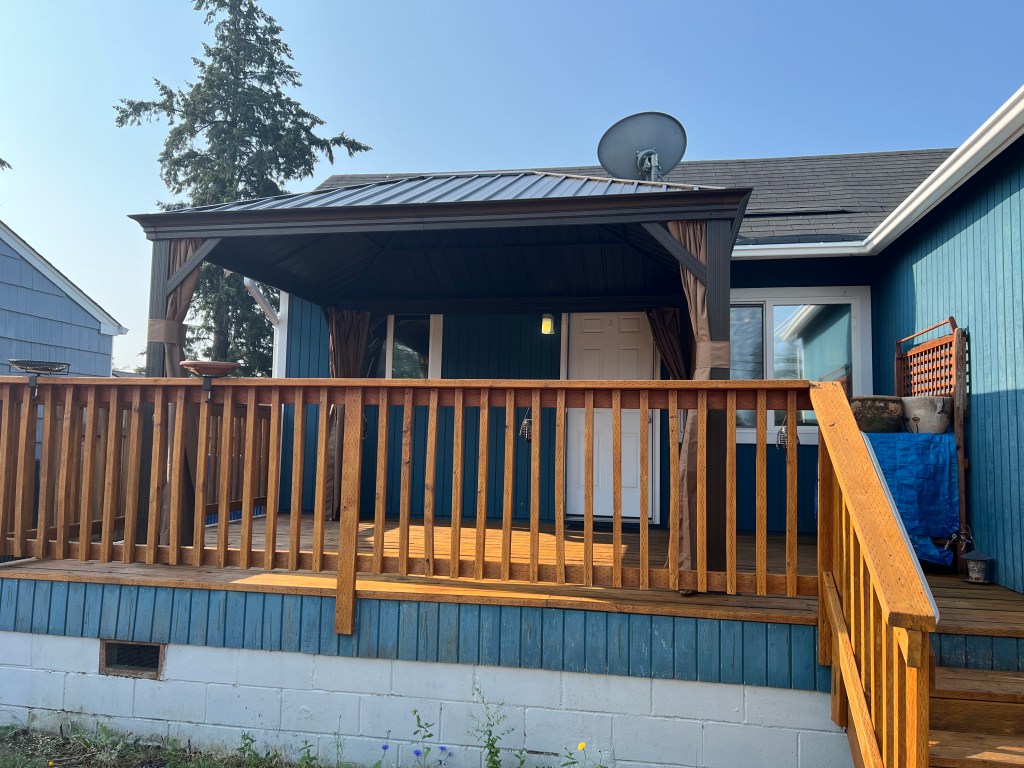
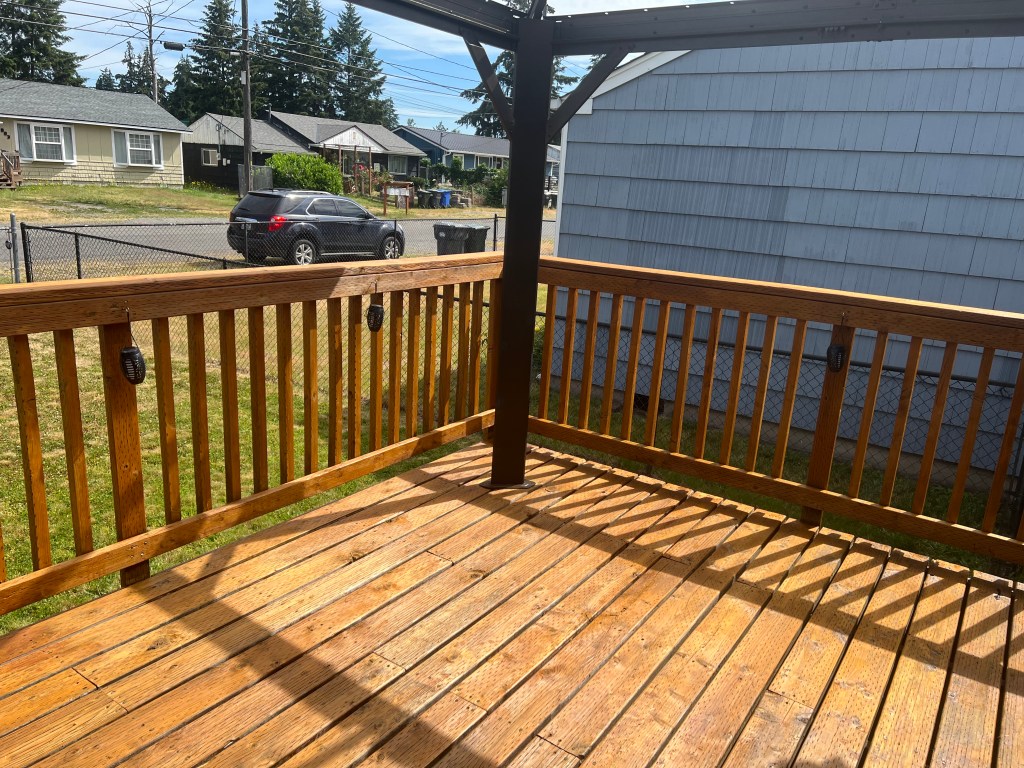
This means I never did get my garden up and running, but I have still been picking at my projects. Yesterday I finished the gazebo on the front deck.
The problem is that we live in the Pacific Northwest and we don’t have a covered entry. It rains a lot here so coming in from the car with groceries, or home from work, you get poured on while trying to get in.
A cheap canvas pop top awning just won’t work here because we live in a windy tunny of land and it’s a rare day we don’t have at least a breeze, and it picks up suddenly and anything canvas will be ripped to shreds very shortly. I tried it on the back deck, and it lasted two seasons.
Instead I found an aluminum roofed gazebo on Amazon. (Not an affiliate link, just what I used.) Its normal price was somewhere around $1400 to $1600, and my Camel Camel Camel website alert let me know last spring it went on sale for $799. Sale gazebo was a go! I bought it, and got the initial frame done before my own surgery in March.
It took me forever to heal, and I knew the roof was going to be a pain in the butt so I procrastinated. Well, procrastinate no longer! I got the roof up. It was every bit a pain in the butt as they said, and I gave up and re-drilled a few holes because they just wouldn’t line up for me no matter what kind of trouble shooting I did. That seemed to do the trick, and it’s up and done.
One complete gazebo on the porch!
The good thing was this company makes really good products. They gave me extra hardware for everything, and it’s sturdy and feels like real quality. It should last quite a while.
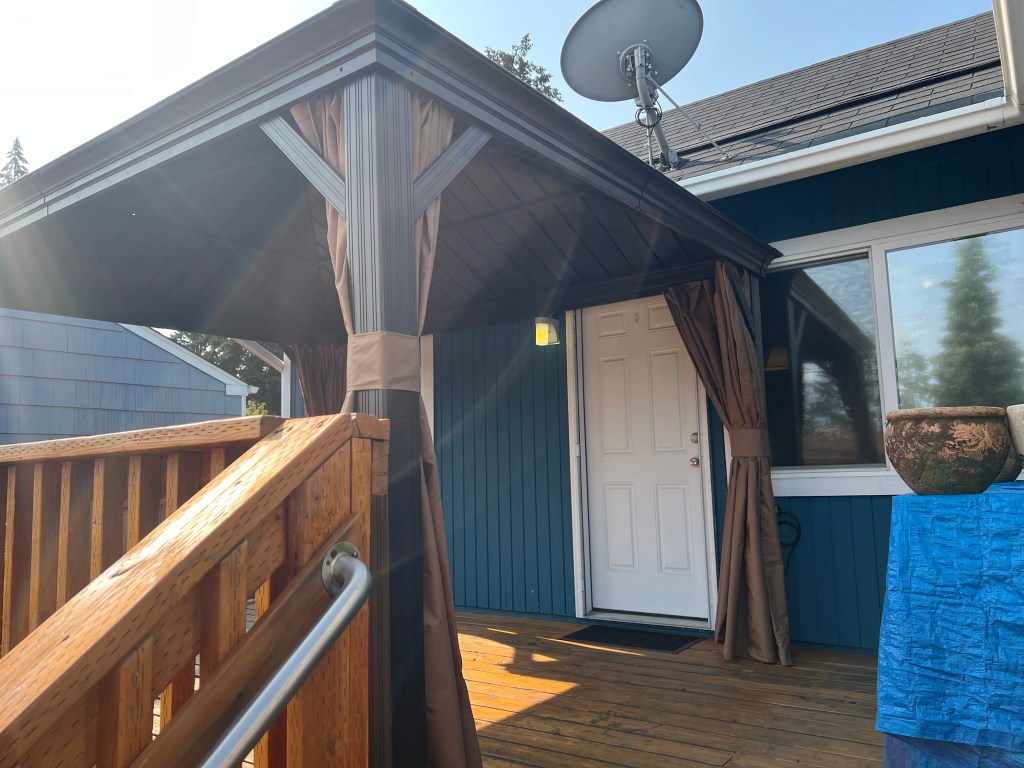
Closer shot of the finished gazebo highlighting my door decisions.
You might notice that while it’s 8 feet tall, it dips down on the edges by the front door. I decided to remove my screen door, because it’s not a huge value to me over having a covered porch option. I mean, sure, that’s a little janky, but it works out fine.
My next steps are to get a storage bench instead of the blue tarp wrapped potting bench to hide packages in, and a couple chairs and a table. Oh, and a few bird feeders. We really like those.
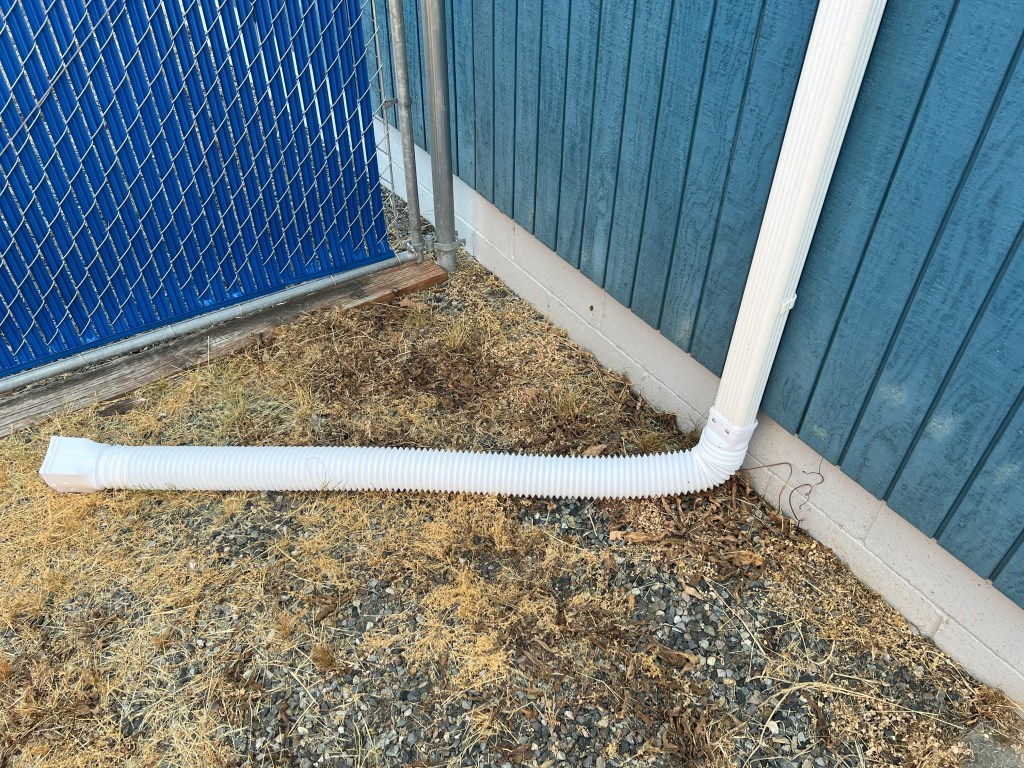
Next on my agenda was the down spouts. I have two, that have been cut off short, and dump right into my foundations. I needed a temporary solution so I opted for some cheap extenders.
White downspout extender in place.
When I looked at it, it appeared like the spout was cut short, and that isn’t great for water management on the property. This one in the picture is in my gravel driveway. Ignore the carpet of weeds. There’s a bare inch of gravel with no weed barriers and it needs to be redone. We are waffling on returning this area back to the back yard when we no longer have to park a Kia Soul back there because of theft risks.
This was a cheap option to get us through until we can make decisions on how to do a more permanent fix. Putting in a drain and whatnot is likely, but I have to wait until we know what we are doing with the area.
Not a huge amount done, and I am sorely missing my garden, but things are being slowly improved around here.
It alls started with a gazebo that went on sale on Amazon. We don’t have a covered porch, and we can’t use an awning because we are in a funny little windy area, so fabric awnings just shred. I thought it would be nice to have a covered area for packages, and trying to get my keys out, so I started watching the $1500 gazebo, and last winter it went on sale for $800. I bought it instantly.
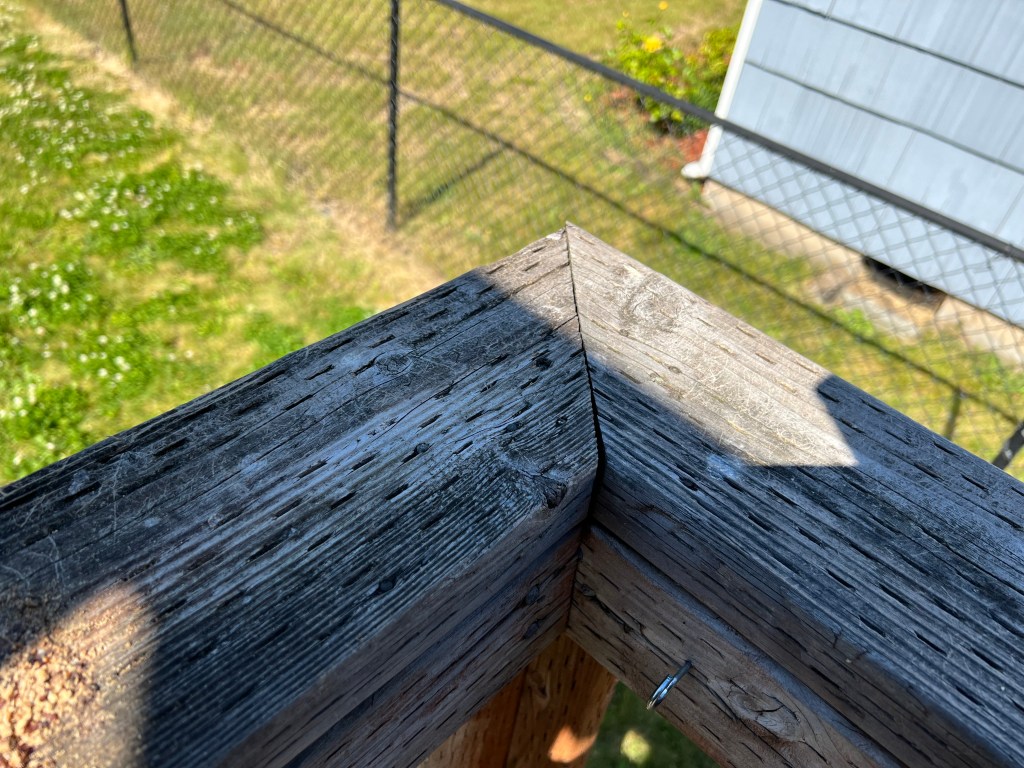
We started putting it together, then realized that the deck was a disaster. It was made with lumber that, as far as I can tell, was never stained or painted. This meant every time it rained, which is a lot here, the wood would swell up, and moss would grow on it, and in winter it would freeze into an ice rink.
We got as far as putting the gazebo frame together, before we realized it would be harder to move it around with the roof on if we wanted to fix the deck, so we paused and I started looking for a solution to our crumbling deck.
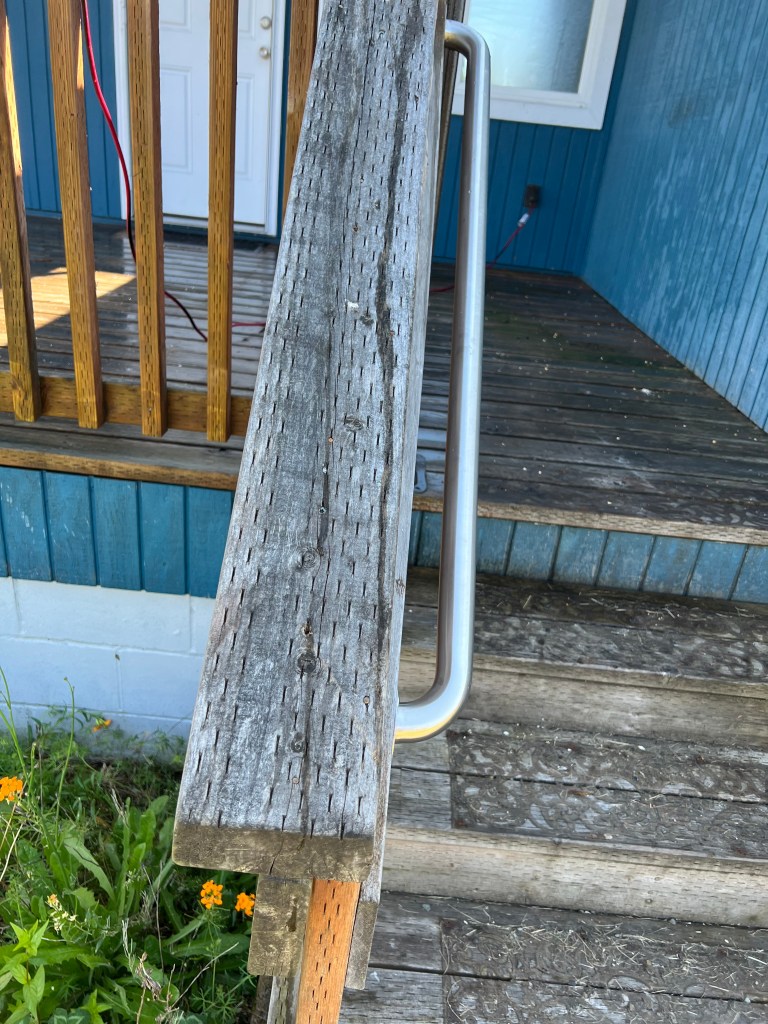
Close up of the railings showing how bad the wood was.
Another close up of the bad deck wood.
We just got a HVAC installation for our new heat pump to the tune of $26,000, so there is no way we could get a new deck put in. It’s not happening until the HVAC is paid off because we are broke!
This guy had a 30 year old deck that looked about as bad as mine, and he used a product called Restore-A-Deck. Not an affiliate, just the product in question.
I figured the $300 kit they sell was a lot cheaper than a new deck and decided to take the risk on it.
It’s got a few steps.
Pressure wash the deck.
Scrub the deck with the deck cleaner solution.
Rinse
Spray it down with the brightener solution.
Rinse
Apply 2 coats of stain.
I did the first 5 steps in one day, then the last staining step in another day, a week later.
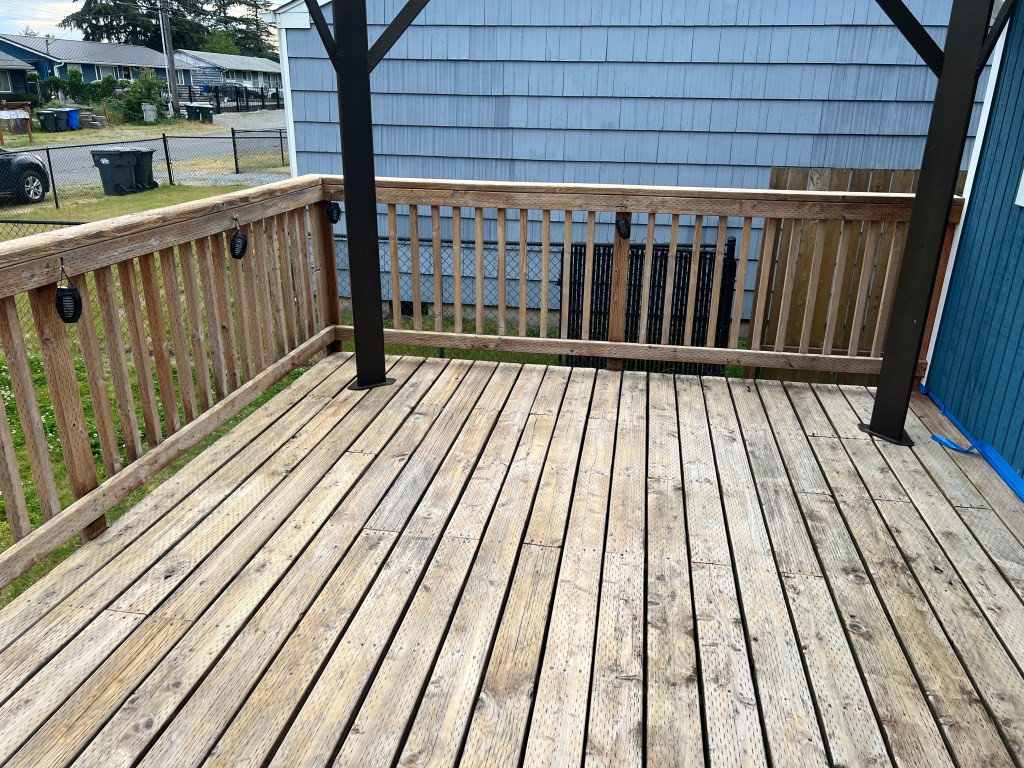
After the first cleaning and prep for the steps I was shocked at how clean the deck was.
Deck prepped and ready for stain.
Deck cleaned and prepped.
Cleaned steps. (Ignore my sophisticated package hiding potters bench with the blue tarp.)
No amount of scrubbing, power washing, or brightening got rid of all the staining and dark spots. It appears a lot of the staining was there to stay. However, I was shocked at how clean it did get. I never expected it to look even that good. It gave me a lot of hope that the products would work.
I took another step and used 80 grit sand paper and sanded the top of the railings because they were in such terrible shape. That was a quick job, and I am glad I did it. I also used some wood filler on some of the cracks, but unlike the guy from the video, the wood filler stained up with the wood and didn’t stand out much more than any of the other weird stains.
I finally picked a day without rain, and stained it. It took forever to do the railings. The first coat took me 1.5 hours to do the rails, and 30 minutes to do the actual deck board application. The second coat took half the time because not so much stain soaked into the wood.
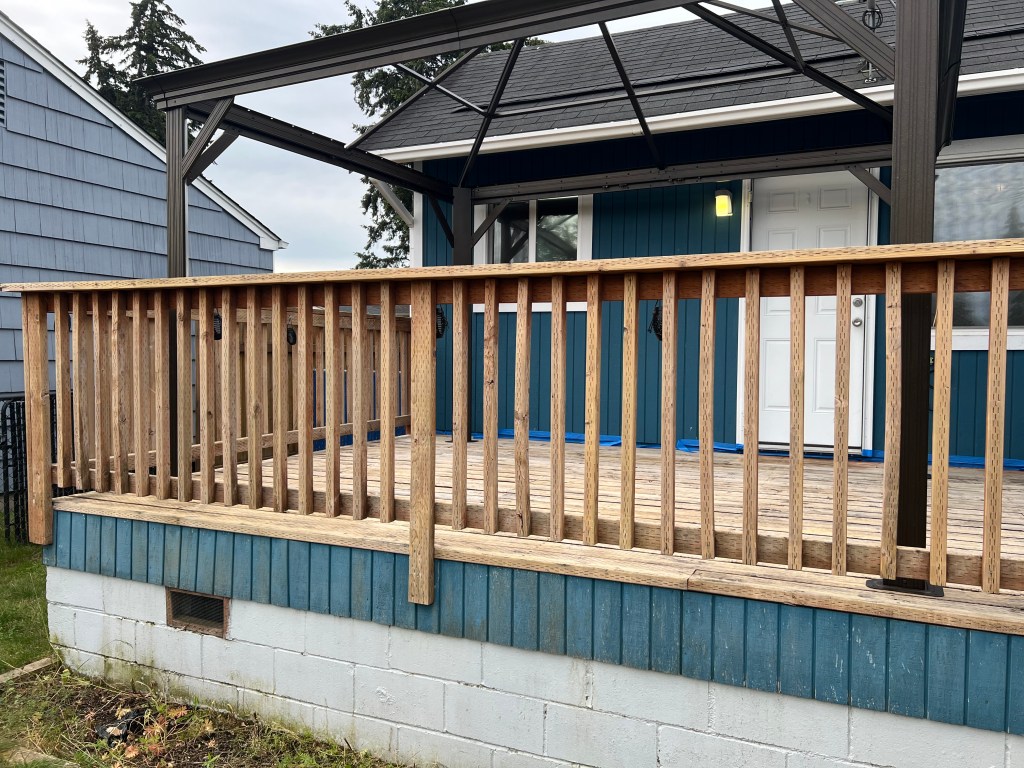
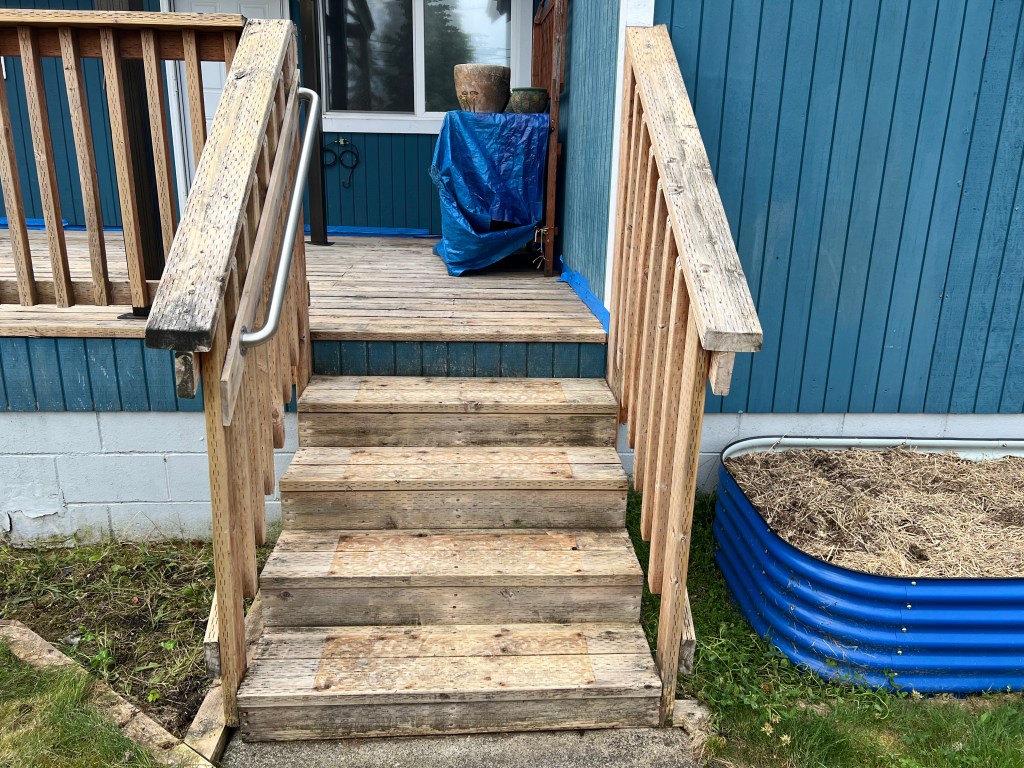
The results were stunning.
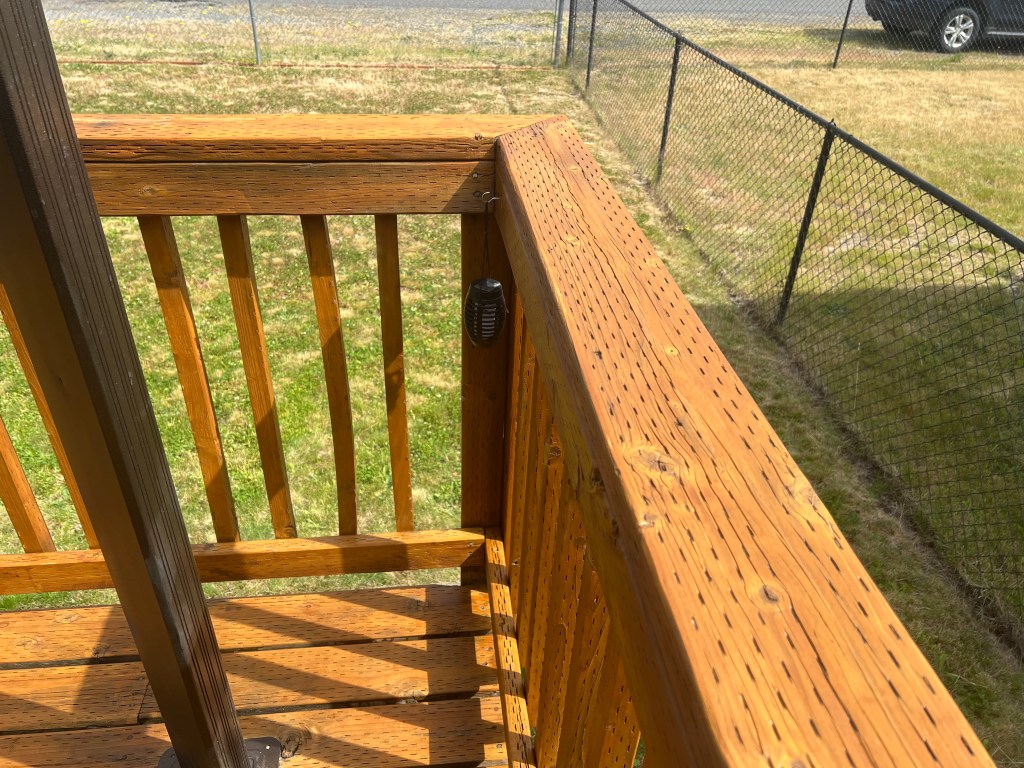
Finished deck.
Railing looks so much better.
Stairs alls stained.
It’s got some spotting and streaks, and dark spots that never came out to begin with, but it looks 1000% times better. I am sure a professional without a failing set of collar bone joints could have done way better, but I don’t think most folks will notice at all.
Additionally, the wood no longer feels raw. It feels like there is a water proof coating on it. It feels nice to touch, and no longer will give you splinters.
Even better, I only used half the supplies to do this, so I have enough do to the tiny back deck as well. . . In a month or two. . . When I am no longer hurting from this project.
My hope is I get at least 5 years out of this, and push the replacement down the road. It will have to be replaced eventually, but stalling for time will get us out of debt for the HVAC.
This means we can finally put the roof on the gazebo and have a rain free space to sit, get our keys, and get our deliveries. I even plan to put a couple chairs and a table out so my wife and I can sit and drink coffee (me hot chocolate!) in the mornings.
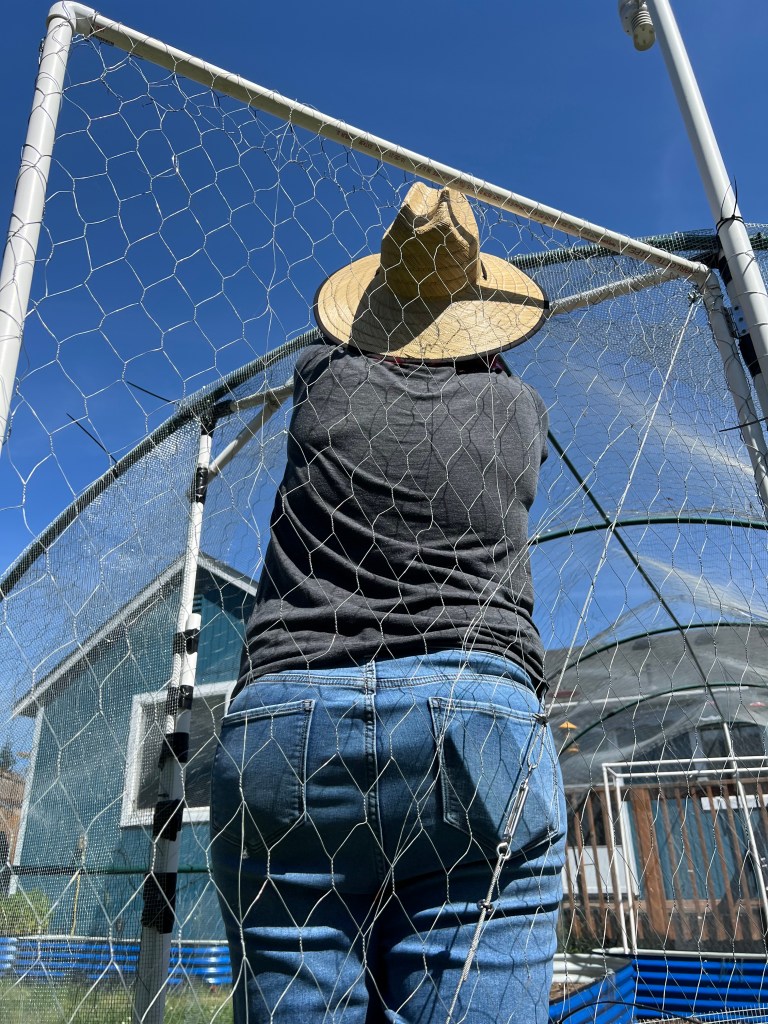
This was actually really hard on me, unexpectedly. Reaching up and over is not a movement my bad collarbone does well, but little by little, I got it done.
Wife helping me!
My wife helped me, but she’s not much better off than I am. However, with the two of us, we got it done.
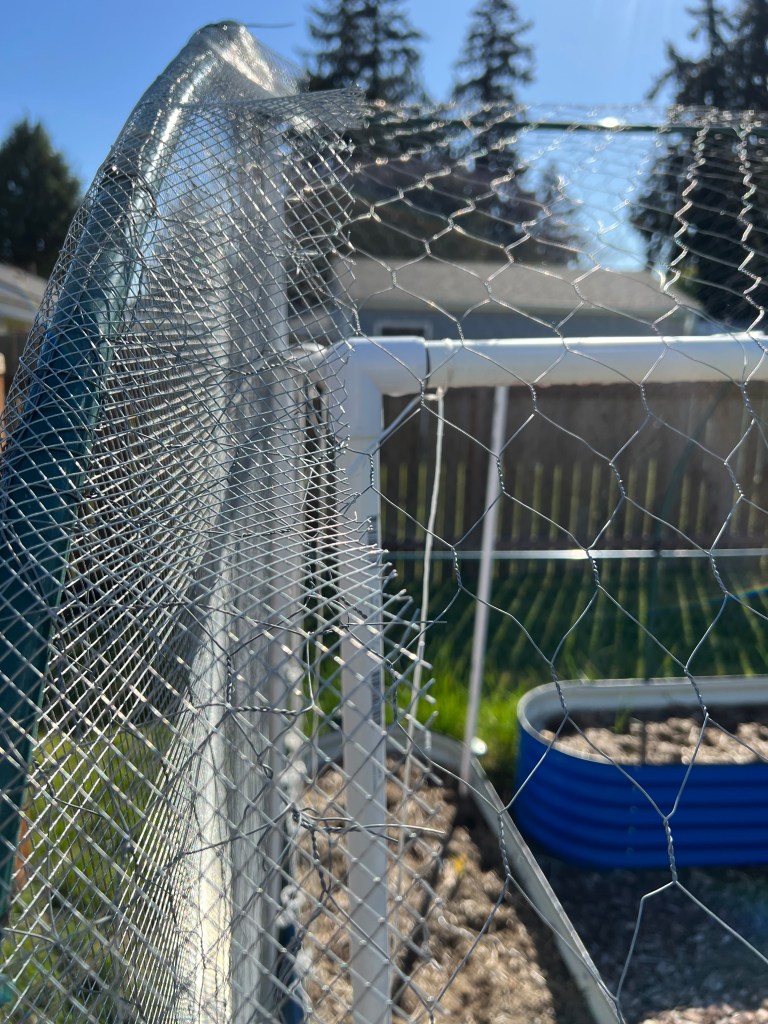
Close up of the half inch hardware cloth.
The hardware cloth was also a bit tricky. It will cut you easily, and I shredded my work gloves working with it. Each session of wrapping the garden cage left me with a lot of cuts and scratches.
Front gate.
I repaired the front door with a gate repair kit to it so it didn’t sag anymore. I left about a foot free on the top of the gate in hopes that pollinators would go in there. If the squirrels find it, it will be a simple matter of covering it too.
I also used a brick border where the hardware cloth came down to the ground. The bricks sit on top of a bit of hardware cloth that is tucked under them to keep the squirrels from digging under.
I used some wire to literally sew the panels on, and that worked really well. I have been keeping watch on the beds and not a single new hole has been dug since I did this.
I feel bad because most of the season is gone, but I figure that is one of the things that is cool with owning your own house. I will prep the beds, and fill them with more dirt, and be ready for next spring.
I might even have enough time to build a cage for a new external, strawberry bed by then.
The only things that survived from last year are the parsley and the strawberries. I was pleased I at least get the strawberries. Oh, and the mint and rhubarb outside the cage. They did remarkably well.
I feel really good about this because if this works, then it’s a one and done. I can then concentrate on planting my plants.
Although exhausting, it was nice to get this done. Here’s hoping I have stopped the squirrel incursion.
Well, not much is getting done. I might miss this season for gardening. After surgery I had a lot of recovery time, then I had to work on getting my garden cage squirrel-proofed, and that is a lot to do.
I haven’t even tried to plant without these protections in place because the squirrels are literally digging up my beds constantly. It’s never ending.
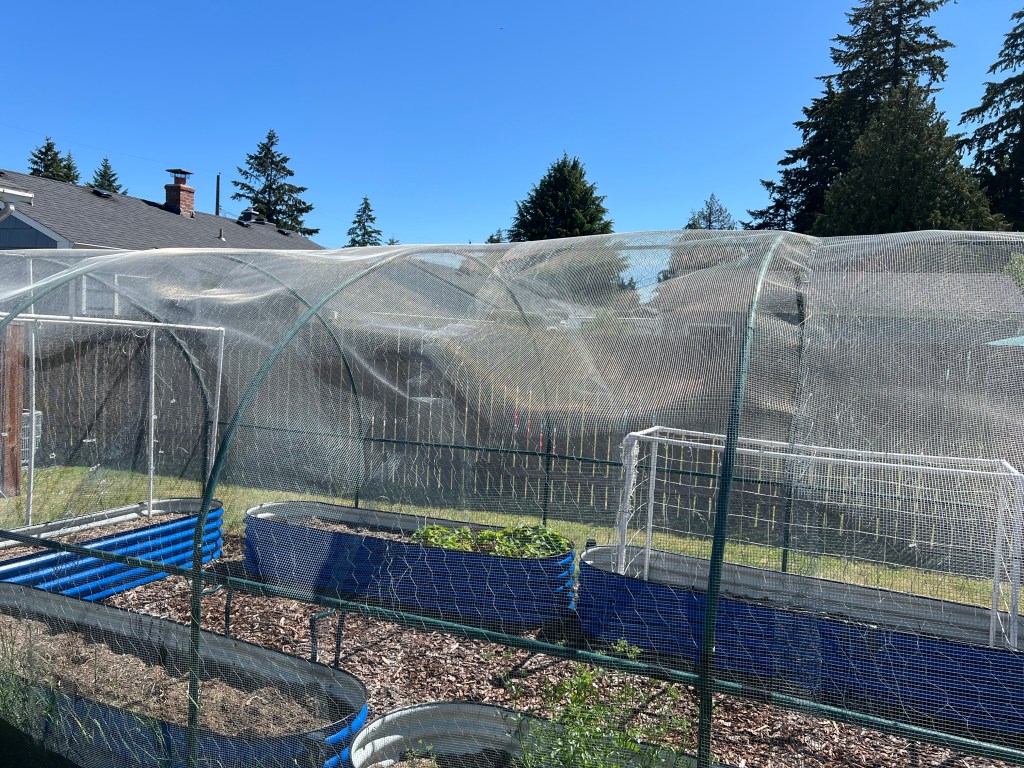
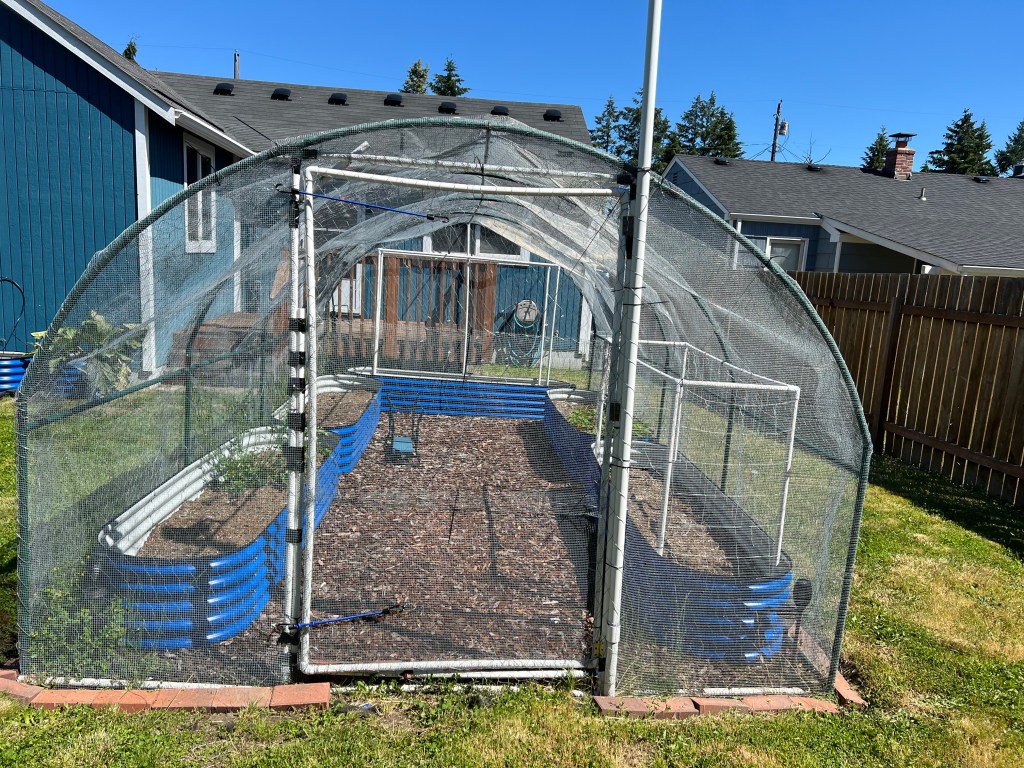
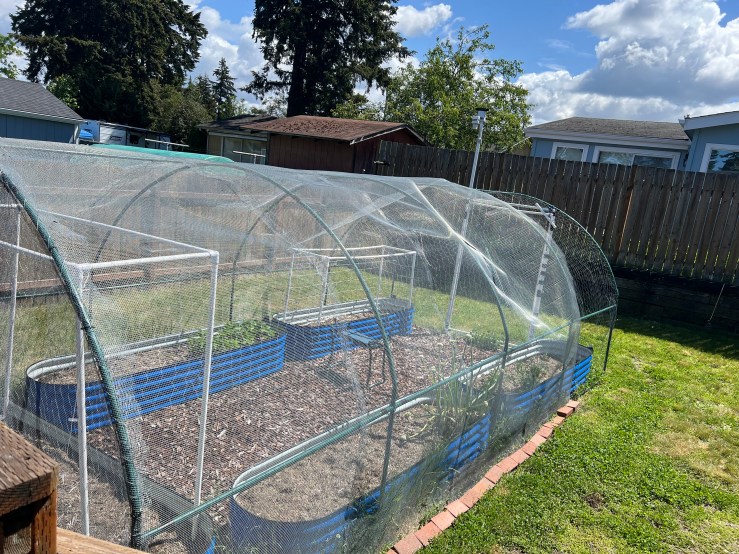
My garden plan is to finish the hoop house, and see if I can put some late crops in. Then slowly turn to my other beds. I have a new strawberry bed I need to cage up, as well as a sunflower, flower bed and herb beds that needs caged.
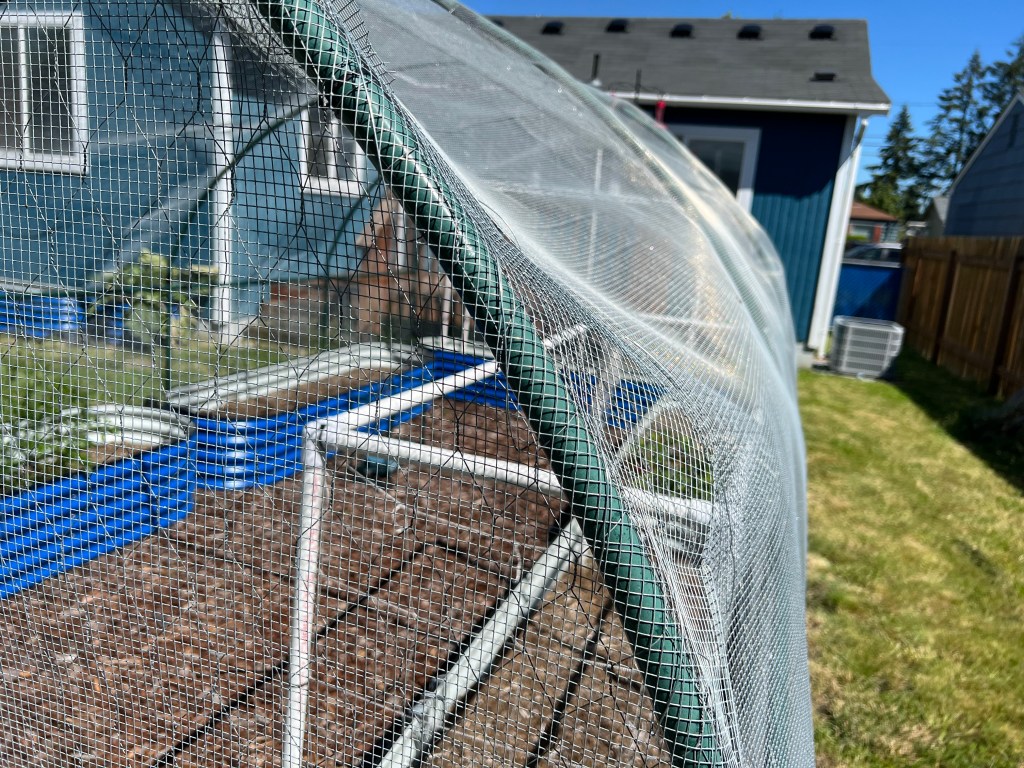
I have about 3/4 of my hoop house covered but it’s slow going. I just take a long time to heal, and my recovery from general anesthetic along with my work obligations have been a lot.
I am wrapping 1/2″ hardware cloth over the entire thing. I am using bricks to weigh down the ends of it, so squirrels can’t get in. You can literally see the squirrel holes in this picture.
My wife has been helping me because her 6’2″ height and long arms are very helpful compared to my 5’6″ stature. I am hoping this weekend to get more done. I am out of bricks so maybe I will pick some up on Wednesday afternoon.
I do like that in the picture you can see all the clover coming in. I’ve had a lot of it grow in from last year. I’ve been mowing it just like grass. I love it. I am going to seed the bald spots again and see if that helps. Clover is so nice! I don’t know why folks do grass yards.
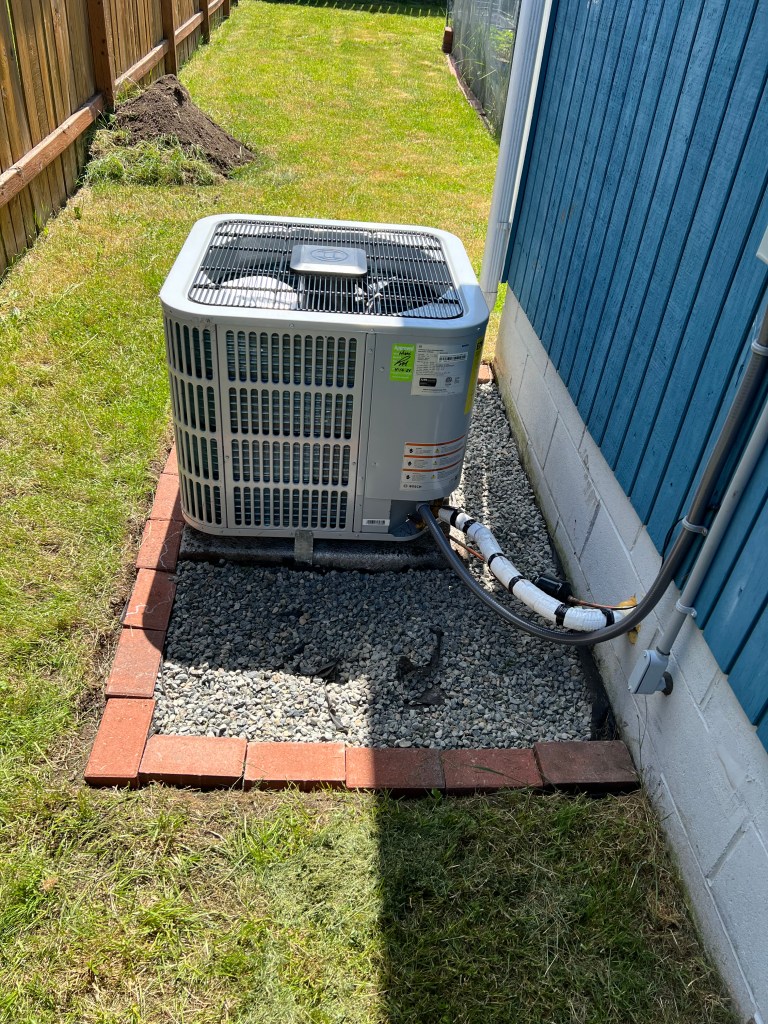
We also had our HVAC system changed out a few months back to a heat pump. This is the single best adult purchase in my entire life. Our house is from 1935 and has thin exterior walls, so being able to control the heat and cold in the house to be comfy is a god send.
We spent $26,000 to do have the work done, and some of it was electrical to prep for this. We will see about getting some of that back at tax time, but honestly? I’d rather pay the small low interest home loan we got for it, and be comfortable.
It’s been a few months and we’ve had a few hot days, and it’s amazing. This, combined with the roof vents, and crawl space insulation means that no matter what, our home is the perfect temperature. This is the first time in a year and a half that it’s not over hot or over cold.
I decided I didn’t want to mow around the heat pump unit, so I dug up the grass around it, and laid down landscaping cloth, and put some gravel over that.
This is so tiny, but literally took me two hours, and I was physically wrecked for days!
I wanted to make sure the mowers or weed eaters didn’t come in contact with the important bits below:
Ignore the landscaping cloth peeking through, I am getting another bag of gravel this weekend to cover it.
Now we don’t have to worry about accidentally breaking anything. Honestly, I’d do the whole side of the house that way, because I hate grass lawns.
The other project I have been doing, a window or two at the time, is reflective UV film. I have been putting it on all the windows. it’s just like a giant vinyl sticker you install on the inside of your windows, that keeps out the heat, and is reflective enough you can’t see in.
You can hardly see in at all, and it sure does keep the heat of the sun out.
I was just impressed with how much heat this window film keeps out. It is also damn near impossible to see. In the picture above you can kind of see the back window, but that’s at 2 feet from the window. On the street, you see literally nothing. It’s 10/10 on blocking heat, and 10/10 on blocking folks from seeing in.
I am just trying to get all this infrastructure projects done. I don’t feel it’s the fun projects, but the basic ones to make everything livable. I am more into the decorating and planting, not the insulating and making the house livable.
I think next spring I will have all the garden beds protected with cages. I will have all the big livable projects done, and can start planting and maybe doing cool artsy decorating projects. I look forward to that.
Mostly, I am trying to give myself the grace that I would extend to anyone else. I am partially disabled. I can’t lift, or move the way healthy young folks can, so I am doing a lot. It’s just on my terms. I like to remind myself of that when I feel I am missing my own self imposed deadlines.
It is amazing though, that I have a house, and I can work on projects at my own pace because I will live here next year, and next year and so on. I sometimes forget I get to live here forever because I am so used to renting.
In my home, I have an old school stove, but it’s very old. I know when it fails I will be upgrading to a glass top. Because I do jam canning, I know I will NOT be putting those heavy canners on a glass top. Add to that, I have a really hard time dealing with such a large pot of water with my reduced abilities.
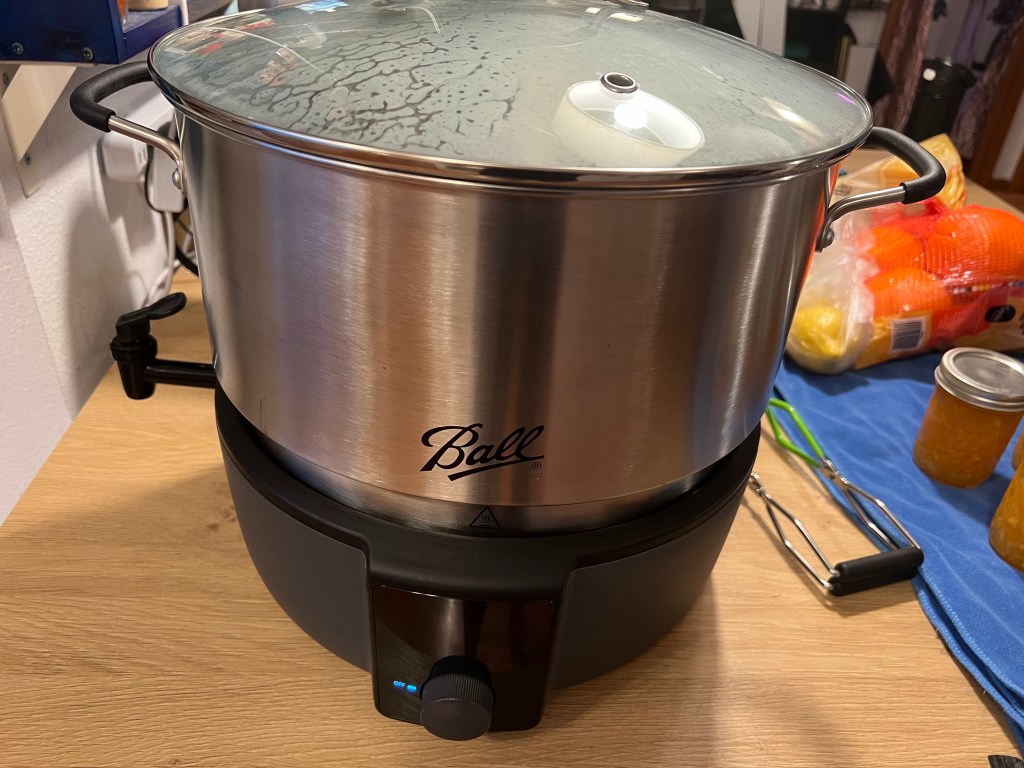
This led me down a rabbit whole looking for a solution. I found the Ball Water Bath Canner. (Not an affiliate link.)
I just happened to have it on my price watch and found it had gone on sale for $174. It’s normally $234. That’s $60 off. I am all about the sale. Camel Camel Camel price watches said it was the lowest price, so I scooped it up.
It’s very weird to be in a situation where I have a permanent home. I’ve moved so much in rentals that I was never able to justify owning something I only used once a year. We often lived in super tiny apartments to keep rental costs down. Owning a home means we are now buying the things we want because we have space. I would have never bought such a large item in a rental.
Initially, I was worried about this water bath canner because it’s electronic. You can toss your jars in, and it thinks out all the timing for you.
However, it worked just fine after I figured out how to do it. It was super easy, and for someone that’s partially disabled? Being able to use the pour spout to get rid of the water afterwards was amazing. No more trying to haul it up and over to the sink. That was always a dicey proposition for me.
Here she is, in all her glory.
My only real concern is that water spout sticks out a lot, and I was worried long term storage might be an issue, so I stored it in the box it came in to prevent accidentally snapping it off. I would not want to ruin my jammy investment.
Since I now had this, I decided to make some marmalade. My wife loves it, and I have never done it before.
It says it makes 6 (8oz) half pint jars, but I ended up with 9. My oranges were HUGE.
I prepped 8 jars, and just used the 9th straight to the fridge.
Marmalade!
My experience with the Ball electric water bath canner was good. Once I let go of my worry about the process it really did simplify things for me. I was impressed that my prepped jars just hung at the right temp indefinitely. Every little bit it would remind me they were ready, but it held them just fine.
I found it easier to deal with due to my disability than a regular water canner. Just being able to pour out water into a pan when done was so much easier. If you aren’t that strong, or have issues effecting your ability to haul a giant pot around, this is not a bad solution.
I have not tested the giant steamer option, but that’s an option too. Maybe someday I will make a stack of bao rolls in it. It’s sized well for steaming big batches.
The recipe was good too. If you’ve never made marmalade before, be prepare for lots of prep work. Chopping peals, removing seeds, and prepping the fruit. It takes a while.
The recipe is nice, but the jam is a little less stiff than I’d like, but still amazing. It is a little bitter? Not bad at all, but if you are sensitive to that, you might want to prep your peels differently.
Over all, this was a great purchase, and it worked really well. If you can’t lift easily, and this is well worth it.
My garden is not going to be up to snuff this year. Between having surgery, and finding out the squirrels destroyed every bed I had, I am going to have to reset my expectations.
My big plan is to get the original garden space covered in hardware cloth. I did the back wall last weekend and I’ll be damned if the squirrels will get into that side now. The end walls are the hardest and most fiddly to do, so now I have to do the 20 feet overtop wall and roof, and then the last end with the door.
Hardware cloth is a way better option. I had no idea they could get through chicken wire.
Once I get that done, I will top up my soil, and do some late planting. Then move my attention to building squirrel cages for all the new beds I invested in last fall.
Somewhere in there I have this gazebo on the front deck to build too.
It’s going to be slow, but I own the house, so it’s okay. By next spring I will be on a roll.
I had this incredible panic about failing to meet my self imposed spring deadline. Then I realized it’s because I am not used to owning a home. If I didn’t get it done immediately, I might have to move, and never get to do it.
Home ownership is such a kindness. I can do as much are as little as I can realistically do, and there is no rush. I can do it all year and my garden will eventually be up and running.
I completely forgot about this post while I was removing from surgery. Just totally left my mind. I wrote this about mid to late March 2024. However, I think the ice cream was great so I am still posting it!
I would love to be out in the garden starting for this year, but I had surgery at the beginning of March. It’s really thrown me for a loop, so while I recover I have been puttering around inside the house.
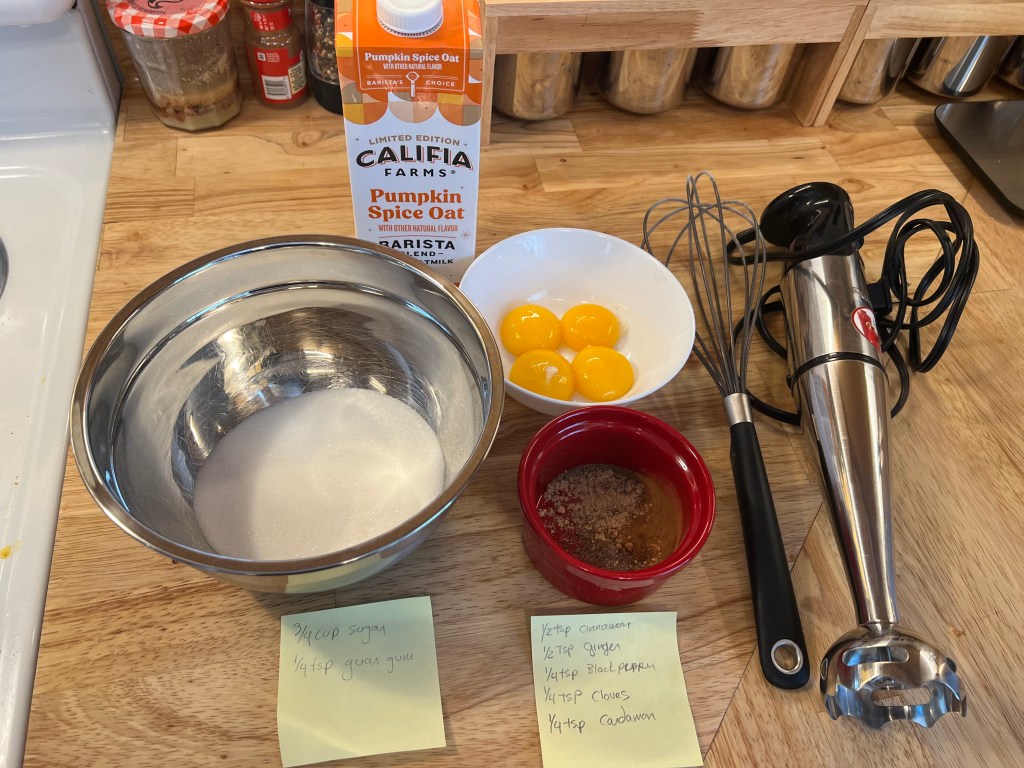
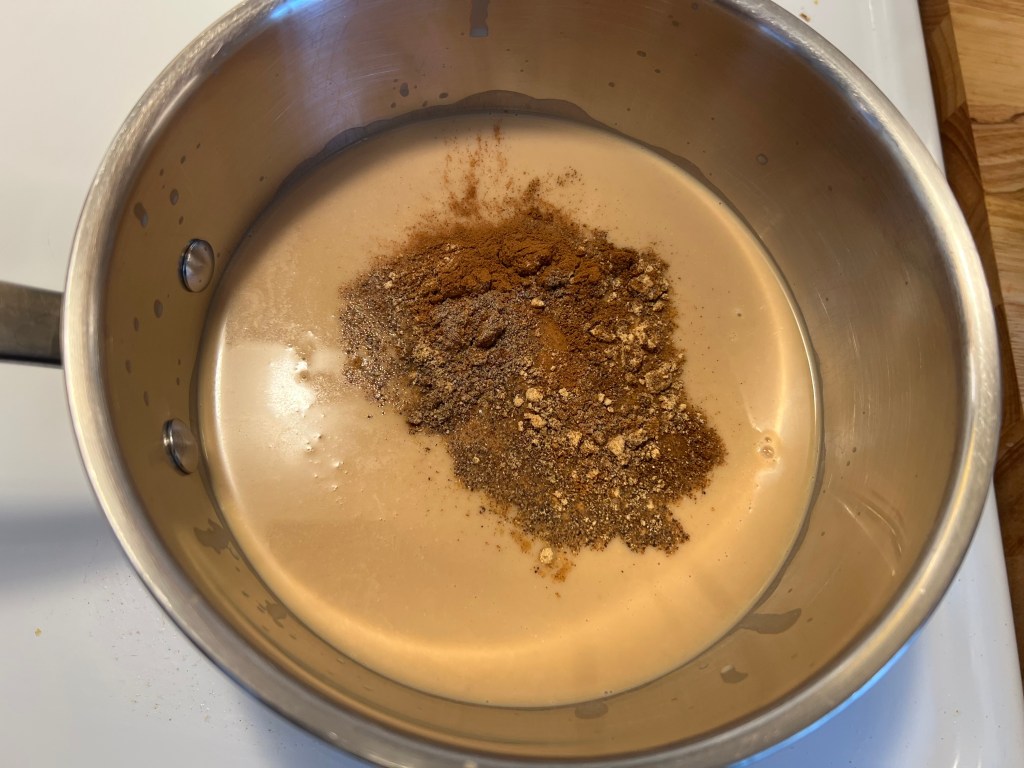
Today’s project was turning a box of chai oat milk into ice cream. We bought a case of this oat milk last fall at Costco, and this is my recipe for the base I’ve been working on. I am trying to keep the ice crystals at bay for texture. It works pretty well.
Ingredients:
I like to lay everything out before I start in case I am missing an ingredient.
4 Cups Chai Oat Milk, or one full carton.
3/4 Cups Sugar
4 Egg Yolks
1/4 TSP Guar Gum
1/2 TSP Cinnamon
1/2 TSP Ground Ginger
1/4 TSP Black Pepper
1/4 TSP Cloves
1/4 TSP Cardamon
Adding all the spices into the oat milk.
Directions:
Mix the guar gum into the sugar thoroughly.
Heat oat milk in a sauce pan.
When it’s warm, add the sugar and guar gum with an immersion blender to ensure it’s not going to clump on you.
Heat milk to hot, but not boiling.
Temper the milk into the eggs in a separate bowl by adding spoonfuls of hot milk into the eggs while whisking, then when the egg yolks are good and hot, add them slowly back into the saucepan with the rest of the milk while whisking it in. How to temper egg video if you need it.
Continue heating for 8 minutes, but don’t boil. Whisk regularly.
Strain the resulting mix into the bowl. You’ll want to strain out any random clumps and eggy bits or escaped guar gum.
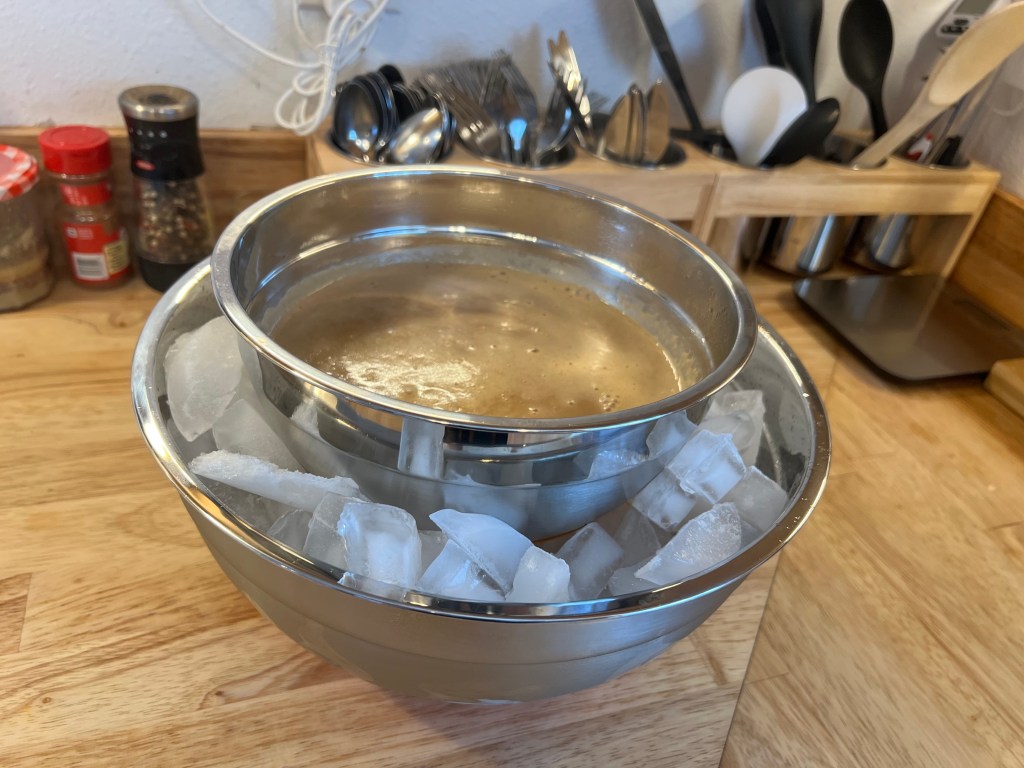
Cool on ice until room temp, then put into the fridge until completely cold.
Use the ice cream maker of your choice.
Tempering the eggs.
My high tech cooling method.
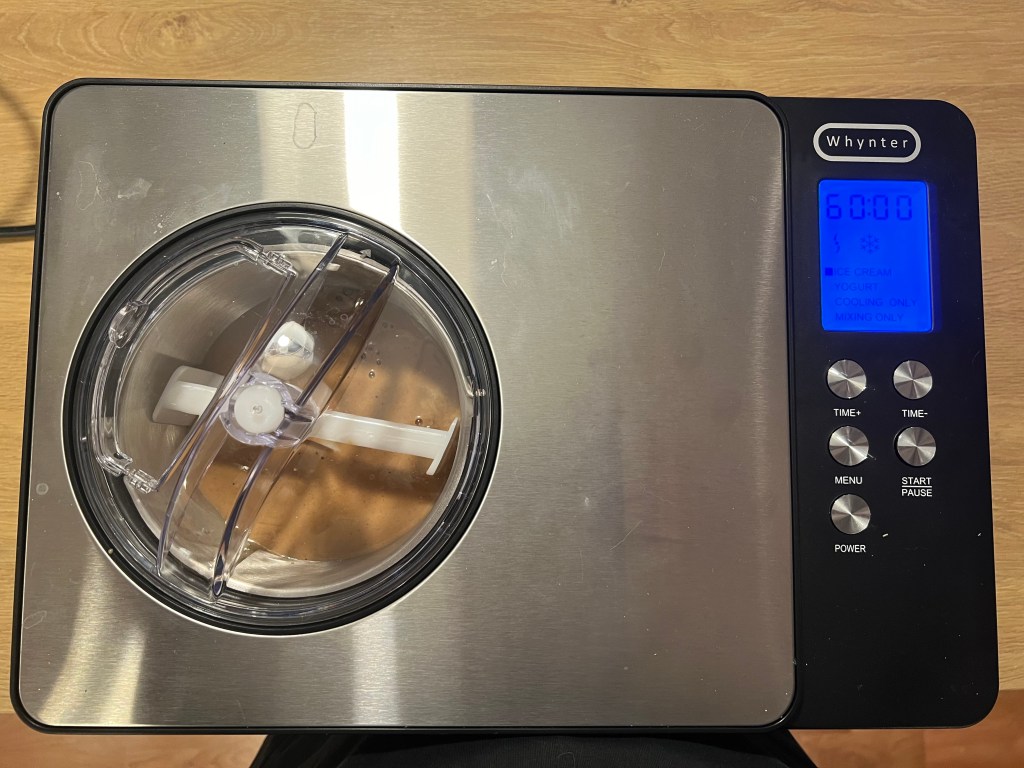
This is my overpriced ice cream maker. If you got the cash to spare, I do recommend it.
Notes
I have been doing a lot of test recipes for ice cream ever since I got my Whynter Ice Cream maker. That’s not an affiliate link, I just liked it. I just wanted an ice cream maker that had its own compressor. It’s a $300 machine, but I was so fed up with store bought ice cream getting weird I threw down the cash on a serious ice cream maker. Plus, getting non dairy ice cream is expensive and never that good.
It’s as if all the corporations out there are hell bent on saving that last tenth of a cent on everything despite all the record profits they rake in from our consumption, so the ingredients are getting cheaper, and the taste is crappier. I never thought I would have nostalgia for junk food from the 70s and 80s, but here we are.
This ice cream maker has its own compressor so you don’t have to freeze anything. You just toss your ice cream mix into it, press go, and it goes. I never have room in my freezer, nor can I organize when I will make ice cream, so this saves me from having to pre-freeze a bowl. This one has a yogurt maker option, but I haven’t delved into yogurt making at this point in my life. It’s extravagant, but now that I live in a home I own, I can actually pay for things and expect to keep them long term, instead of however long I have that much space in my rental.
I tried this recipe without the extra spices first, but the cold dulls the chai flavor, which wasn’t that chai forward to begin with. I like a chai that bites back, so I added the spices in from my favorite chai recipe. I think I could have honestly doubled the amount, but it’s still quite good.
I have also been experimenting with stabilizers, and I have found without the guar gum, you get a very icy crystal texture to varying degrees. The eggs are also an ice cream stabilizer, but I find without them, you don’t get a rich ice cream texture and it feels thin. Together, it comes out pretty good. This has worked with milk, cream, and now oat milk as my base.
While I did the wooden butcher block backsplashes, I wanted to extend the backsplash upwards a bit. I cook a lot, and it includes things like canning jam, and frying up things. My kitchen runs hot and heavy, and I would just like to be able to wipe down the walls behind my counters easier. From experience, it’s nicer to have an easy to clean surface.
My first attempt was to buy some self sticking backsplash tiles off amazon. (Not an affiliate link, I don’t have affiliate links.) They said stickers, and I guess they really were, because I would not use them for a backsplash. They also weren’t sticky enough that I trusted them to stay up. Surprisingly some of them came with a pinkish background, so not the colors I was going for.
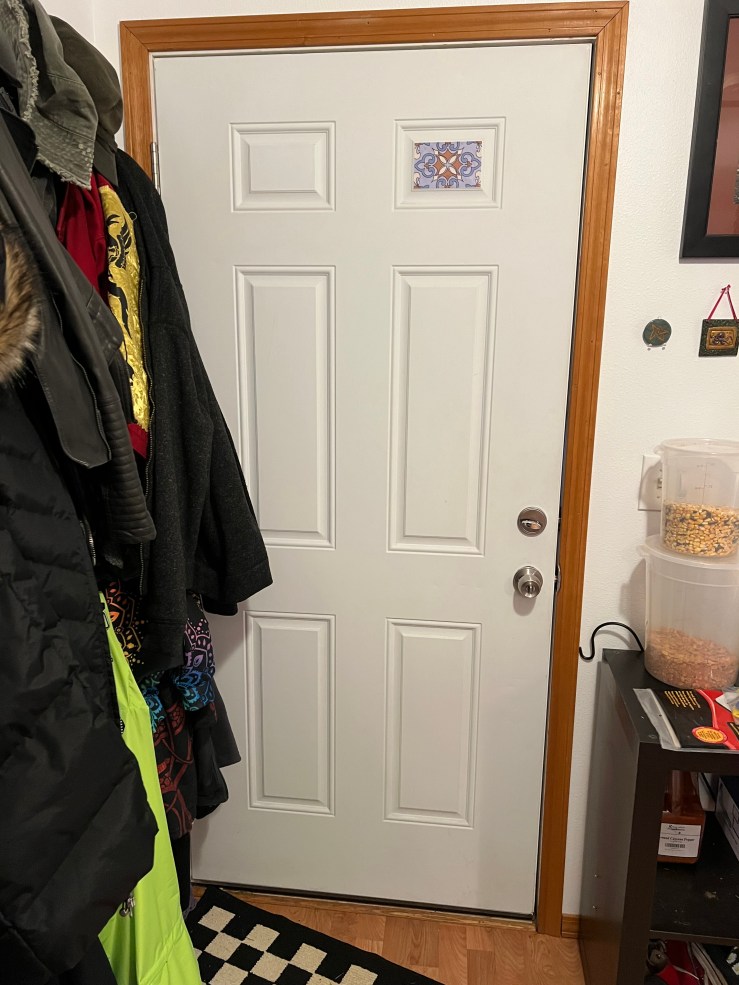
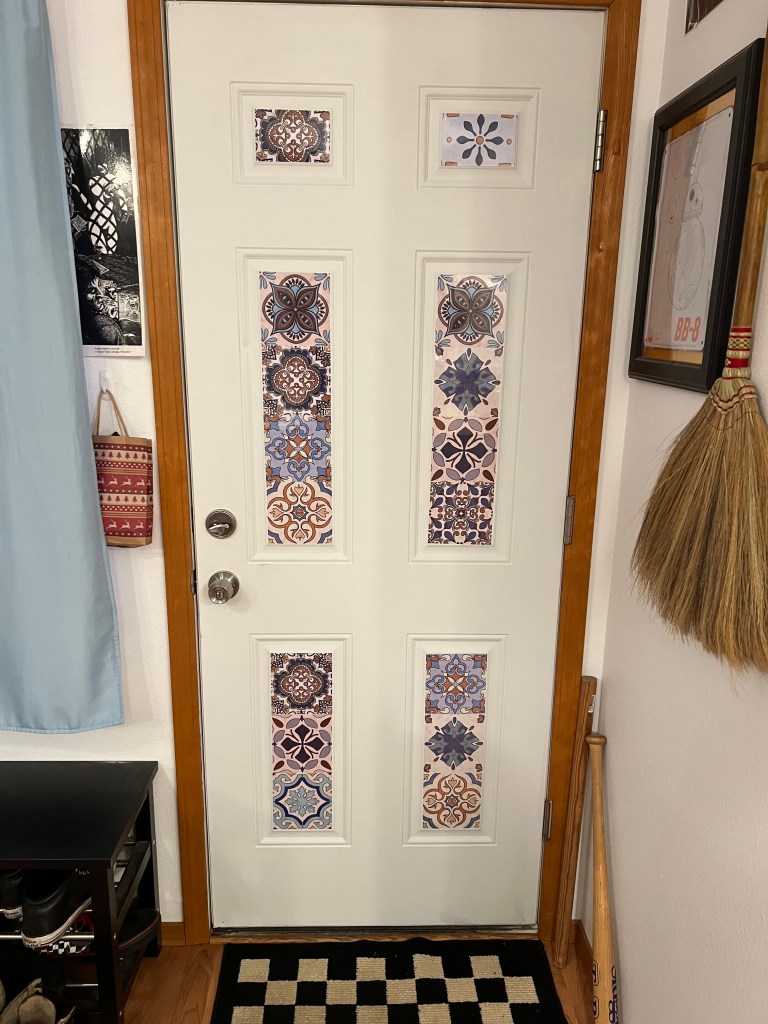
However, I got to thinking about them, and decided to adorn my very white front and back doors with them. I figured it might look nice to have them in the panels of the doors.
I tested one to see if they would stick and work out.
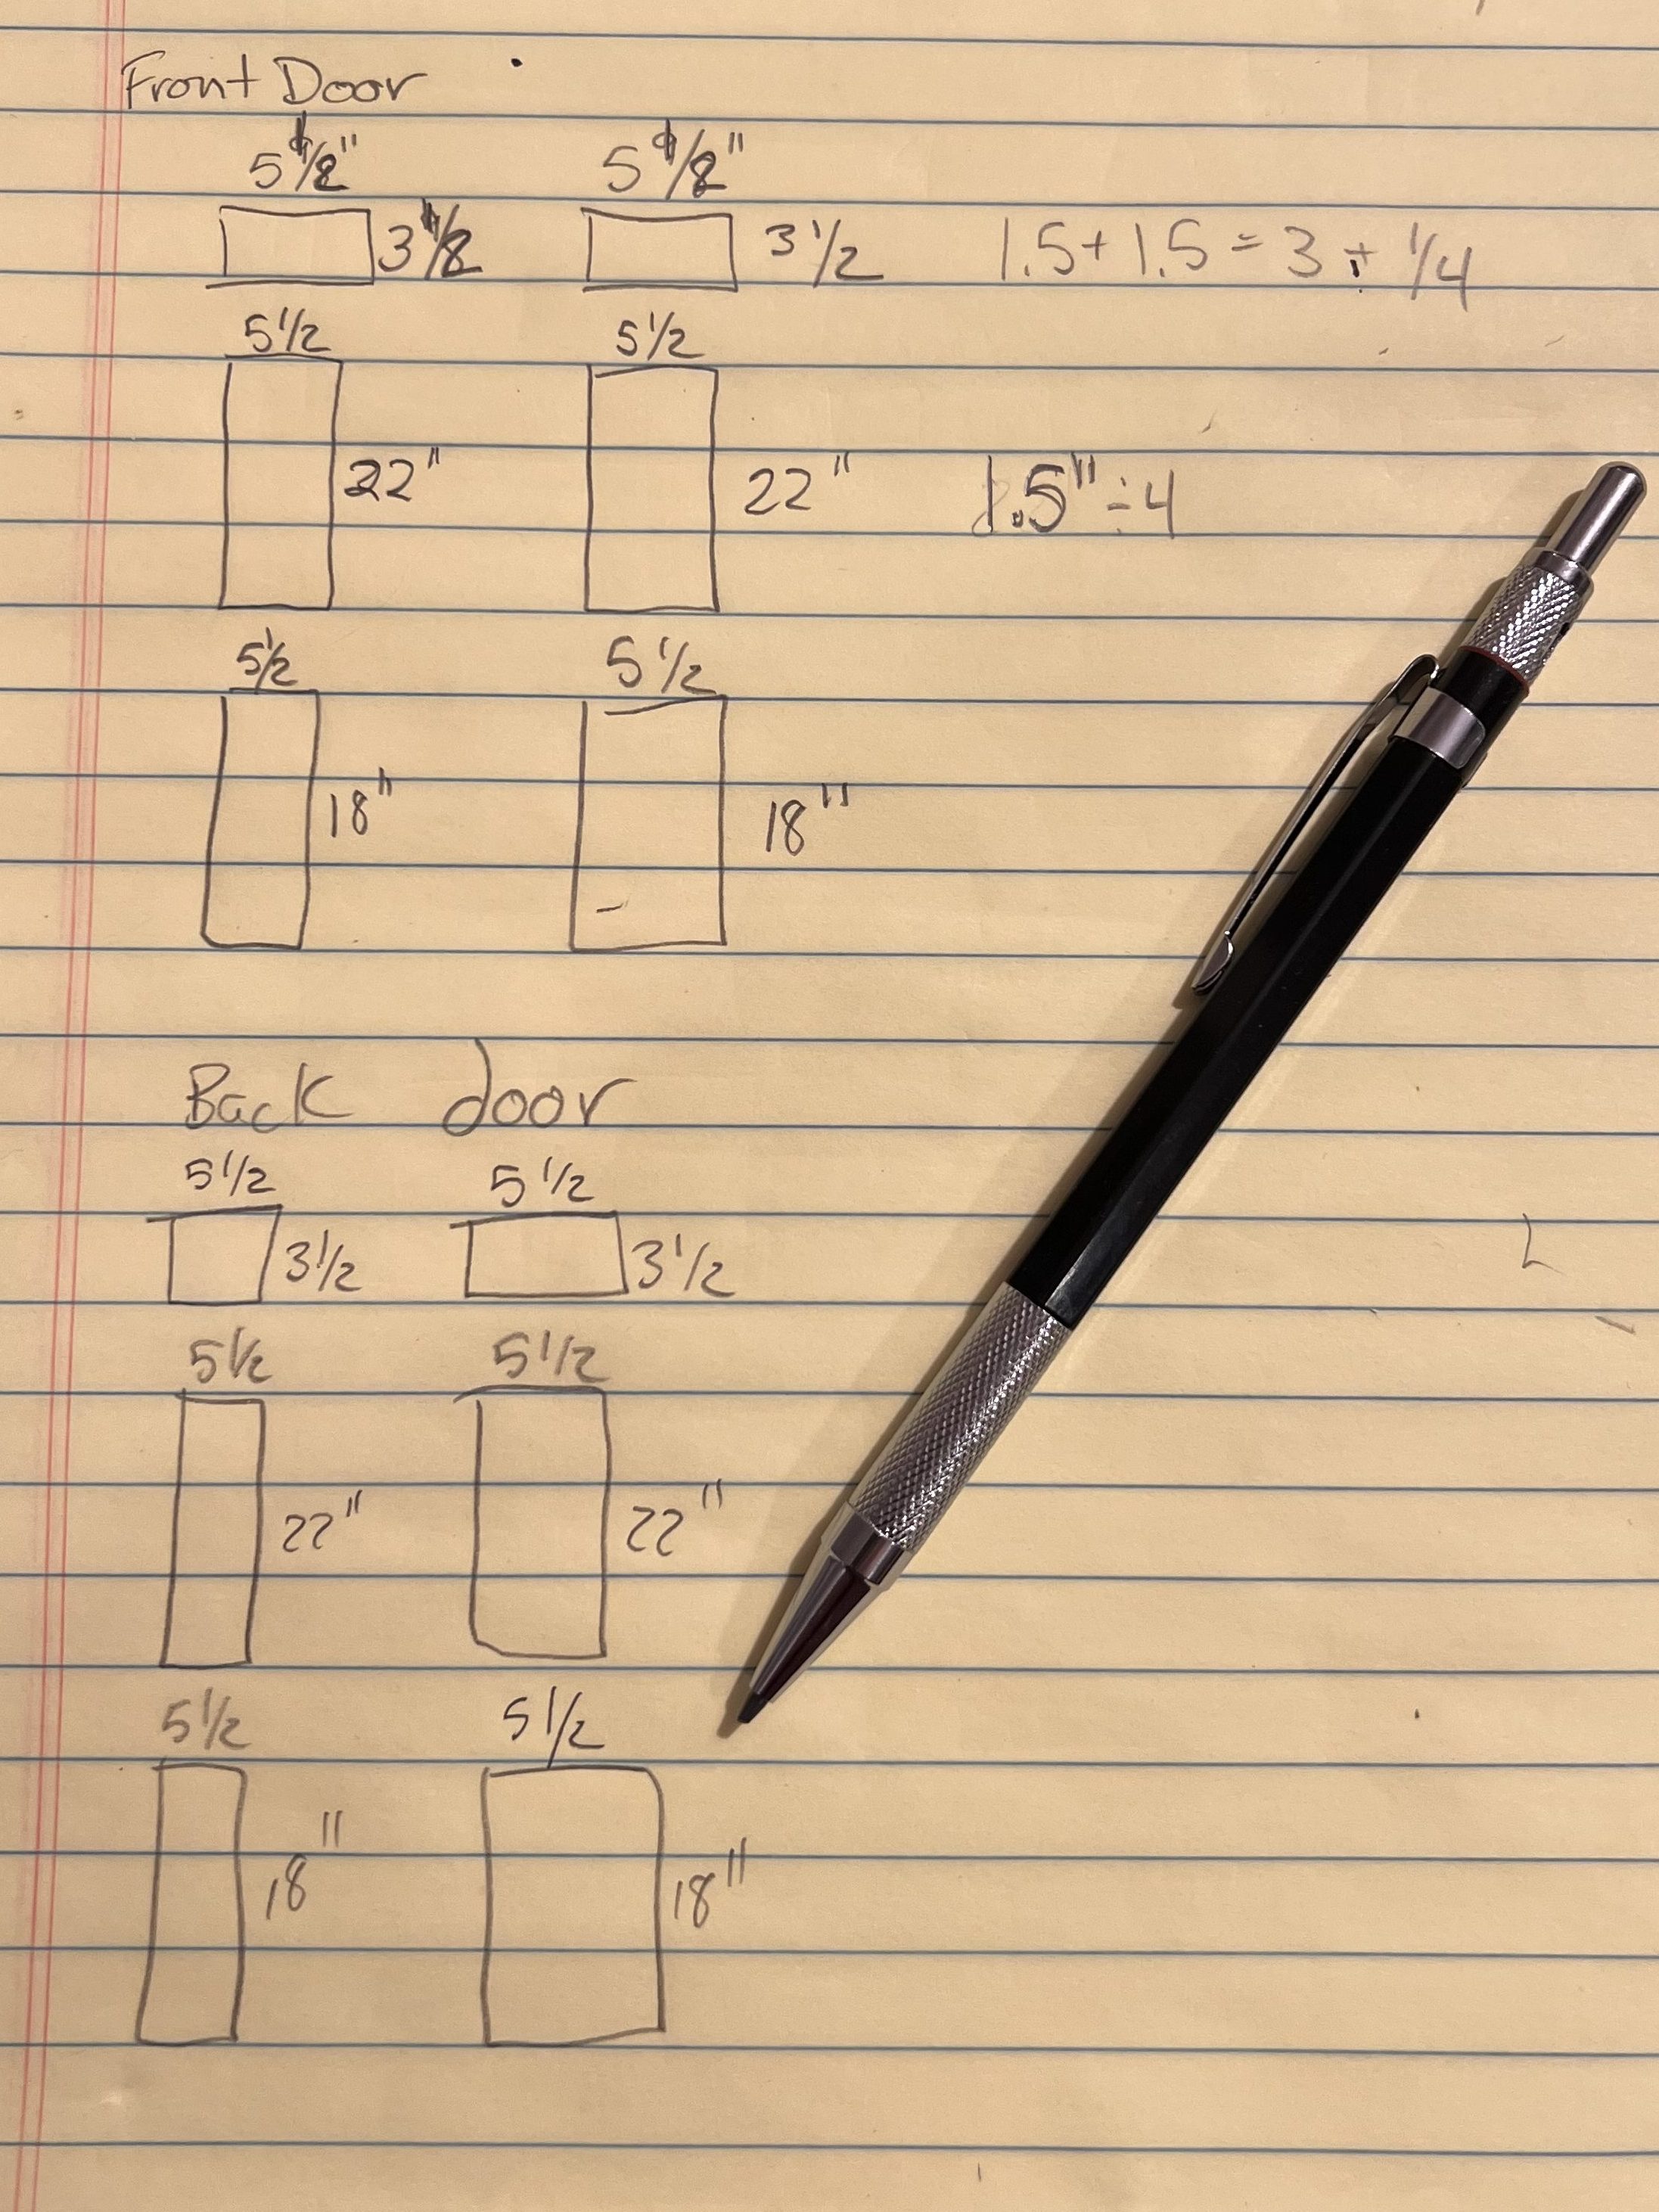
First I measured every panel I wanted to do, in order to make sure every panel’s measurement was what I expected it to be. I like to be thorough on measuring because sometimes things are made off by manufacturers.
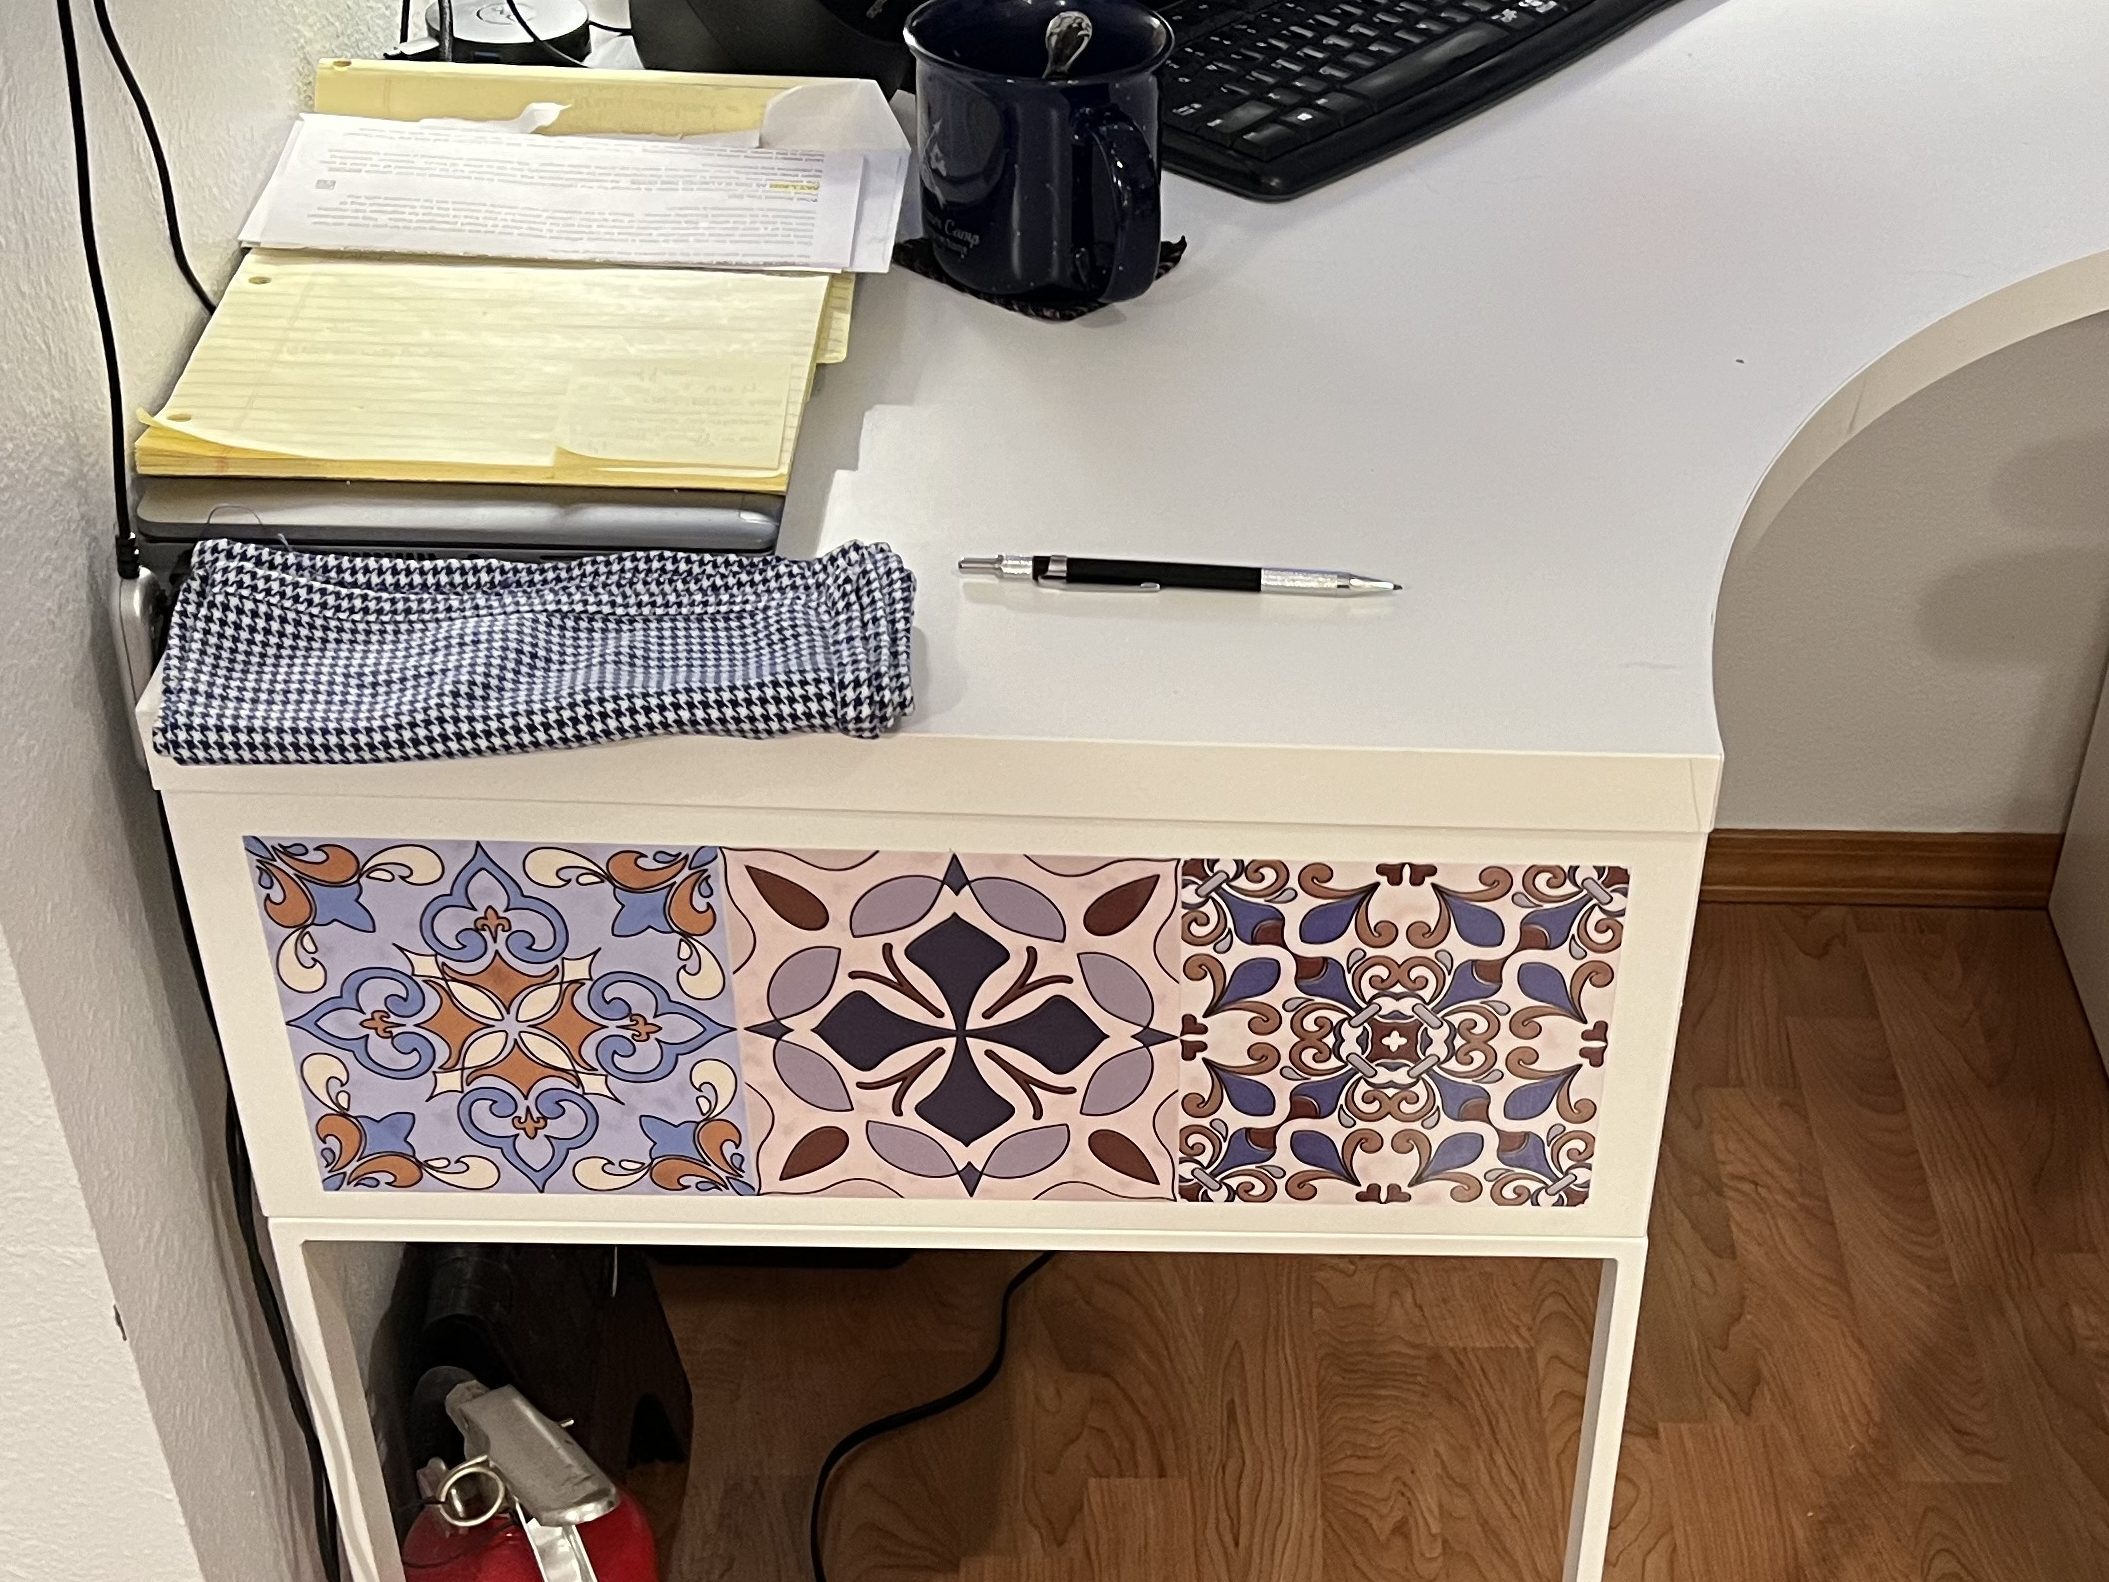
Notice my really cool NicPro Carpenter pencil! OMG, I can’t break the lead on this thing. Sooooo recommended. My hands shake and I always break pencil lead, so that is a cool pencil.
The tiles were supposed to be 6′ square, but they aren’t. They were 5 and 15/16ths. That’s just enough to be annoying.
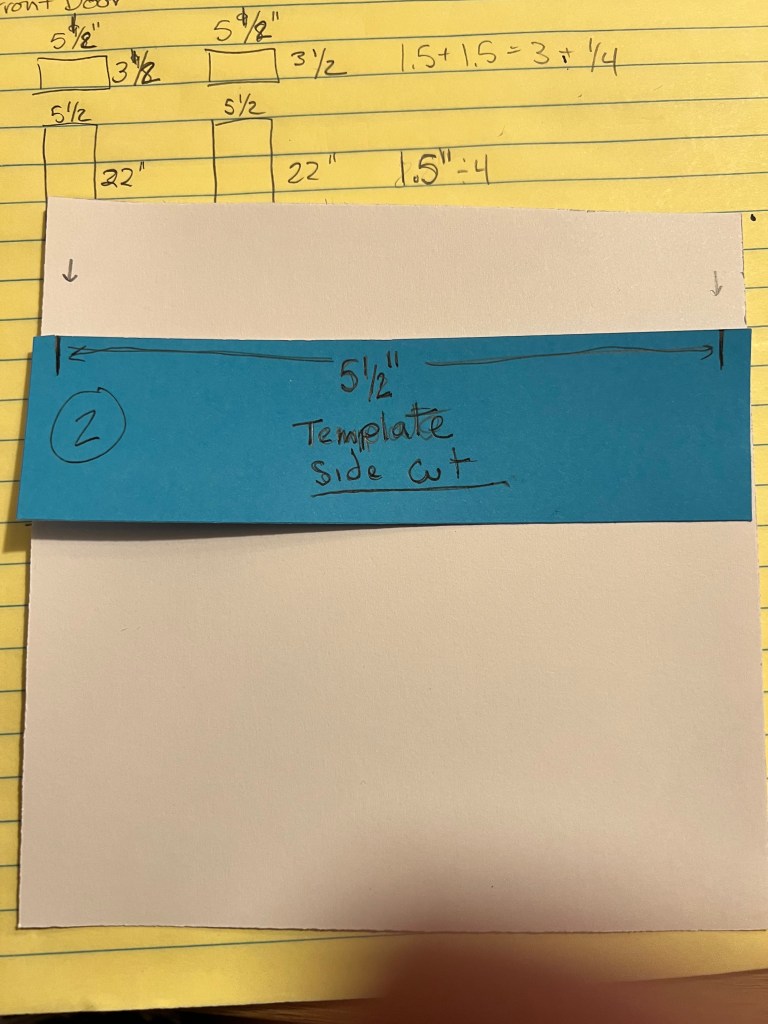
I then used piece of paper with the size of the sticker tile, and then split how much I needed to take off into 2, and marked each side, so I could take an even amount off of each sticker tile.
I used this for every tile I had, so I could get them all at 5 1/2 inches wide without having to measure each one. Safer that way!
I then used a normal Fiskar paper cuter to cut the tiles.
I’ve had this old paper cuter forever, and it works great.
To do the length down in the center panels, it was a little trickier. The center panels were 22″ down, but 4 tiles was 1.5″ longer than that. I divided it by 4 using a fraction calculator online, then divided that by 2, and made another little paper template so I could make marks and cut all four of the tiles, making sure to take the same amount off the top and bottom.
The bottom panel was the opposite problem. It was only 1/4″ longer than the length of 3 tiles, and I did not want to cut down 4 tiles that much. Instead, I just applied those bottom panel tiles 1/8″ lower than the true top, and you couldn’t even tell.
Applying the tiles is similar to applying a Cricut vinyl project. I used a scraper to smooth out the bubbles. The sticker tiles were not especially sticky, and if I had an issue with a bubble they were easy to peal off and do again.
One thing I think was important for me, was to accept that was it was impossible to make it perfect. The tiles slid, and cut funky, and applying them was a little odd from the normal vinyl I was used to. However, with the white door background, you could not tell unless you got nose to door with where there were imperfections.
I think sometimes it’s easy, especially for me, to just give up if I can’t make things mathematically perfect. However the tiles themselves did not have a perfect printing run with some uncentered tiles, so I just went with it, and I am glad I did.
Finished front door.
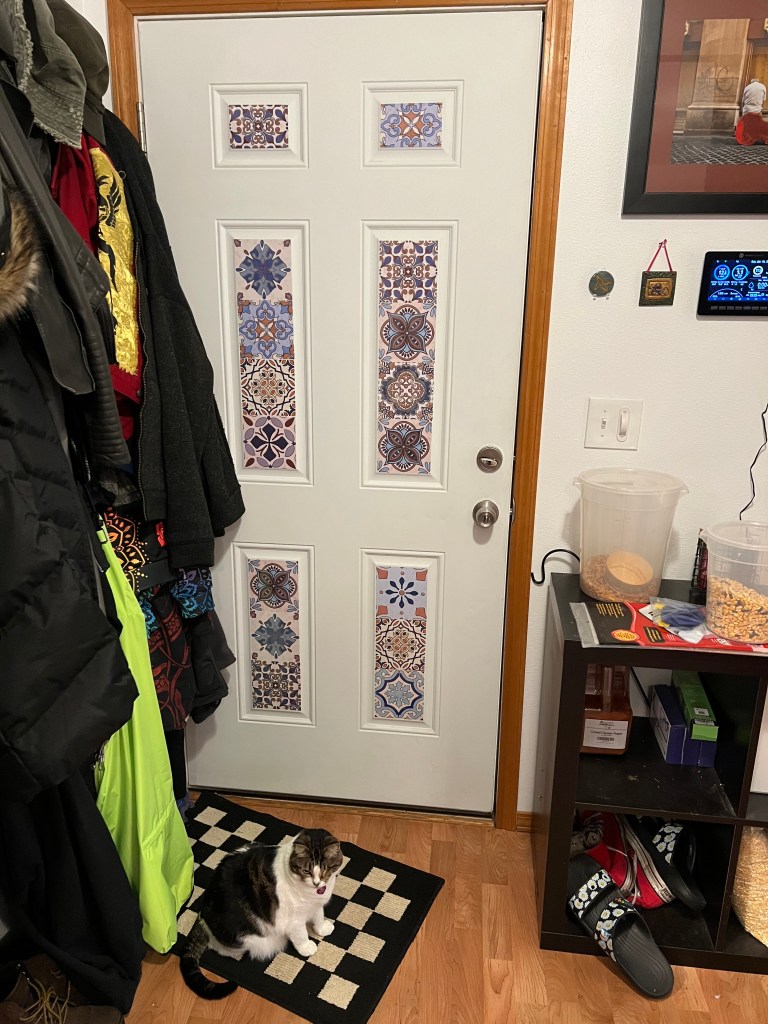
Finished back door with Tally, who “helped” the entire time for certain definitions of “helping”.
I’m pretty glad I did this. I like it. My home is not a show home, or a “normal” home, but it is my home. I don’t ever plan to leave it, and I want to live in a place that feels good for me. I don’t want plane white doors.
I did have enough extra I added some to my super cheap white IKEA desk, too.
This cheap IKEA desk was what I got when we moved in. Most of our furniture was super cheap as the house cost was a lot! Personalizing it is a good step until I need to replace it for a longer lasting desk.
This was a last minute project because I had these stickers and I didn’t want to return them. I am glad I did it. It took me an hour or so, and nothing is better than a project with instant gratification.
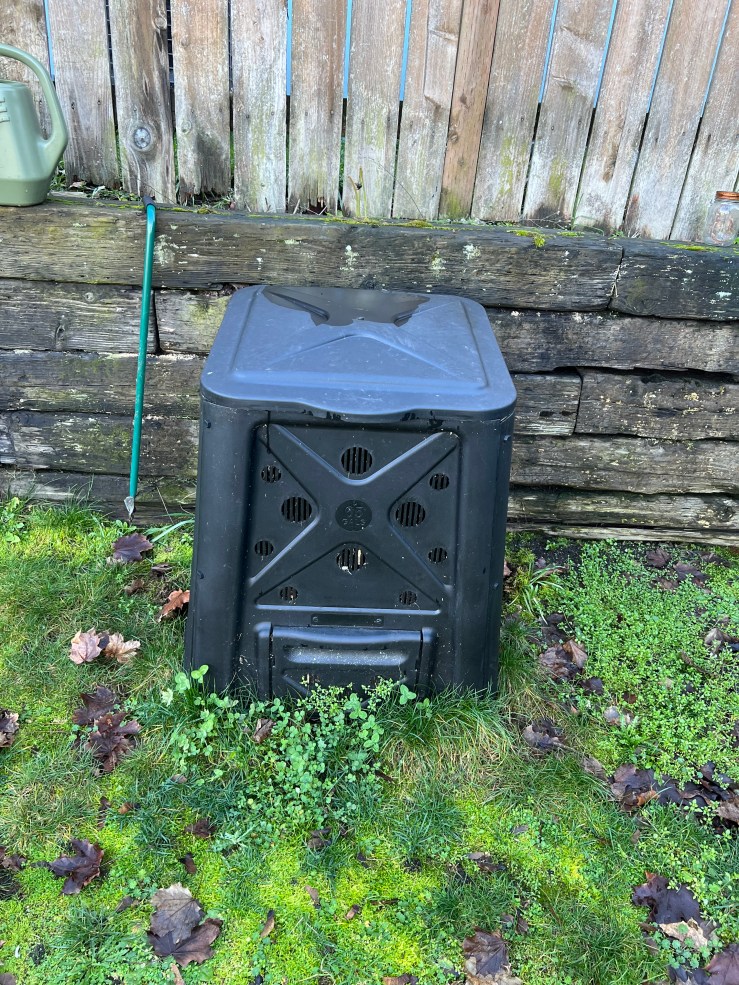
I’ve never composted before, so this last year is the first time for me. What really worked for me was these black plastic bins from Amazon. (None of these are affiliate links. I get paid nothing if you buy anything. I just like ’em. ) I just wait until they are under $80 on sale. I hate paying full price!
Black compost bin from Amazon.
They provide that green compost turner hanging on the back wall, but it’s not good. It took too much yanking on my bad collarbone joint to work well.
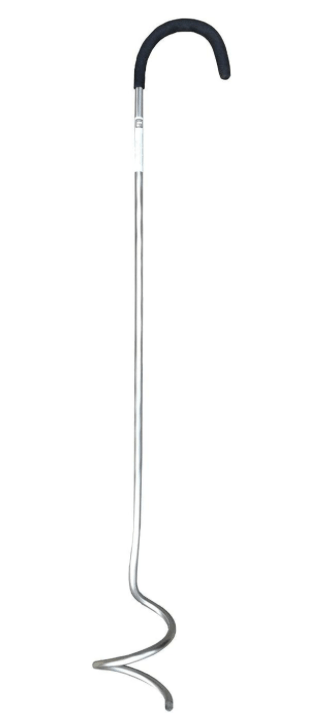
Instead I got an overpriced spiral version on Amazon. I guess I am getting old because I resent spending $50 on basically a chunk of spiral metal. It works though. Really well, so I guess it’s worth the money.
Spiral compost turner.
This is far easier on my bad joints. I can twist it in, and yank it back out easily, turning the compost. Now I can do it when I want, not when my joints are good enough to do it. That’s a nice change.
I literally only turn it about once a week, when I take my table scraps out. I’m just not that dedicated. I do use my big paper shredder to shred Amazon boxes to mix in. I just don’t have browns at all if I don’t use paper and amazon boxes. The shredder was about $250, and says it won’t do cardboard, but I have been doing great with it. I am pretty impressed that I can compost like 75% of all my own cardboard. I still get overwhelmed with it, but it feels good to not dispose of so much.
I didn’t do any fancy compost calculations. I just tossed in about roughly 50% browns and 50% greens. I didn’t expect it to work so well due to my laziness, but I was wrong.
Today was the best part. I turned my compost, and it was filled with happy worms.
Worms in my compost!
I am super excited about that. When spring comes I think it will be ready to spread on my beds. I won’t have to pay for Lowe’s compost!
I have also learned that what I think will be a lot, really isn’t. The bin was filled to the very tip top in October, and now it’s broken down to so little. I had dumped some of my greens into the yard waste bin for the city to pick up, but now that I know how much it breaks down, I am not doing that again. I need that for my garden!
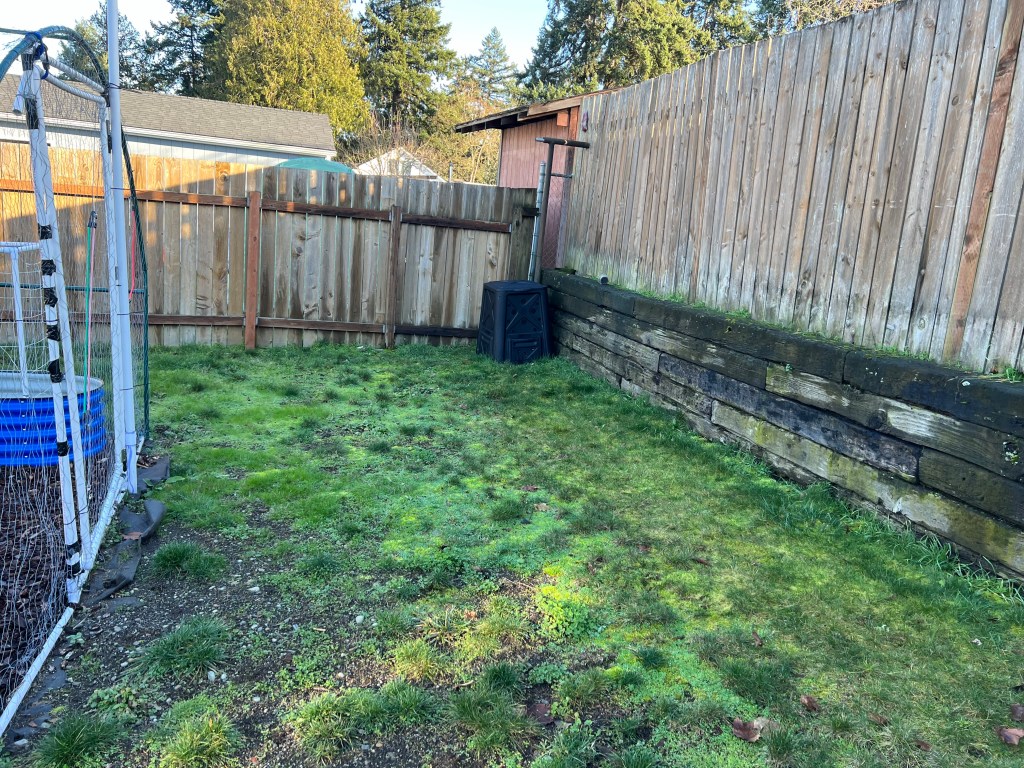
I bought a second one, and placed it in the corner of the yard. When the first one is done, I will move it over next to the corner one. I think I need a third now that I know what I am doing. I need enough room to fill like two of them, and let one of them just age. I think they will look nice there all in a row.
My corner compost bin.
As an aside, you can also see the clover coming in around the grass clumps. The entire yard is like that. It started as a garbage dump of trash dirt and clumps of dying scrub grass, but the clover seems very hardy. I hope by year two, it will have spread all over.
My next plan is the garden cage. I need to cover it with squirrel proof hardware cloth. My Squirrel Interdiction Cage failed spectacularly. None of my overwinter ideas are going to happen because the squirrels dug up literally everything. Including the rhubarb! Lesson learned! Squirrels can fit through chicken wire!
I am going to see about starting that process in February, when I have a little more light to work by. It’s getting dark before 5pm, and after work I just don’t have enough. When I do have a day off, it’s full of rain and I am not doing it in the rain.
When I start I will keep posting about my progress, though.