To recap, I had hired this grifter to remove a floor to ceiling skinny cabinet, install my dishwasher in it’s place, lay a butcher block counter across the cabinets instead of the plastic countertops, build a cabinet box on the other side of the dishwasher, and then install a sink, a hot water dispenser, and the faucets.
I found him on Angi’s List and it was so bad, I won a judgment against him for the work he screwed up. It’s just stunning. I basically had to redo all his work, or fix his work, because it was so terrible.
One of the things that killed me was that he installed the butcher block backsplashes crooked with up to 3/8ths between the back splash and the counters, and cut all the backsplashes short from the counters.
His work as a self professed “finish carpenter.”
Every edge was like this. It’s like he didn’t take his saw blade position in account when he cut the backsplashes.
The backsplash was raised up at least 3/8″ off the counters.
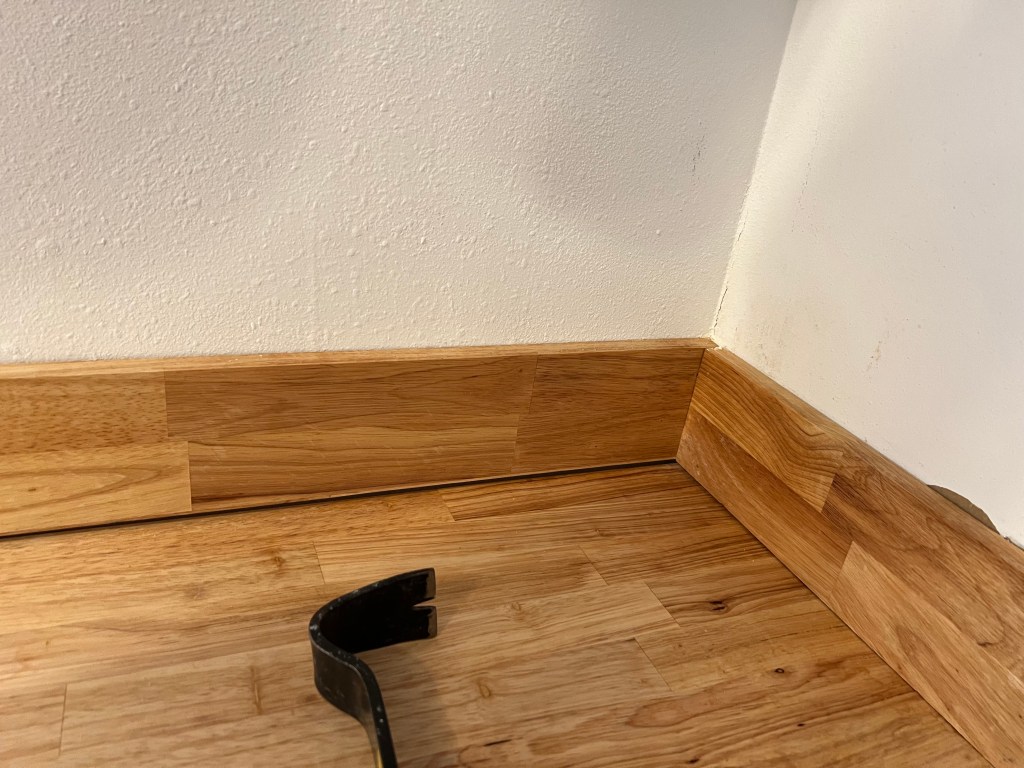
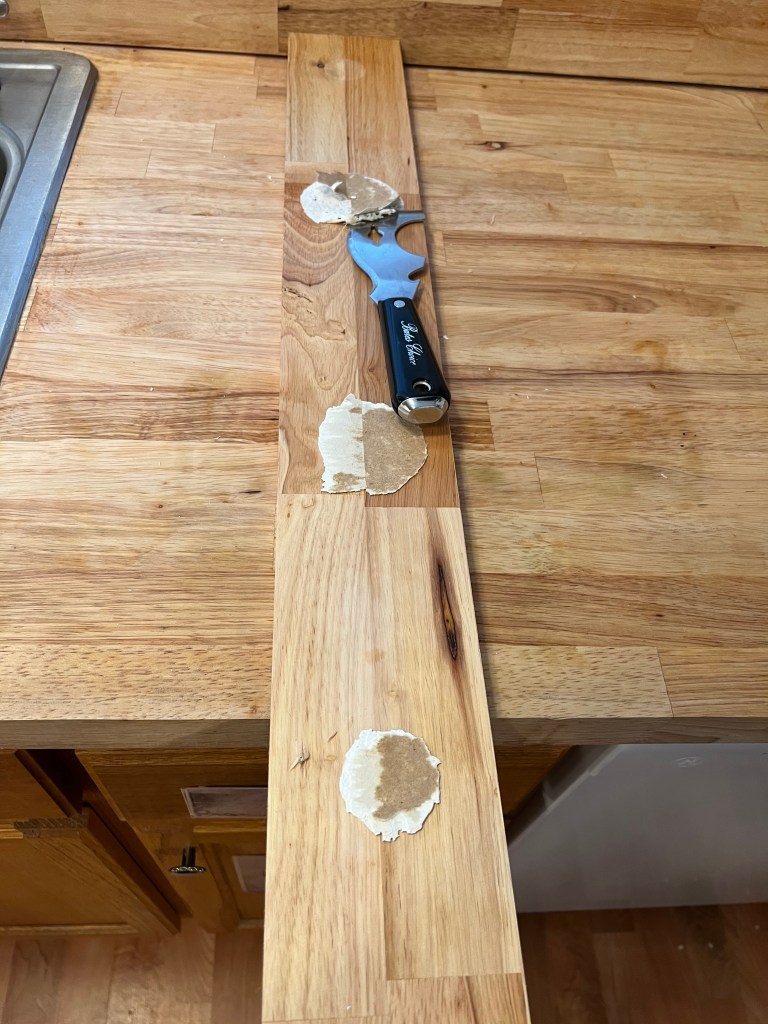
Turns out the backsplashes were super easy to pop off. They were held on with white silicone sealant which scrapped off super easy.
Blobs of silicone sealant I just scraped off the backsplashes after I popped them off.
The galling thing was I had an entire new board he could have used in case he’d made mistakes and had told him to use it freely, and I didn’t care because I could not return it.
Before I cut any new boards, I dry fitted the existing boards he had across the back, with the biggest gaps, and I’ll be damned if it didn’t just sit fine? Like no gaps. He’d just installed it crooked and running upwards at an angle.
I’d asked him about the gaps when I saw it the day of the install, and he’d told me “you have to expect irregularities in wood and it would not be perfect.” He’d also told me he was a finish carpenter, so that was a fascinating bit of bullshit. I told him I needed it fixed and he said it was impossible.
I am a total amateur, but if I can fit the backsplash pieces better than a self professed finish carpenter, I think I have some issues with his credentials.
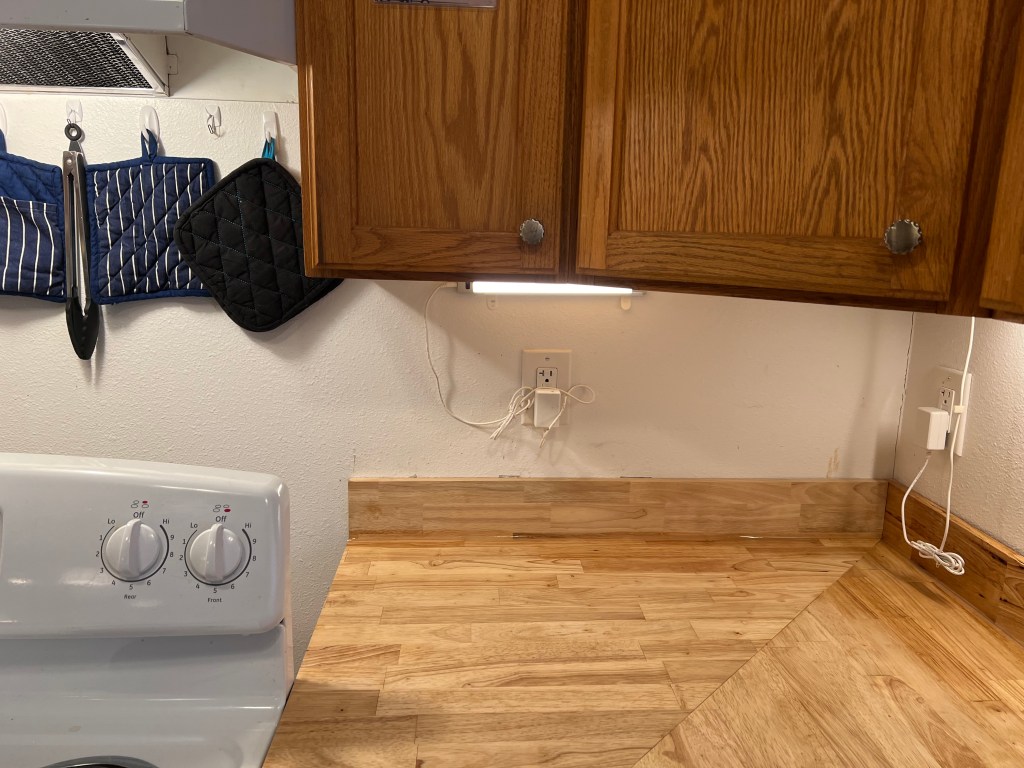
I was able to recycle most of the pieces of backsplash, use some liquid nails and finish nails, and cut them to the right length. I even filled the nail holes, and sealed it with clear silicone sealer across all the edges, especially behind the sink where water is a concern.
I guess my amateur self can cut wood to length.
I paid him a lot, and he took advantage of my wife and I because I guess I was too forthcoming with having a disability that prevented me from doing the work. He never paid us the settlement he owed from arbitration with Angi’s List, either. They eventually yanked his business from the site.
No gaps.
The side piece was a bit wonky, so I scribed it, and made it fit. It was the first time I have ever done that. It took me 20 minutes to fix it so it had no gaps.
My wife came in and said it best. We were not looking for perfection at all, but we could have done it together with just me directing and her helping and get this result the first time.
I guess I was really lucky I could afford to take the hit financially, and had the ability to fix it myself when it was clear there was a problem. I don’t know how long I have where I can work like this with my degenerative joint issues, but at least for now I can. I am grateful for that.
I am also grateful that I can now look at my kitchen counters and know it’s done. They may not be finish carpenter level, but they are good enough. That’s all I ever wanted.
The last thing I need to do, is have the electrician we have coming in this year look at his electrical install of the dishwasher and make sure it’s not a problem. Then I will be able to put this all behind me.
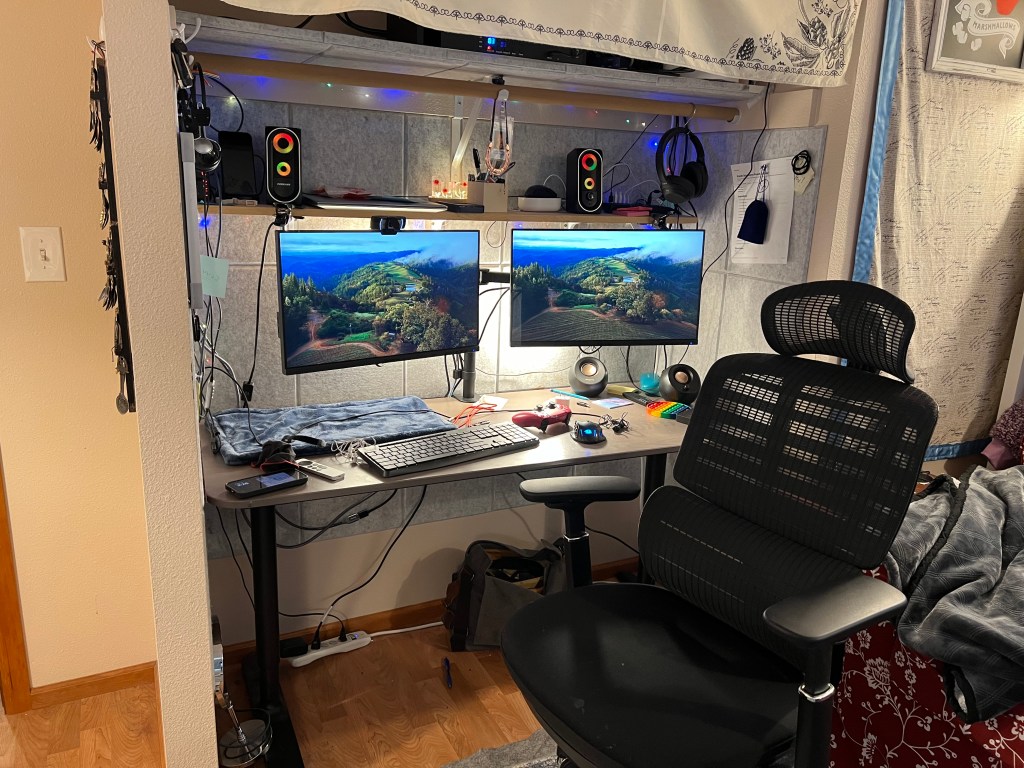
On the exact opposite side of the wall is my wife’s workspace. Our living room is actually the front bedroom in the house as we live in 899 square feet, and it’s not a huge place. My wife has her desk literally in the bedroom closet, and it’s worked out great for soundproofing for her video creation.
My wife’s desk.
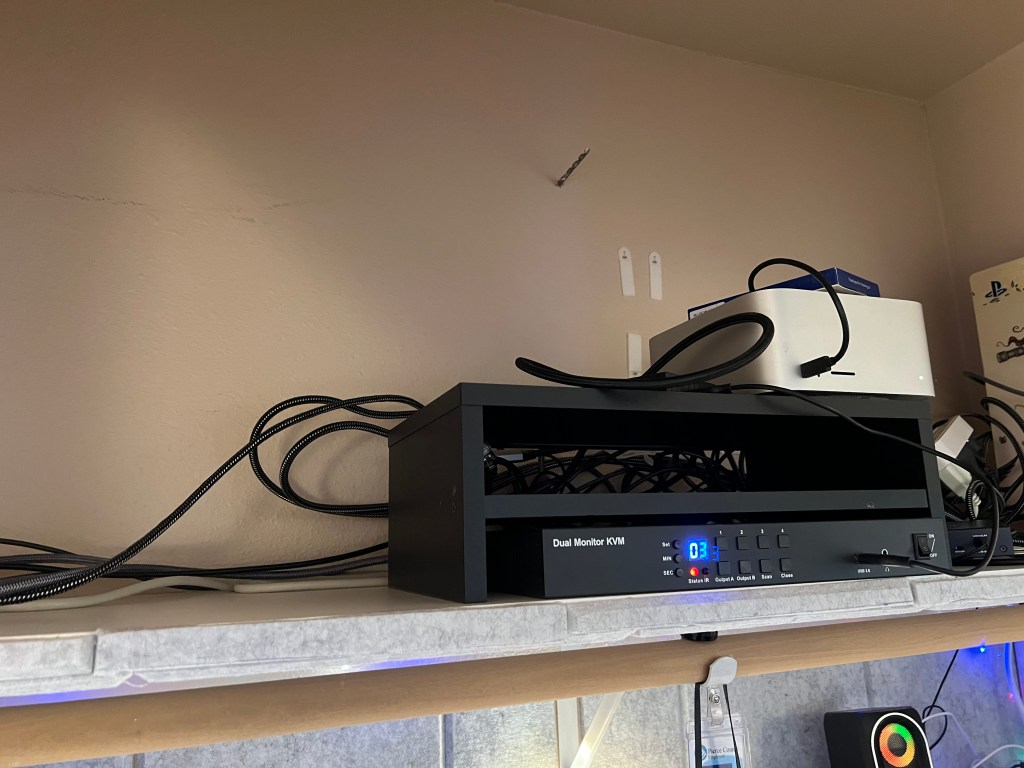
The top shelf is where she keeps her gaming PC, and KVM switch, and all the other wired things. We wanted to punch a hole between the modem and router shelf in that room into the top shelf of my wife’s workspace in our living room.
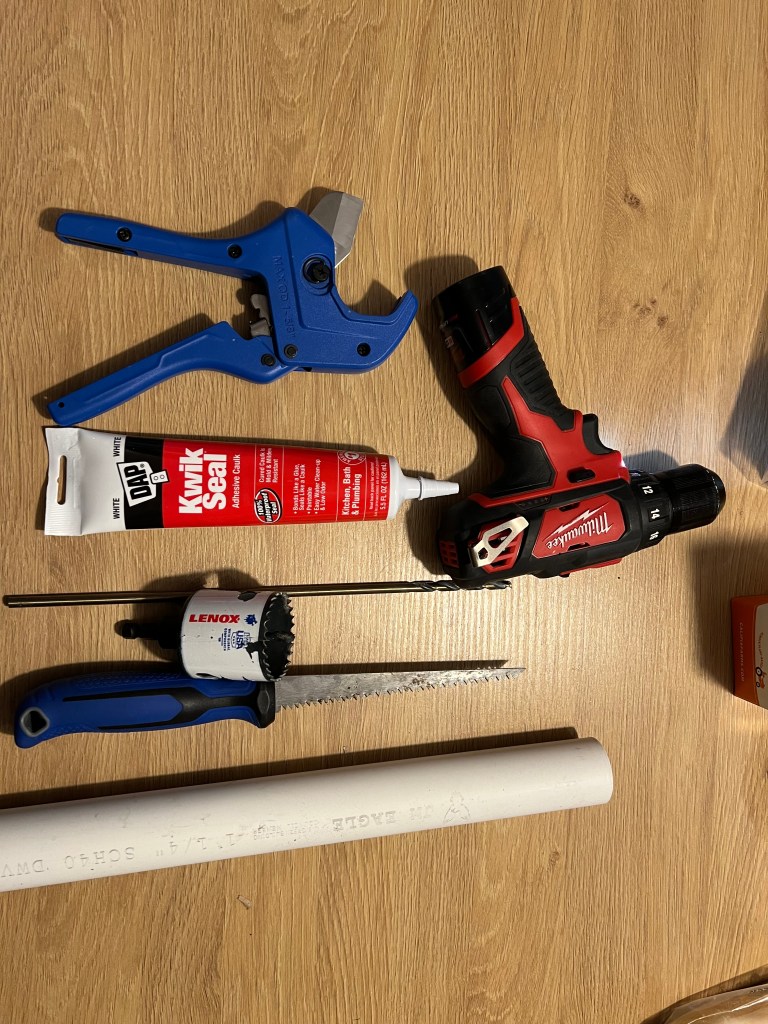
Needed Tools.
The plan is to use a long drill bit to drill a guide hole, then use that to use a large hole bit to drill into each side, then put in a 1.25″ PVC pipe, cut it off, and use paintable caulk to glue it in. it’s pretty easy, and you don’t need much to do it. PVC is easy to work with, and can be cut with a hand tool, and the drill bits were not expensive.
Drilling with an extra long drill bit to make a pilot hole between both sides of the wall.
I knew where the studs were already from hanging the shelves, so I just put the hole along side the stud.
Drill bit sticking out of the other side of the wall.
The long drill bit creates the hole so you can use it to line up the hole bit, and it will match on both sides.
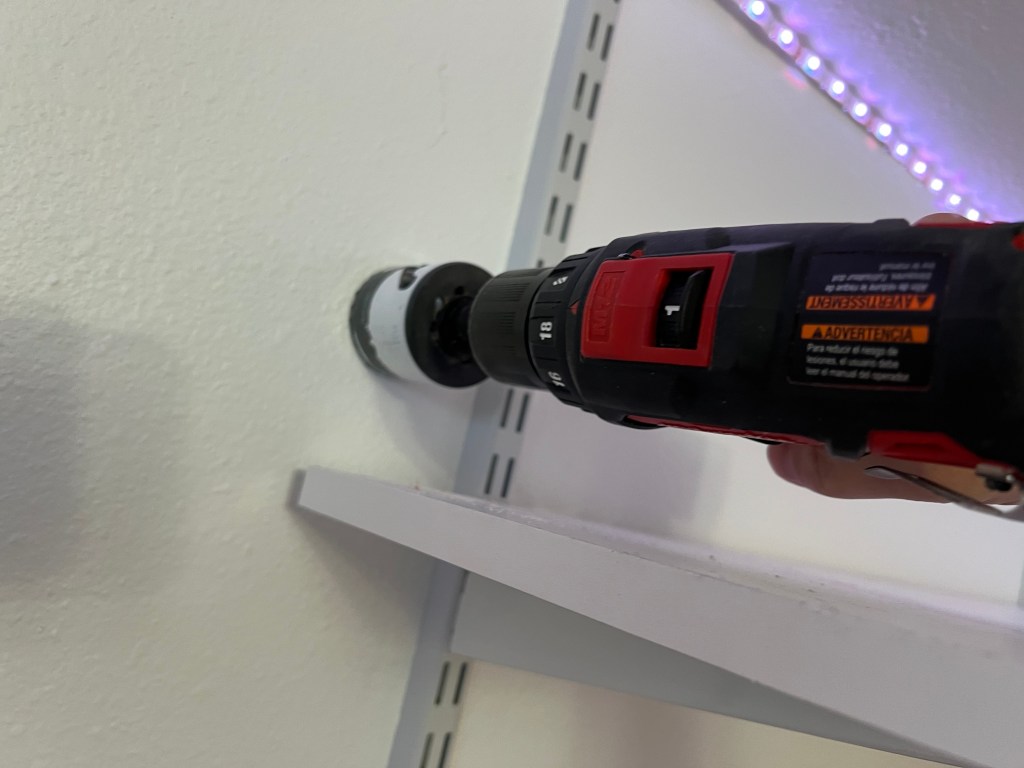
Using a hole bit for my drill.
It’s important to drill the hole in from the outside, on both walls. That way if you have any blow out, it will be in the interior of the wall. It just gives a cleaner round hole to work with.
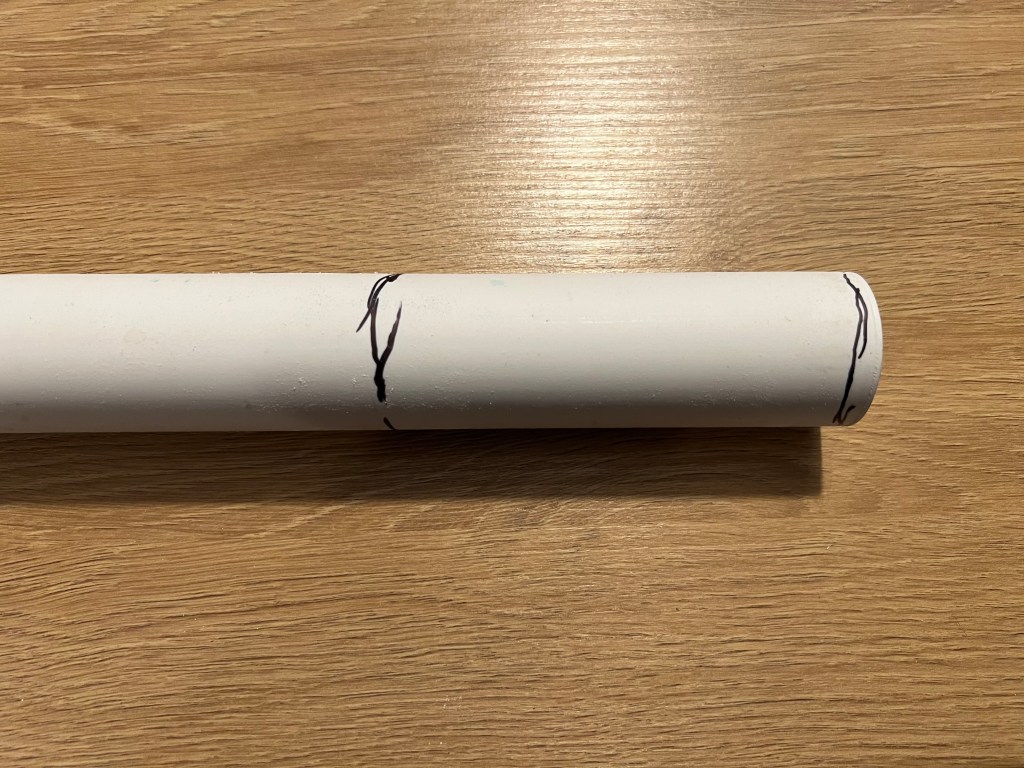
PVC Pipe to put in the hole.
I didn’t want to just have a hole in the sheetrock. I was worried cable and cord movement would degrade the sheetrock in the wall over time and I didn’t like how it looked to just see inside the wall. Not to mention I didn’t need anything important falling into the wall, where I’d have to rip it apart to get it out later.
The PVC pipe was a good solution for me, as it could be just caulked in, and would protect the sheet work, and keep me from dropping anything in the wall.
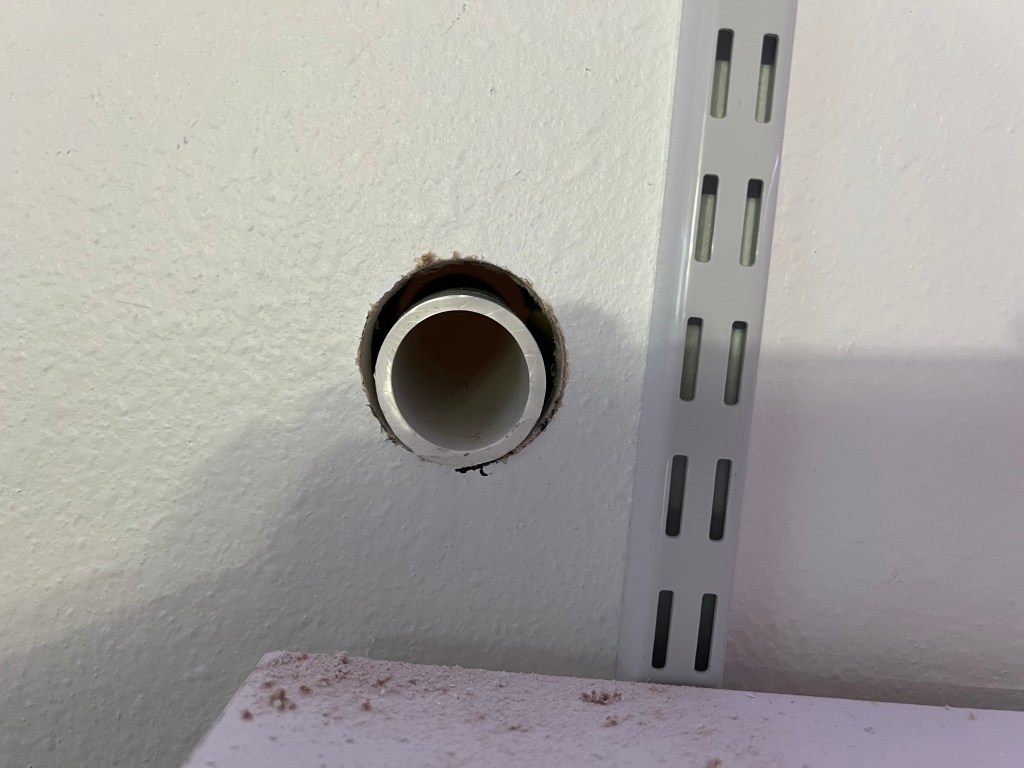
PVC in the hole of the wall.
This is where I realized, I had grabbed my larger sized hole saw, and had a full on panic that it would not work well. The last time I did this, I had the exact hole size as the PVC, and it was a bit more slick, but this worked too with enough paintable caulk.
Caulked in PVC pipe so you can run cables from the other room.
I just caulked it in with a bit of extra caulk. This is still wet in the above picture. It needs sanded down, but I am lazy, and I’ll sand it down when I go to repaint that room.
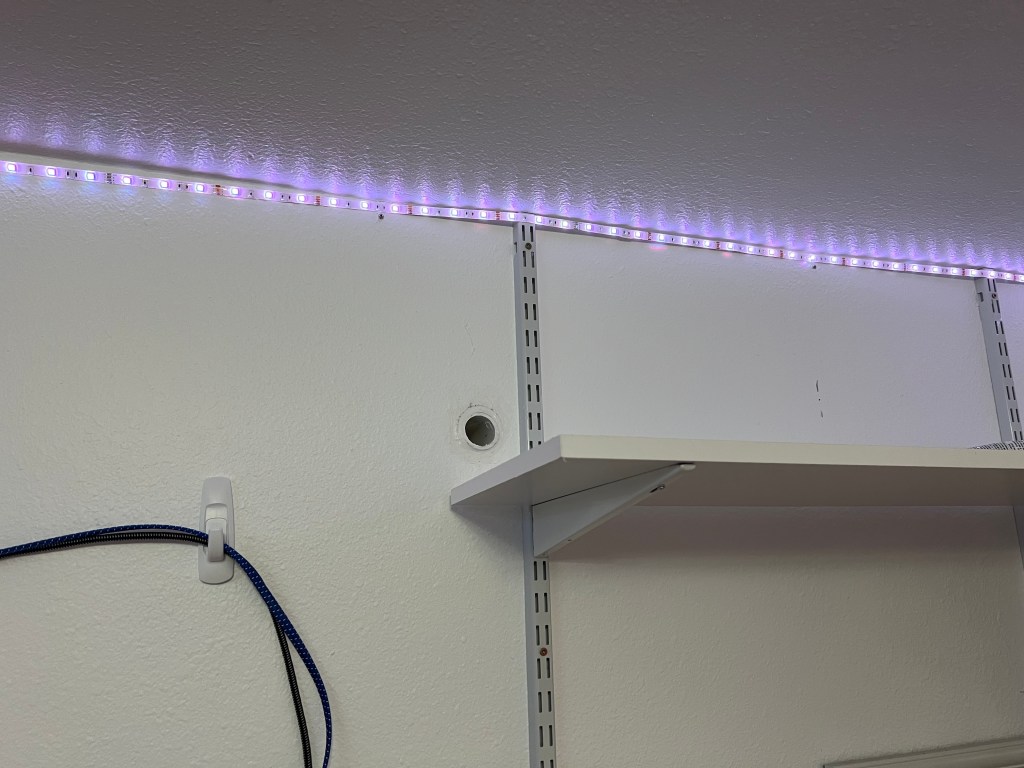
Finished hole into my wife’s work space.
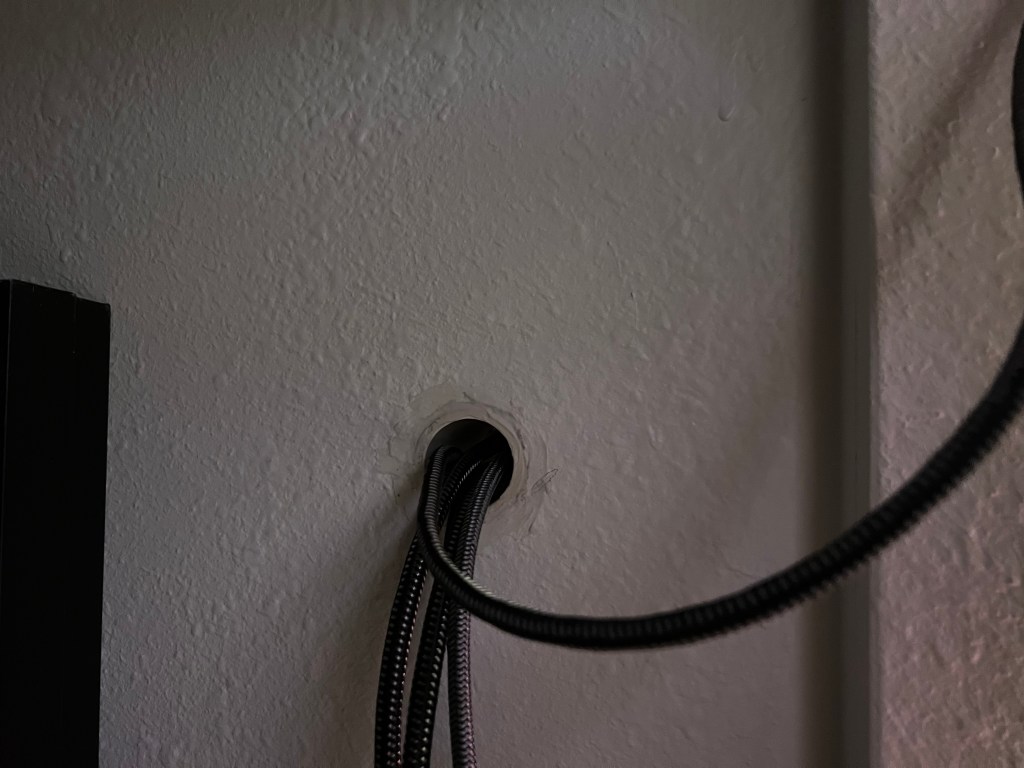
Cables in another cord run from one closet to the other.
It actually worked out really well. My wife likes to wire her computer gear in instead of using the wifi, so she can now do that without running cables around the doors into the other room.
I know there are some grommets you can buy, but they didn’t extend through the wall and only were on the surface, like a desk grommet for wires. I also have exceptionally thin walls in this circa 1910, so an out of the box solution probably wouldn’t fit my house.
They do need a little sanding and painting, but that’s for another day. I am just happy my wife’s workspace set up and be organized the way she likes it.
I have been down for the count a bit this last month. I have to go have a surgery, which I did not want to have. It’s not like I am going to die, but it will greatly improve my life. It gets in the way of my projects, and my life in general, but what are you going to do?
I did manage to get myself together enough to get some shelves installed. In our spare bedroom we have a wardrobe/walk in closet area for my wife, with her makeup desk and its large lighted mirror. I get the small closet for my hanging clothing, and a small table for my sewing machine. It’s also where the home wifi, router, and modem come into the house. It’s all utilitarian, and as such we needed more shelves.
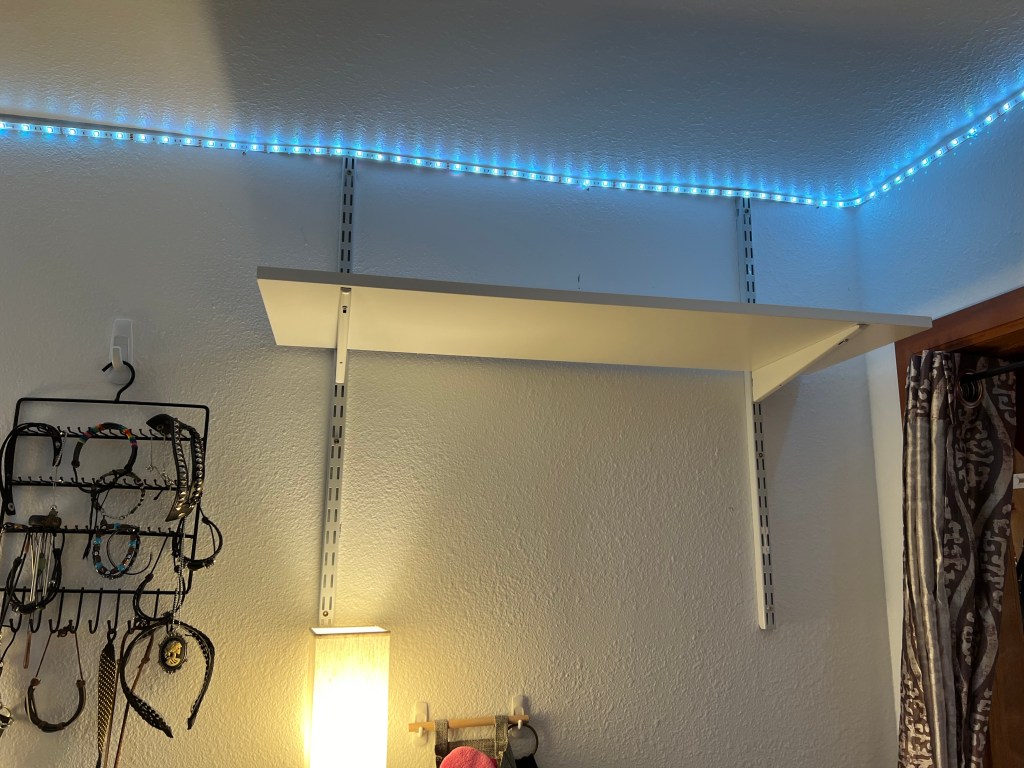
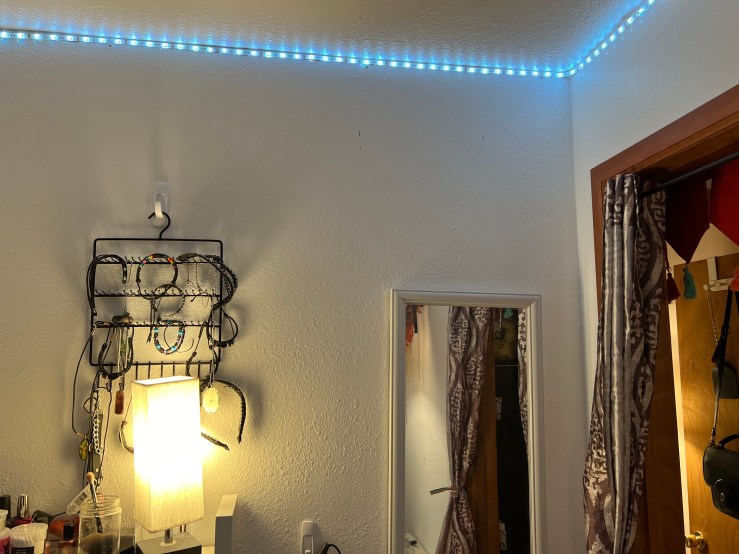
I had two sections of shelves to put up, the first being a wifi and router shelf above my wife’s makeup table.
I will move the mirror and the jewelry hanger, slightly, and put up the shelves.
I used my stud finder to find the studs, and actually drilled an extra screw hole in the brackets. They are technically supposed to go into a closet made system, but will hold to the wall studs just fine for what we are doing.
The studs aren’t always where I expected them to be in this ancient little house so a stud finder is invaluable.
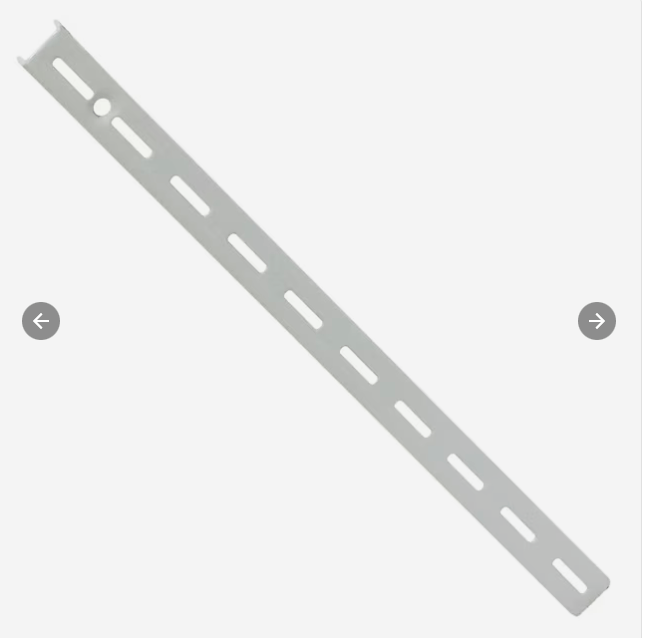
I prefer these double hook hanger style shelf brackets. I have the single ones pictured below in the bathroom and they are not that secure. Sure they won’t fall off the wall, but the shelves wiggle to much. I will replace them with the double style versions once above when I get around to it because life’s too short to be irritated by wiggly shelves. Plus, the double style brackets have holes to screw the shelves to the brackets so you never have to worry about accidentally knocking them down.
Sure the brackets are long, but we might want that later. The mirror isn’t up yet because I am waiting on more command strip picture hangers to put it back.
The router and wifi will fit up there, and it’s tall enough my wife can’t bonk her head. Few people are taller than her, so I think it will work.
Part of the reason for it’s placement here is to get it away from the electrical panel so there’s less interference, put it closer to the center of the house, for better wifi coverage, and to place it on the other side of the wall from my wife’s desk so she can hard wife into it for YouTube uploads. Her desk is actually set into a closet, and her computer equipment is on the top shelf, so I will be putting a hole through it so we can run cords through for her to hard wire to it.
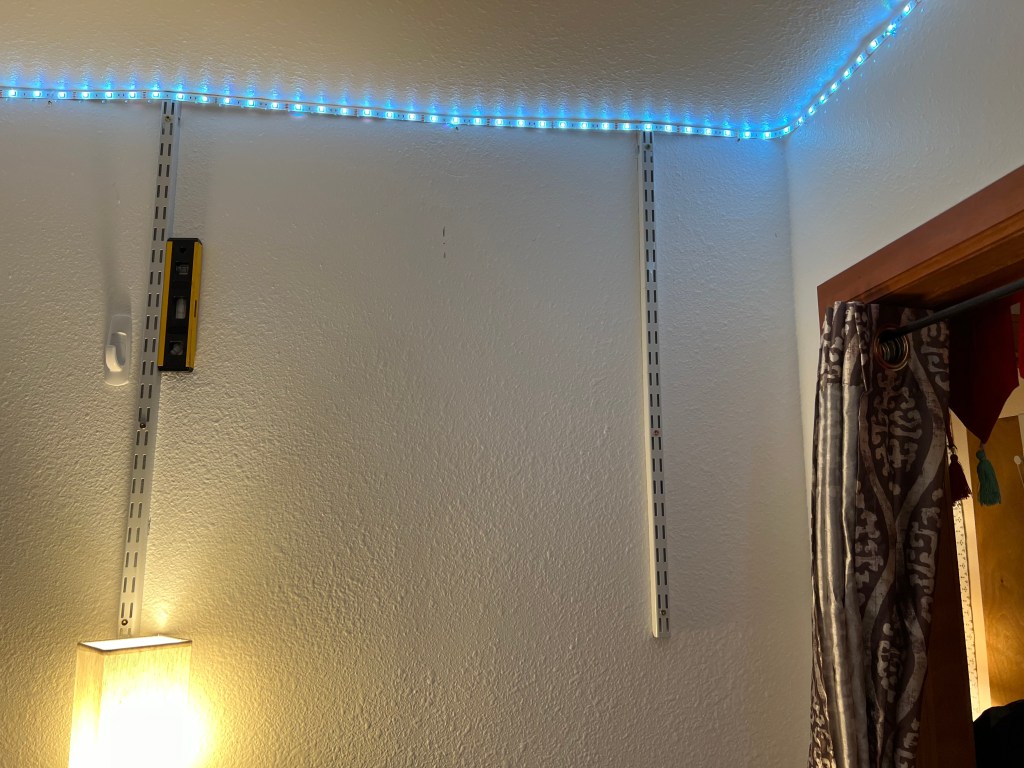
The second set is above my wife’s dresser. I wanted to center them over the printer, but the studs were not where you’d expect, and it was just more secure to do it this way. I will have to forever live with it not being centered. It won’t bother my wife, but I will probably rework this problem in my head for as long as this is set up this way. Maybe by next year when we repaint, I will think of something.
You can see the issue with why we need somewhere to put the papers.
My wife makes these great 5 x 7 laminated card stock game cards for her tabletop games. She creates them for missions, characters, NPCs, items, and locations. They are amazing and look like professionally made game pieces. We bought an Epson liquid toner printer for it, which as a great bargain as we’ve done hundreds of prints on the original cartridges. This means she needs space to put her supplies.
Once again, this was as easy as using a stud finder to find the wonky stud placement. Interior walls in the little blue house are sometimes not there? Like you’d expect them to be 18 on center, but they skimped. This means, sometimes there are no studs at all in places you’d expect them. Old houses are weird. The external walls are fine, but just the interior ones are like this.
It took me very little time to get the shelves up and secured.
Shelves for my wife.
This would probably not be optimal if it was for me, because I am 5’6″. However at my wife’s 6’2″ she can reach the top shelf without a ladder.
I am sure she will organize these when she gets to it. We are thinking baskets or bins, as that works with her ADHD, and my need for organization both.
I can’t tell you how grateful I am to have a home because I can do this. If we find we don’t like it? I’ll just rip it out, patch it and do something else. Just having that freedom is astounding. I wish everyone could have a home they could do that with.
The funniest part of this entire process is now my shelves are level and straight to a degree the rest of the house isn’t. The little blue house isn’t terrible, but it’s old, and not as level as you’d hope.
My home has a lot of windows. This is amazing, because the 630 sq ft apartment we had before this had two total and there was no light. I love that I have so many windows now.
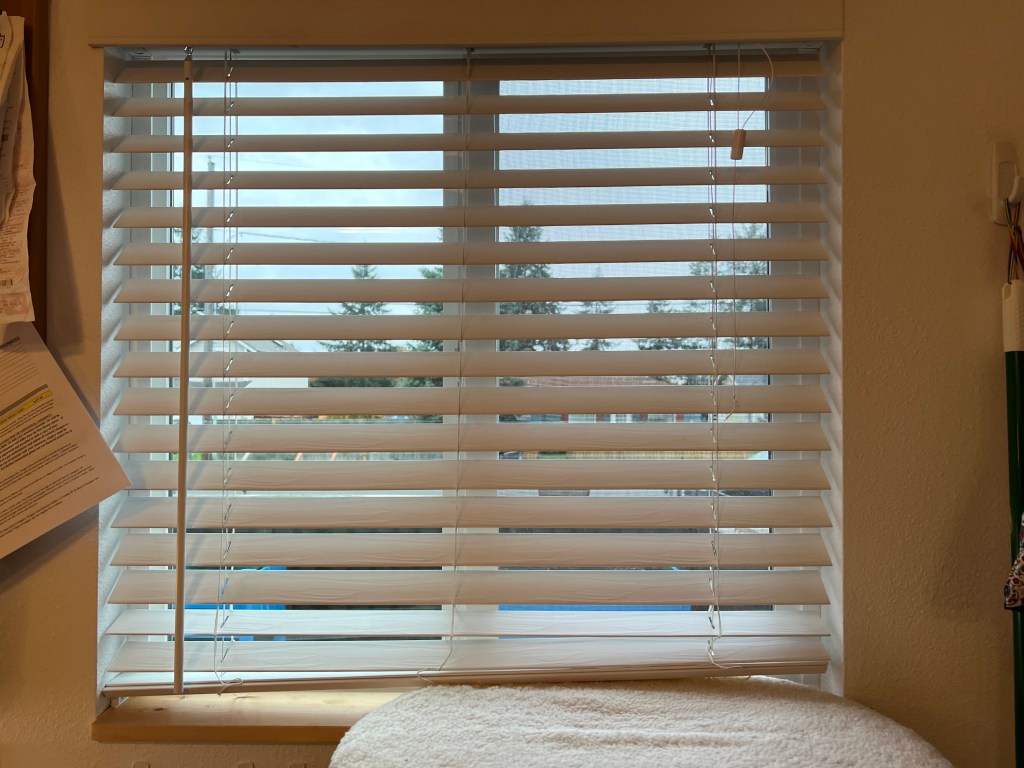
However, my home came stock standard with white blinds. I am not a fan of blinds. I hate raising them, lowering them, and twisting the little rod to get them to angle the blinds in the right direction. They are not really energy efficient, and hot summer and cold winter weather came right through them. Plus, I never ever feel like they are completely closed. I know they are, but I always feel like you can see into them.
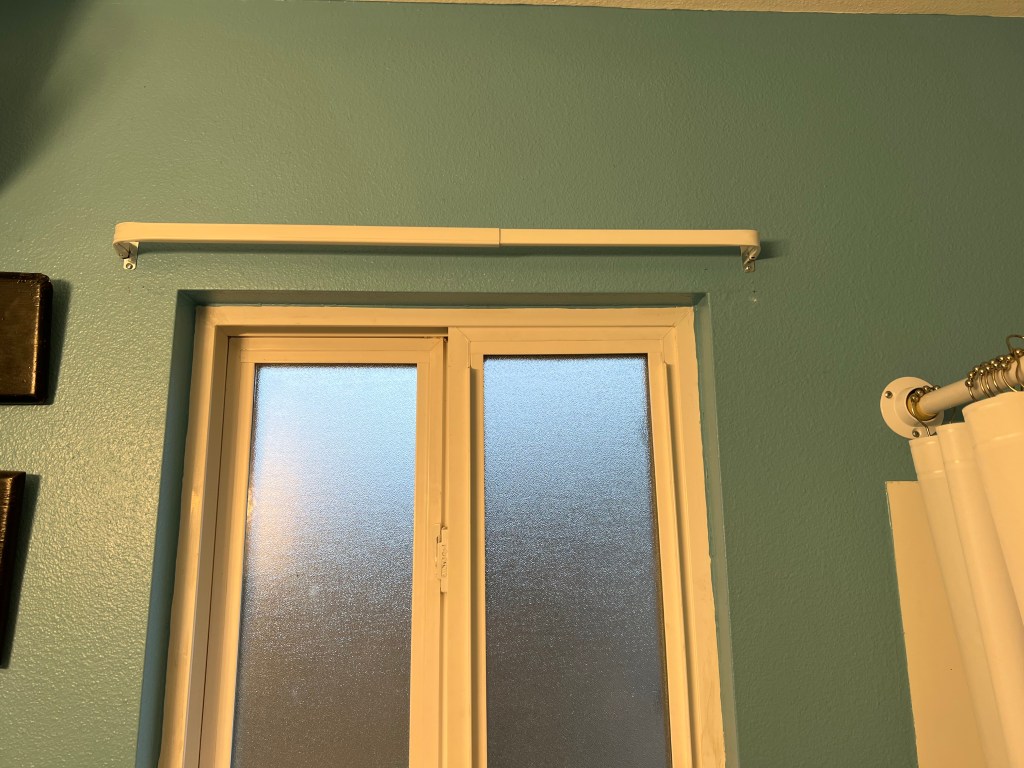
The window blinds that came with my house. The fuzzy platform is a cat shelf I have installed so my little monster can scream at other cats, squirrels, and god knows what at 3am.
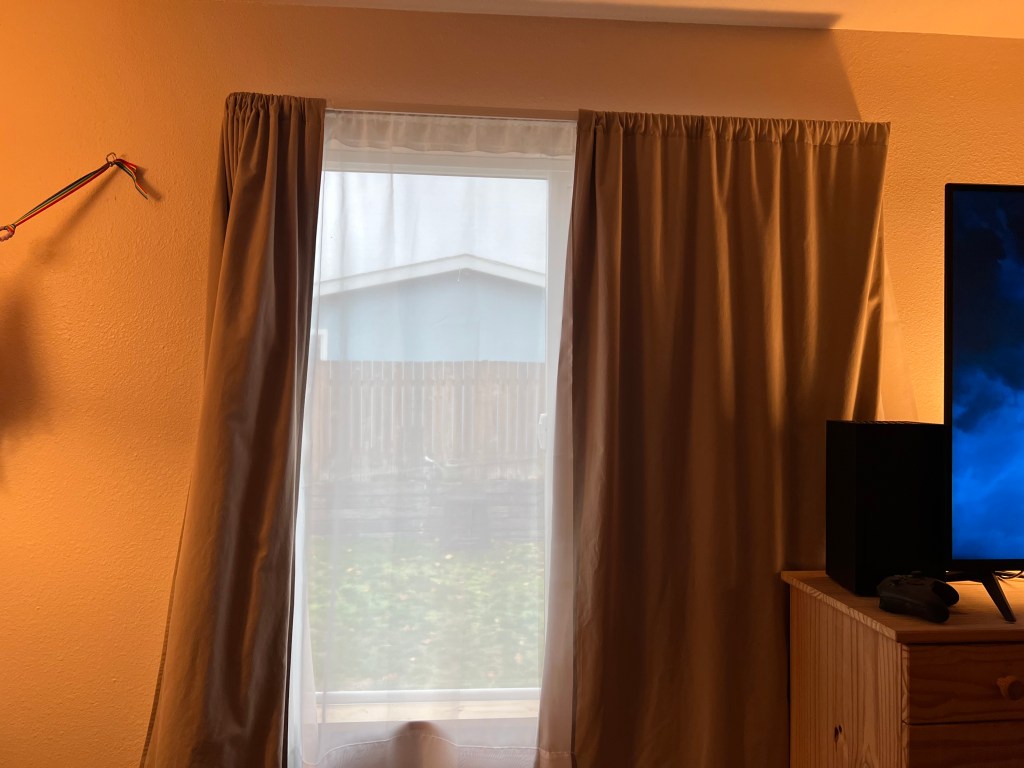
I like blackout/insulated curtains, and I found this great blackout fabric on Amazon. (not an affiliate link) The fabric is insulated, so it helps keep heat in during the winter and out during the summer. It’s white, so from outside you see white curtains with the blue house, and that looks cute.
For the inside layer of curtain fabric, I bought sheets for everything but the bathroom. I got jellyfish fabric for the bathroom to keep with my undersea theme. I needed ten windows worth of fabric, and that’s a lot. Joanne’s seems to be dying a long tragic death, and has little in the way of selection, and Fabric.com got bought out and closed by Amazon. Because of all this, it was just easier and cheaper to buy flat sheets from Walmart for fabric.
It was a really easy job to sew them up. I just made a big pocket and doubled over the top for the rod to slip through.
Sewing my bathroom curtains.
I added some inexpensive curtain rods to the my windows. Maybe when I do the rooms in their final colorful fun form I’ll replace those rods with fancy ones. I don’t know yet.
Curtain rods were easy to install and were not crooked. The camera angel just makes it look that way.
I also don’t want my neighbors seeing into my home, so I got double rods for all of my larger windows. This allows me to put sheers into the inner rod, so we can see out, but nobody can see in.
They have an Arlo camera right at our bedroom window there, so I like having a privacy option. I don’t know how much they can see, but I’d rather be safe than sorry!
I started this project last year in December, and I have 7 out of 10 curtains done. The last windows in the dining/kitchen area need done still, but are challenging because I need to figure out how to hang them when the windows but up against the cabinets with zero space to spare.
What I didn’t expect was how effective on heat and cold insulation these curtains would be. You can physically feel the different behind the curtain when it’s hot or cold out. The difference is shocking. If I had know these kind of insulating fabric for curtains existed, I would have done this years ago. Not to mention the black out effect is better than any store bought black out curtains I have ever had. I can sleep midday and it’s dark in my room now.
This makes this project far more effective than I could have imagined. First, I feel safer in my home with windows that feel fulling closed. You can’t put a price on that. Second, the insulation quality of the curtains with that black out fabric was off the charts. I totally underestimated how much of a difference this would make. I highly recommend this, if you can sew even a tiny bit. This is an easy project to help insulate your home and depending on how old your windows are? This could really help.
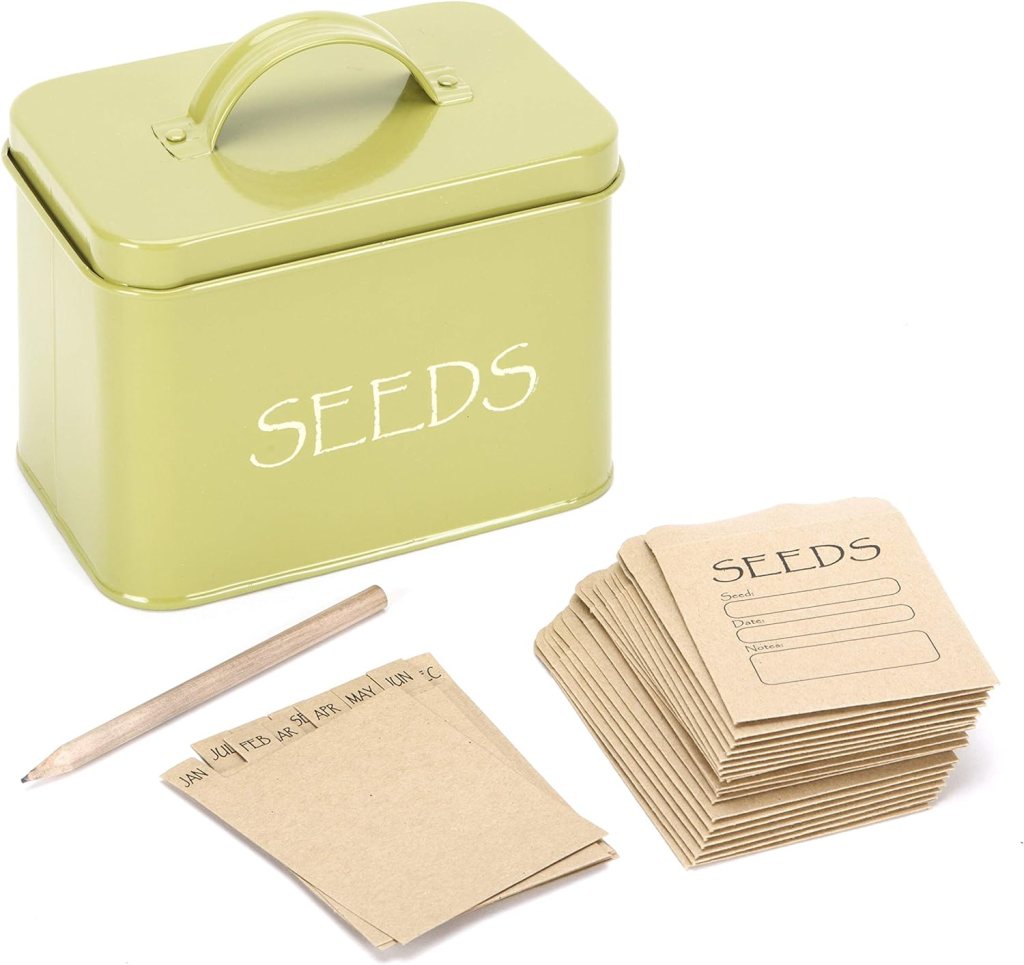
It turns out I have quite a few seed packets in my possession and I needed some seed storage. I first tried a little tin box but that turned out to be annoying to file my seed packets in. Apparently I have too many, and not all of them are in the same size packet. (I don’t get paid for any of the links, this is just what I used.)
It was a cute little box if I didn’t have such a large pile of seeds it would have worked.
I also wanted to be able to clearly see them so I got myself a 3″ binder and seed insert pockets. This worked way better.
The problem was the binder was seriously weak. It is so weird because I have two other 3″ Avery binders. One is from 20 years ago. It’s still going strong, and sturdy and protects my art work. This one, though? The sides were so bendy it just annoyed the crap out of me.
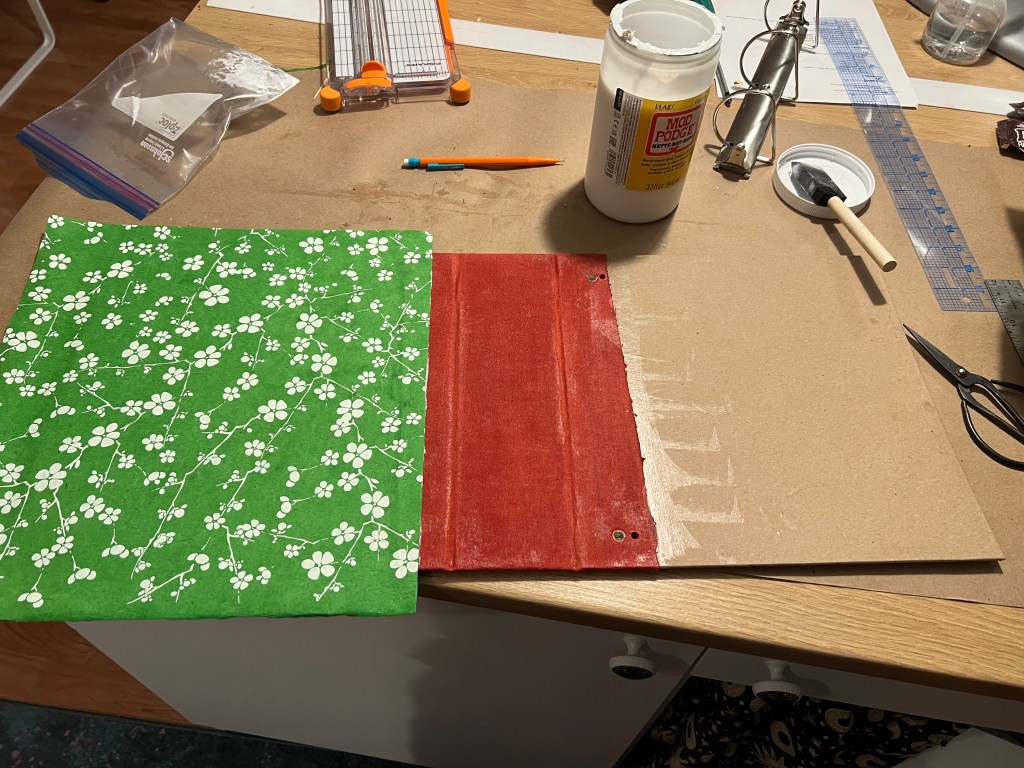
I decided to make my own binder using the hardware. I bought some bookbinders hardboard off Amazon, and some paper off Etsy and followed some simple Youtube tutorials.
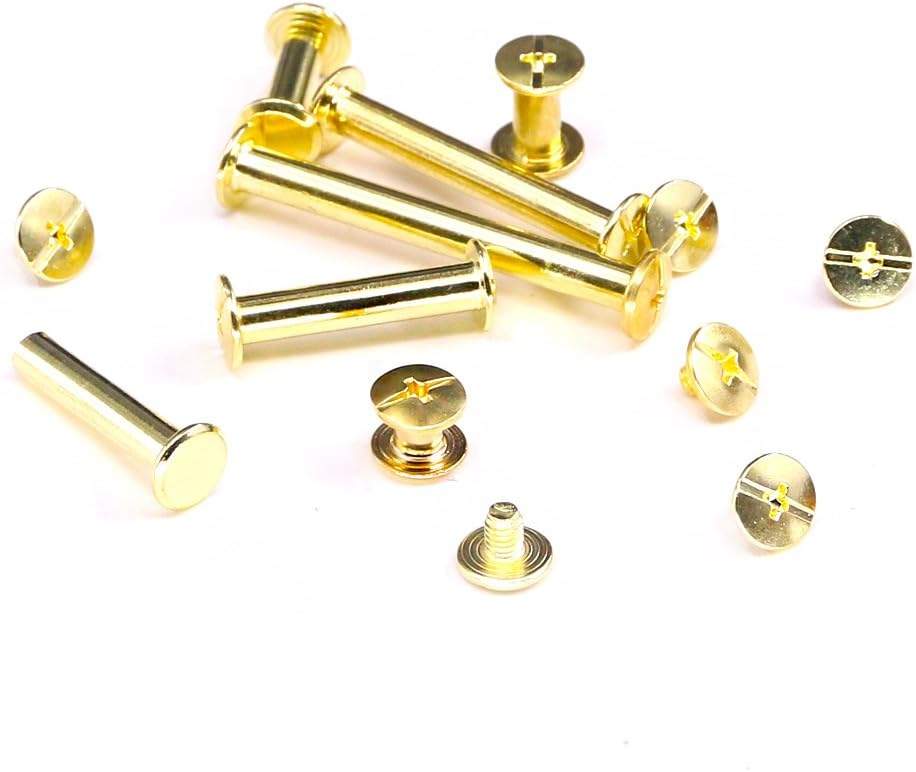
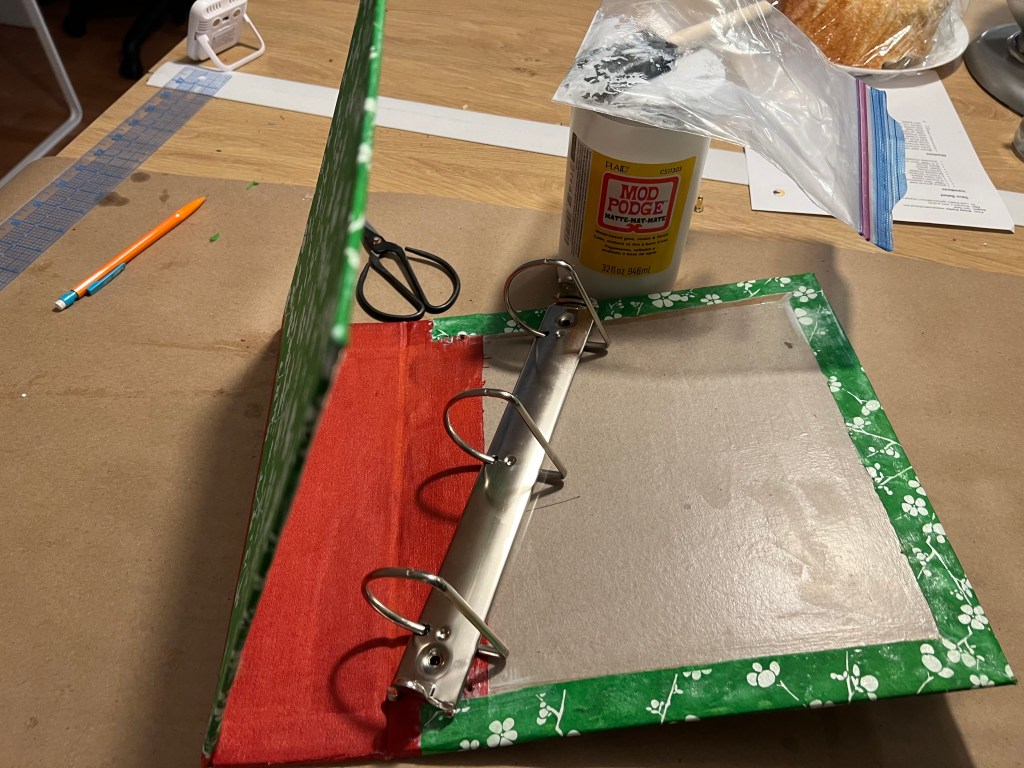
I drilled out the rivets holding the 3″ binder rings in the old binder so I could just use some Chicago Screws to screw it to the new binder. I really like Chicago Screws as they are internally threaded. I have used them on random book related projects before.
Internally threaded Chicago Screws.
I then measured and laid out the book boards, and covered the whole thing in butcher paper. Which, immediately bubbled up with the glue, and took a lot of work to smooth out. I used some random rust colored linen backed with interfacing as a book cloth for the spine so it would last longer.
I had already cut out the binder boards and glued them to the butcher paper and fabric and cut holes for the binder hardware.
I glued the whole thing up, and drilled holes big enough for my Chicago Screws to put the binding rings back in, and covered the interior with paper.
External cover paper glued on. Just waiting for it to dry so I can put on the internal paper.
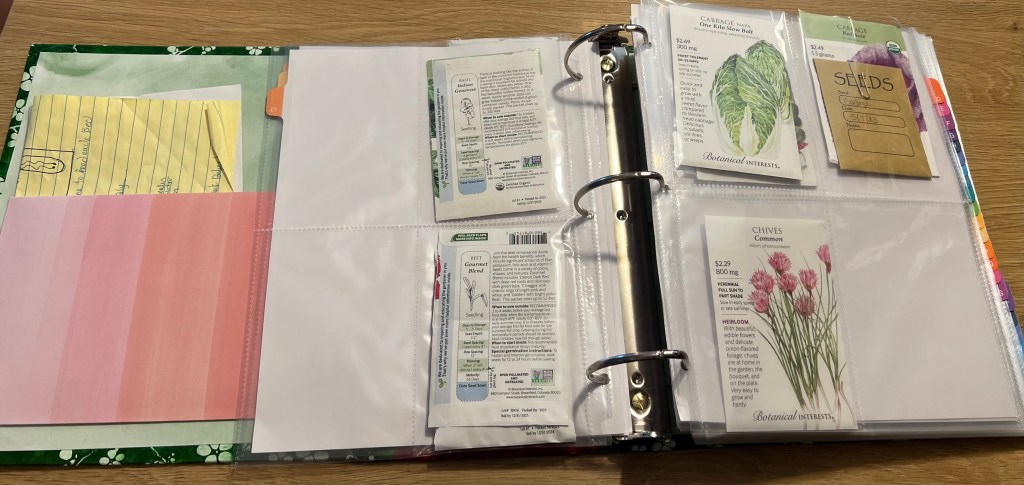
I added a pocket, which I am not really sure I like, to the front cover, and screwed the binder hardware in, and added my seeds and an alphabetizing rainbow divider in.
I like to put my seeds in a little seed envelop, paperclip the top, and keep the seed packet for directions. My irrigation plans are on the yellow legal paper in the pocket.
Inside of finished binder showing seed pockets, dividers, etc.
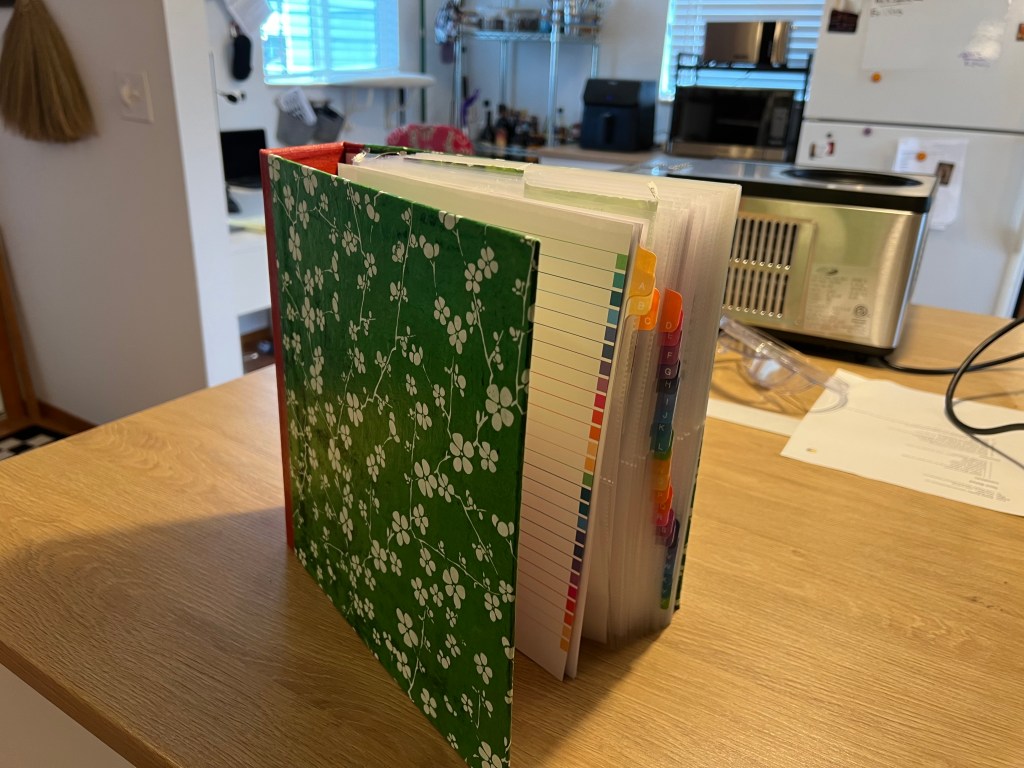
Finished external binder. (Notice the expensive Whynter ice cream maker int eh background. I have to talk about that eventually. Best purchase ever! )
It looks a little warped but further drying with the Modge Podge and it straighten out.
Struggles with this project:
I used butcher paper as a base layer on the hard boards. The second it touched the glue, it bubbled like crazy. I had a very difficult time getting it flat and smooth because using butcher paper like that is a terrible idea.
Precision. This has some minor measure issues because while I can measure and cut, when you add wet glue, and bubbling to the equation, it was a lot harder to get things to line up with precision for me. This might just be a me issue, but that was rough.
Hardware. Getting the hardware on was so easy, I did not initially test it with the binder closed. When I did, the spine angled out because I had placed the hardware too close to the spine, and had to move it in by a 1/4 inch. I should have checked this, but did not. I fixed it by filling the old holes I had drilled through the hard board with balls of cover paper and Modge Podge. Worked just fine as it was all under the green cover paper.
Glue choice. I had Modge Podge on hand and used that, but I am not sure it was the best choice. I will probably get an acid free bookbinding glue next time. I just felt this bled through the papers so much.
Book Cloth. I watched some YouTube videos on using iron on interfacing to make book cloth so I did that with the rust orange linen I had on hand for this. As soon as it hit the glue, the whole thing wanted to peal off, and I had bubbles, and it was stressful. I almost started over at that point. Whatever interfacing brand I had, which I have no idea, just didn’t want to work with this. It’s iron on, so I have no idea. I will probably get the actual Heat’n’Bond as recommended next time.
Outer cover paper. This was a hand made green leafy paper, and I think it was too porous. The Modge Podge bled through funny in some places. It’s alright, but I think I would look to treat it differently to prevent that in the next version.
However, all in all, I am happy. This is as sturdy, or more so, than my 20 year old version of a 3″ binder. Even better, it looks cool. I might try to Cricut cut some dividers that are all mine, but I haven’t decided yet.
I was working on my garden this last Saturday when as I stepped out on my back porch, a common brown roof rat shot out from under the stairs and across the yard. It had been eating dropped bird seed.
This is not the actual rat, as it was so fast I didn’t get more than a moment before it was gone.
It went in the direction of a neighbor’s yard that isn’t usually mowed, and has a lot of shrubbery and overgrowth. I was shocked because it was dead middle of the day. It was black and small, so I think it was a roof rat. It was not one of the bigger ones.
I do find this a little concerning, and this might be the inevitable outcome of bird feeders, and a garden.
I did some research and learned that you can add spicy pepper to your feed mixes and the birds can’t taste it, but mammals can. This actually might help with the squirrels which are literally digging up my entire yard and garden.
I tested it with the peanut tray, which the squirrels get into, and boy do they hate it! It’s 3TBSP to a pound of seed, and it works well. I added a little olive oil to make sure it stuck, and it worked. The crows still got the peanuts we feed them, and the squirrels are off elsewhere.
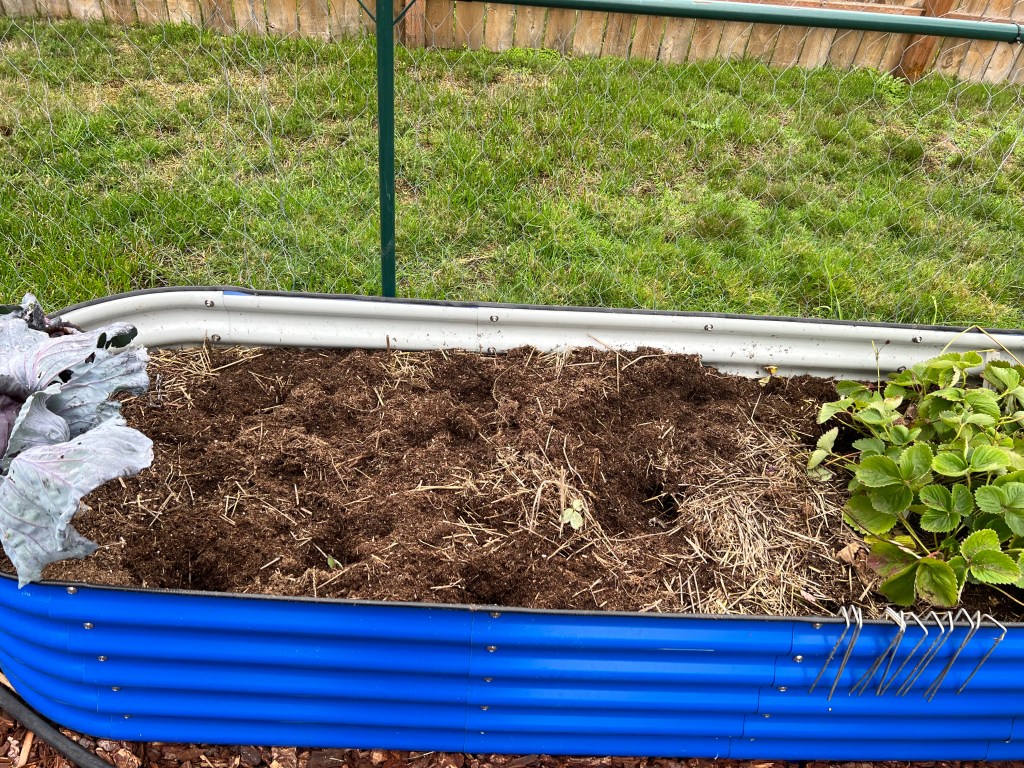
My wife is sad, but they are literally destroying the yard, digging up all the clover seeds, and every garden bed I have looks like this now below.
This bed was level and had leftover mulch, until the squirrels decided to go HAM on the beds. My Beet bed, and my tomato bed look the same.
As for my Squirrel Interdiction efforts? The reason they got into the area was that I used chicken wire. Chicken wire has too big a holes to use. I just ordered $300 in hardware cloth with 1/2 by 1/2 squares, and not I have to redo the entire structure this winter.
Sigh. Squirrels 1, me 0.
My New Plan
I am going to wrap the structure in hardware cloth. I am just going to do it over the chicken wire. I can’t see how that would matter at all. It will just create a double layer of fuck you to the squirrels.
I am going to cayenne pepper the bird seed and peanuts. That will give them less incentive to destroy my yard and my garden, and my wife will still have all the birds. The hawk that sits on the fence and looks for rodents might have to look elsewhere, but I am fine with that.
This last month we had to upgrades to the house related to insulation and heat issues.
Insulation
Over the last winter our house could not maintain heat. The floors were icy, and the heat cycled on every ten minutes. At one point during an ice storm it felt like the heat was running constantly for 24 hours straight. It was just that cold and the heater could not keep up.
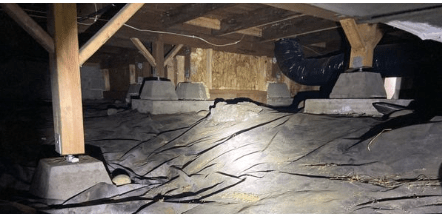
Notice no insulation under my home.
We were recommended Boulton Insulation from our home inspectors, and we had them come. The inspector (Kevin) was honest, and really fair in his assessment. He was also super knowledgeable about heat pumps which is on our home list. He said it would be an easy job to put the insulation under the house.
If I was 20 years younger, or didn’t have my disability, I’d have done it myself, but I just can’t anymore.
Our quote came in at approximately $1200, after a power company rebate. That is less than the iPad I was eyeballing. Sold!
They scheduled us and had it done in a week. It was a one day job, and the next morning we noticed an immediate difference. The floors were warm. We could walk barefoot. As the mornings are getting colder, we have only turned the heat on for ten minutes in the morning and our tiny house just heats up and stays heated. If we cook or run the dishwasher we don’t even need it.
Best of all, my wife is comfortable. That is worth a lot to me.
Roof Venting
The second issue we had was the house roof was done by the previous owners, and while it’s a fairly good job, there is literally no venting in it. Like none! The blown in insulation in the attic is five star good according to Kevin from Boulton, but the lack of venting means it heats up in there, and just cooks us in the house.
On a sunny day you can literally feel the heat in the ceiling start drifting down and making the house hot. In the most recent sunny day, it was 74F, and the house was 85F just because of this with windows open. On a really hot day, our air conditioners struggled to fight it.
Kevin at Boulton gave me a recommendation for Patrick at Sound Roof Care, and I got a quote. Like Kevin, Patrick was fair, and gave me a reasonable bit of information that mirrored my own experience and research. Basically, I was risking mold and reducing the life of my shingles because I had no venting.
The quote to add venting along the entire roof was approximately $2700. That’s great, because I went up there to seal some nails and the roof cap on the recommendation of the home inspectors report, and I hate doing that. Even if my body was able, nope! There is no fucking way.
I helped my father roof two homes when I was a kid, just being up there and nailing down shingles. I don’t remember having an issue. Now, I apparently am not okay with doing this at all.
So as far as I am concerned $2700 is a fair price. We got scheduled and they were pretty quick at finishing the job.
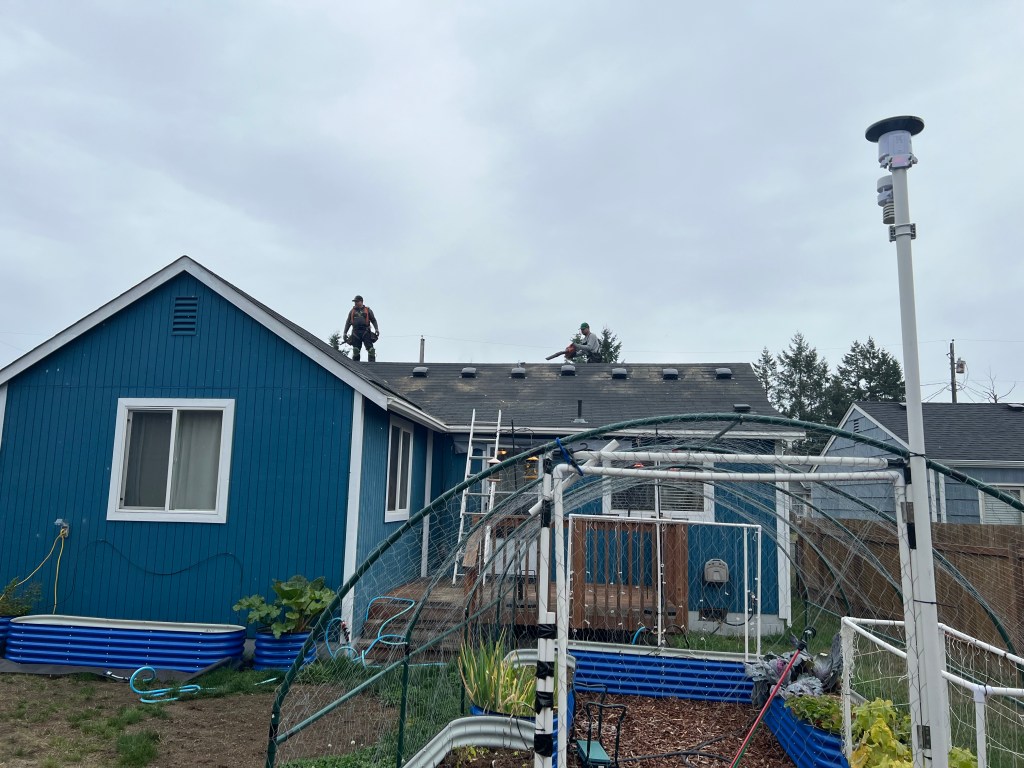
Super heroes adding roof venting to my roof.
I probably won’t know for sure how this feels until it’s warm again next summer. I do know it’s a good preventative measure to make sure my roof lasts and I don’t end up with a moldy attic crawlspace.
I do know, it can’t hurt, and I can’t wait to see how a hot sunny day is in my home now.
A Transgender Aside
My wife and I are both trans, with my wife being visibly transgender. Part of hiring people in during the current political climate is fraught with concern that people might refuse to work with us, or treat us terrible for being transgender. Since my wife is the visible one, that will fall on her. She takes more than enough abuse when we go out, that bringing it home to her isn’t something I want to do.
I have to say these were concerns we had when we looked for professionals to work on our house. Yet, both Kevin from Boulton (and the office staff when we went in the pay it off) and Patrick from Sound, were kind and respectful.
If you have never had to consider this, it might seem strange to worry that someone you are paying may not want to work with you. It happens though. It might seem like a low bar to have to be happy someone treats you with respect, but we’ve had companies in recent years refuse our business. Not everyone takes a cake lawsuit to the Supreme Court. Some of us just go somewhere else and put our money in small businesses that are not staffed with bigots.
I can say these two companies were fantastic, and respectful, and safe for transgender clients as far as our experiences go. I am so happy we chose them, and will definitely be recommending them to everyone that asked now.
We might be winding down, but I still have a few things to do before next season. This is the list of things I am planning.
Squirrel Interdiction. They are getting into the back wall of my garden. I think it’s under the wall I created, so I am going to buy some hardware cloth and bricks and try sealing that area up. Then I have to see if that works. It’s an arm race between me and the squirrels.
New front bed. I need to buy some soil and fill it. I used the garbage dirt I had in a pile for the bottom of the raised bed, but it still needs real honest to god good dirt. I plan to transplant my strawberries come spring, in it.
New back bed. Same thing. Except I am going to plant sunflowers in it. They will be beautiful to look at, pull in pollinators, and block my neighbors Arlo house cam from pointing into my bedroom window. That’s a lot of wins.
Two raised herb garden beds. I have two picked out at Amazon’s and need to buy and set them up. I want to move my herbs onto the deck so I can grab them for dinner faster. it will also open up areas for planting other vegetables and flowers.
Soil. I need soil for the rest of my beds. They settled down a lot. I hadn’t realized just how much they would, so I need to top them off, with soil and some compost.
New composter. I am close to being down with my first compost bin. I have filled it, and it’s been good. However, it is still cooking for next spring. I need to buy a second one. I am thinking one of those rotating composters because with my physical issues, it’s actually kind of hard to turn it otherwise.
On a sad note, for reasons that elude me, the cabbage I was going to make into saurkraut today exploded and looks half eaten. maybe too much water with the rain, and maybe squirrel action. In any event, no saurkraut from that. I have two smaller ones I am going to pull. So we will see if I get to that.
I am also trying to grow clover in the raw dirt areas in my yard, because I am tracking so much mud into the house. I probably will have to pay a landscaper to come put a walkway around the garden because I am not physically capable. That would help and I could go barefoot to grab the watering can.
I’ve gotten to the point where I can review what I did with my garden this year. What seeds I used, how they grew, how much I liked the flavor, etc.
Overall Observations
This overall was a great first year. I didn’t expect it to work out so well, so I am very happily surprised. It was definitely hard on my body to get the garden set up but I think going forward it will be much easier because the beds are in, and everything is built.
To say this was satisfying is an understatement. I had so many meals with my own garden vegetables. I can’t even quantify how amazing that feels.
Squirrels
The squirrel interdiction cage worked until it didn’t. I am pretty sure they are coming in the under back wall. I plan to get some hardware cloth and bricks in winter and see if I can deter them. To be honest they are tearing up my entire lawn too, but I am just not that bothered by grass issues. I hate grass lawns and we keep reseeding with clover anyways. If they would stick to the lawn I’d be happy.
Once I am done with my tomato plants I will redo the area, but I can’t get to it yet.
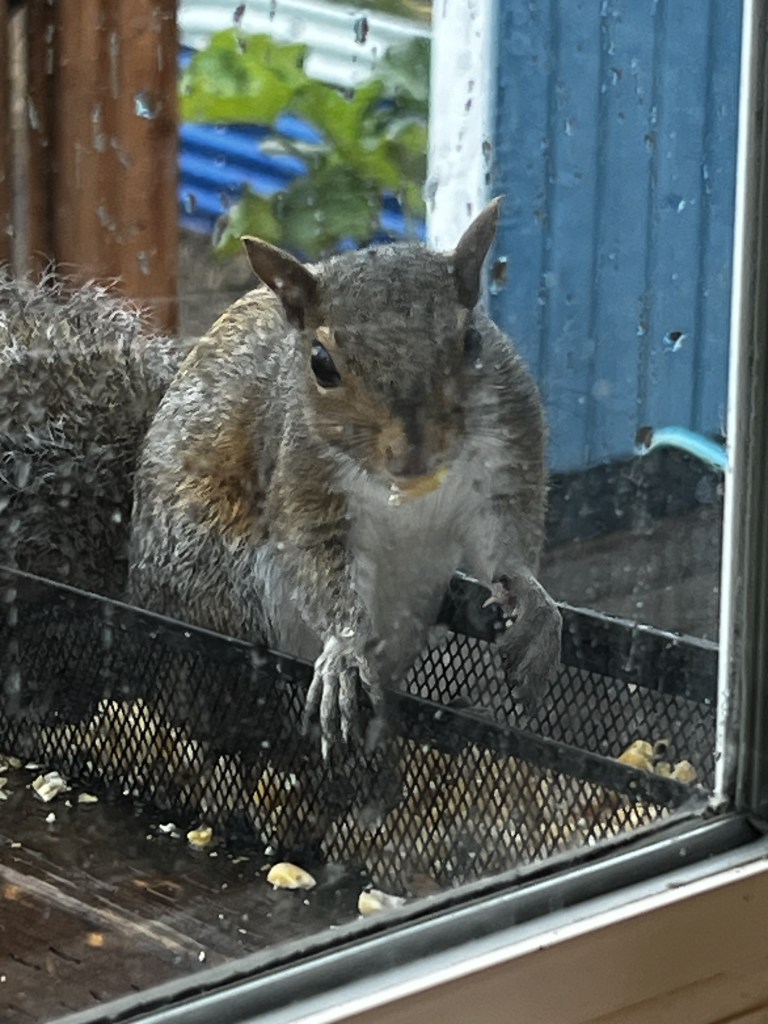
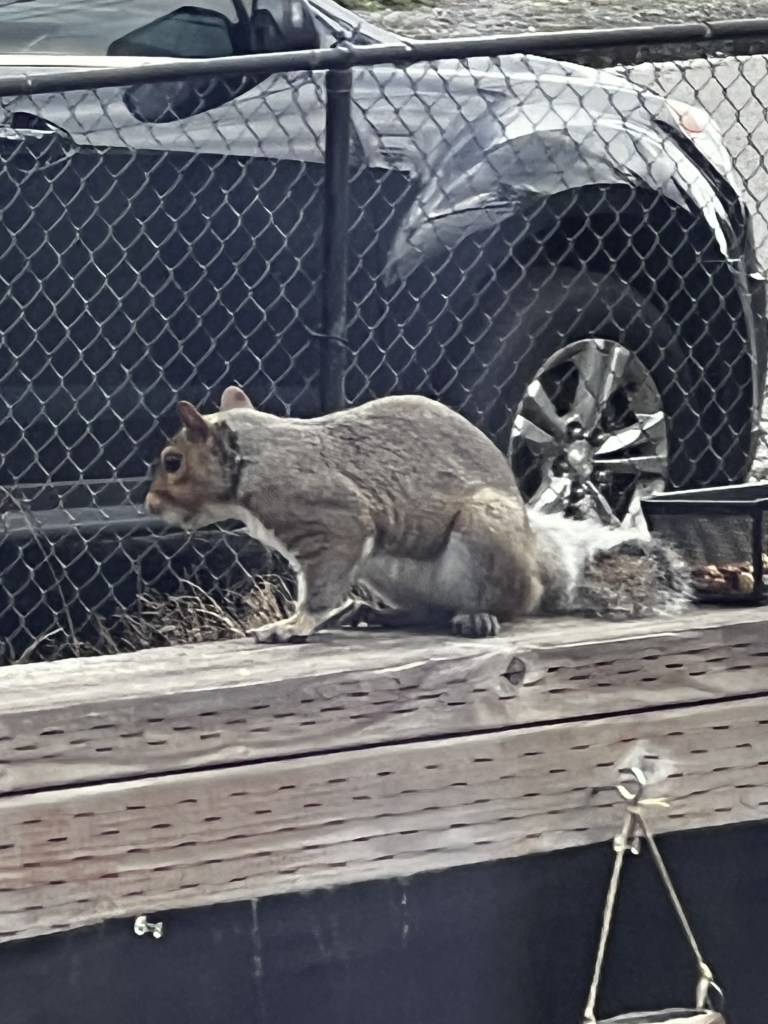
They knock on the windows to be fed, and I know that’s half the problem, but they make my wife so happy.
This is the victor of a vicious battle over the feeder. The loser is on the ground below.
Water
The watering system was something I should have done earlier. I am now really bad at remembering to turn the water off now, so I need to update it with a timer. I am still not sure exactly how I want my irrigation system to look. I found emitter tubing worked better than individual little drippers spouts. I might just get all emitter tubing. I still have a big kit from Rain Bird with all the bits and bobs so I can play with it.
The one thing I was not satisfied with was how I got the water to the garden. It works, but I think I should do some PVC lines underground to clean it up, and make it look less like an octopus made of garden hoses is sticking out all over. I am still considering my options, and what I want to do.
These are a 55 day bush tomato that were called a semi-determinate. These were insane. I planted the seeds directly in the bed a couple weeks after the last frost date in early May. I was very worried about them, but when they decided to do their thing, and they exploded in tomatoes. I had 10 plants, and I could not keep up. Even now, in October they are still trying. For a 2 person household this was way too many plants. They really were the star this year. I gave them to multiple neighbors and froze 15 16oz jars of tomato sauce.
While they aren’t the big beefsteaks everyone seems to want, they never stopped. I had tomatoes from July on. The taste was amazing too. I am going to plant some of these next year, but not so many.
Way too many tomato plants. They just never stopped all summer!
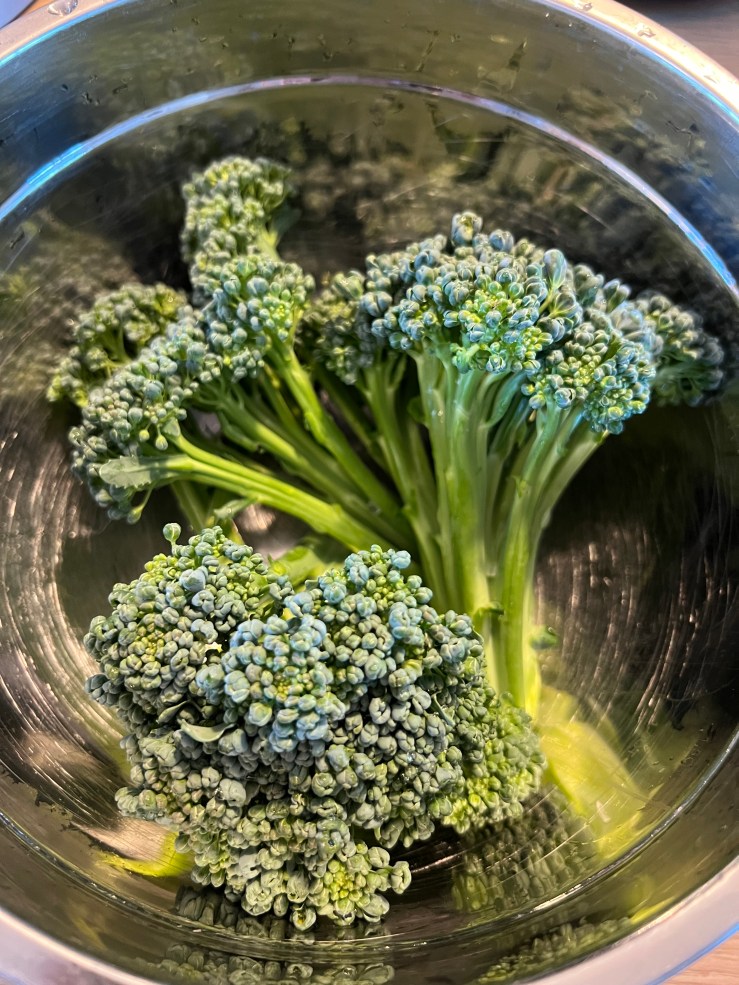
I direct sowed these seeds in early May, and they grew really well. However, once they got big, the cabbage moths came. I fought those cabbage moths hard so I could get a harvest out of them, and I managed to get enough to eat. I planted ten plants, and all but one did really well.
As for taste? They were really bitter. I don’t know if it was our uncharacteristic heat this year, or what, but they were too bitter to eat alone. I cooked them up in some stir fry dishes and they were amazing for that. Unlike grocery store broccoli, these were not as fragile and really did well in the stir fry dishes.
I am not really sure what happened here. I direct sowed three square feet of the planter to these, and they just did not grow well. I planted each square 2 weeks apart as kind of a succession planting scheme. I’d never grown green onions before, so maybe I did something wrong. Half of them never germinated at all. Half of what I sowed did not germinate at all.
They taste just fine like green onions, but are tiny and weedy, and didn’t come up well.
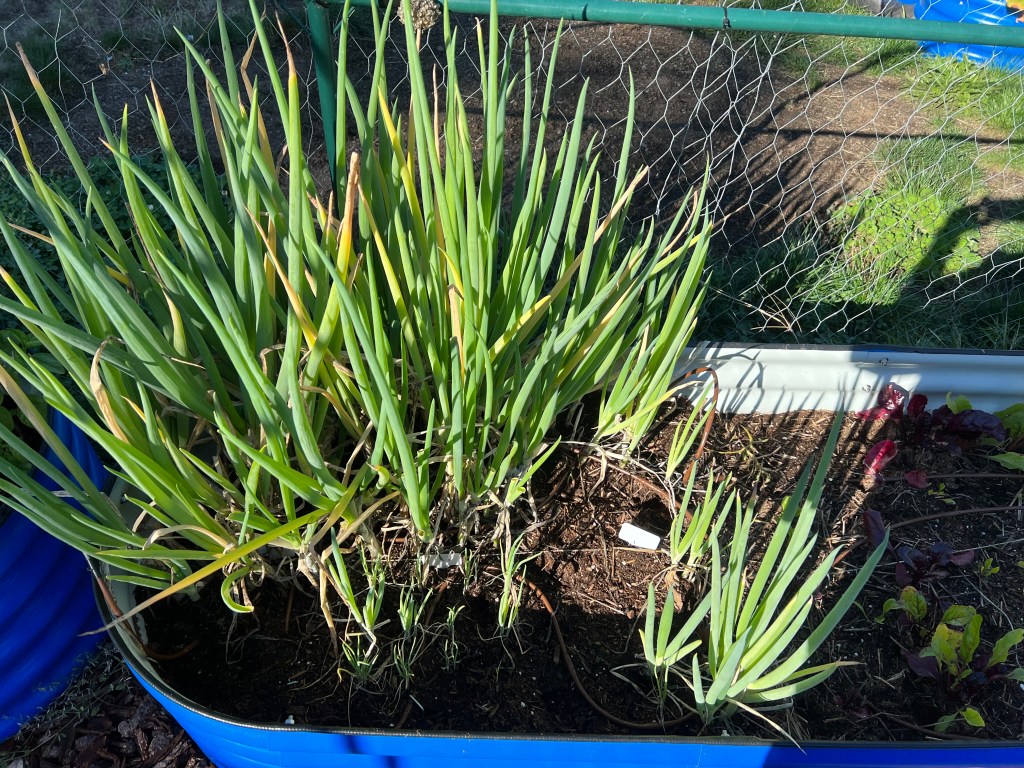
Grocery Store Green Onions
These were just ends from grocery store green onions I planted while I waited for my seeds from the Tokyo whites to come up, but man did they outgrow and out perform my fancy seeds. I planted 2 squares of my 12 x 12 inch squares for this, and they just took off.
This was amazing. I just went out and harvested green onions whenever I needed them. They tasted 1000X better from the garden than they did originally from the grocery store. I was surprised at that.
You can really see the difference between the grocer store green onions to the left and the much smaller Tokyo whites in the front right.
I planted these in place of the broccoli when it was done and bolting. I can’t say how well I’ve done because I don’t expect a harvest until the end of October.
The squirrels figured out a way under one of the walls of my squirrel interdiction garden cage and went absolutely crazy on them. I have a few still valiantly trying. Initially it was beautiful, and the entire bed was coming up germinated after I planted them in early August, and now it’s hit and miss. I have to say I am impressed with how hard they are trying to come up after all that destruction.
I am hoping to get a few if possible, but we will see if the squirrels destroy the rest before I get them.
They are still trying, so I am still hoping I get some.
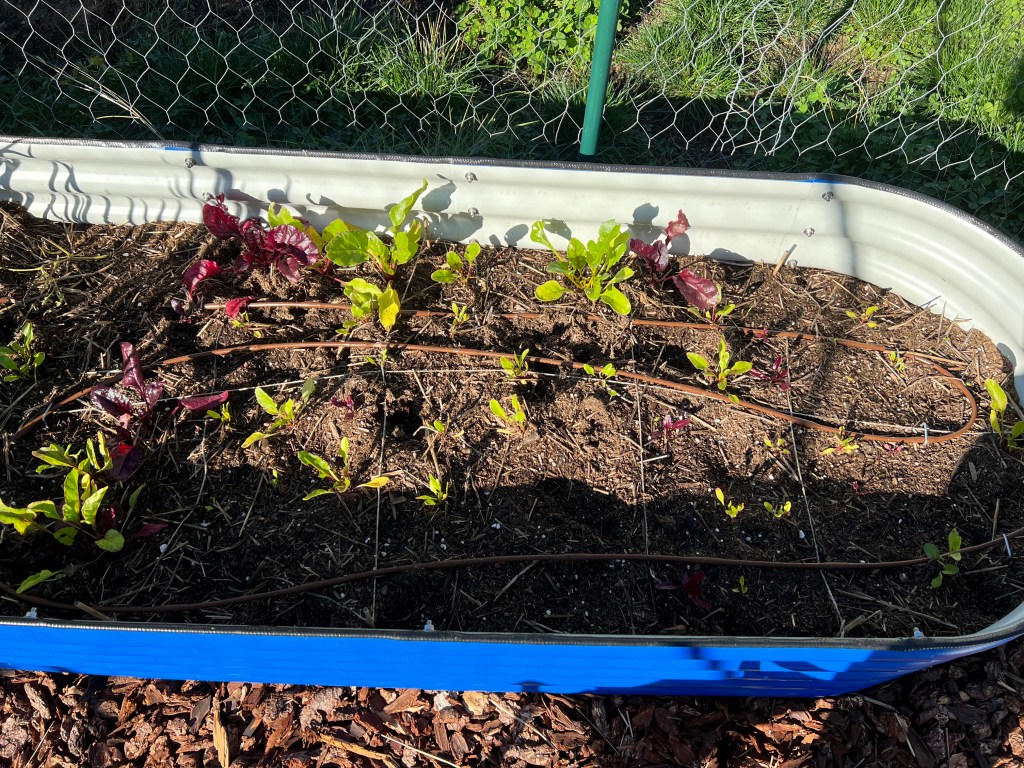
I planted these seeds in May and they came up like gangbusters. I had 8 of them, and only lost one to cabbage moths. I heard the moths don’t like red, so they primarily went for the broccoli. I have to say I didn’t do much with them but water them and leave them and they were strong.
Flavor-wise, they were perfect. I have made coleslaw, fish tacos, burritos, and added it in to just about everything and we have loved it.
This red cabbage is going to be made into sauerkraut.
These were a great deal. I ordered ten, and got 2 extra. I planted them right away, and all but one did well. They were a little thin at first, but damn in August did they explode. Like they have covered half a planter and are invading their neighbors.
It was only the first year, so we didn’t get many strawberries, but it was enough to go out in the morning and grab a few for yogurt parfaits weekly.
These were the best strawberries I have ever had. They were so red inside, and so perfectly tart and sweet.
I need to transplant them to the front bed this spring so they can be contained and stop invading everything around them.
I planted 4 of these in late May, and three took off. I had a hard time with these? They were slow to start and it seemed like they just didn’t want to go. It got much better when I got my water system in, and I think that was the problem.
I have never had fresh basil before so this was great. One of them flowered, and I just let it, but the other two were enough to give me a lot of basil for salads and meals. I could have used double the plants for pesto.
I had the same problems with this as I did with the basil. It was slow to start, and didn’t’ really take off. I planted four of them, and they were tiny. They tasted great, though. Then, in late august the squirrels got them. They are still limping along, and what little I got was very tasty.
Like the other herbs, this struggled, but did better when I got the water system in. I did not get to taste these as they fell to the squirrels digging. They looked so nice for pickles then they were trashed. My war on the squirrels is eternal.
These worked out amazing. They took off, they were huge, and brought so many pollinators in. I loved them. They were too tall for my garden cage and I had to thread them through the chicken wire. They will go in a dedicated bed elsewhere next year so they can be as tall as they want.
I was going to harvest the seeds but that was way too much work, and I gave up. It was just not worth my while. Maybe if I ever find myself not having to work for a living and have more time to spare I will try it again, but I’ll just keep them for the flowers next year.
I wanted to can some pickles, so I planted 12 plants. Then I panicked that this might be overkill. Turns out, not so much.
They struggled to get going, but did better when I got the watering system in. They didn’t produce a whole lot at the same time. I got like 2-3 cucumbers at a shot. I switched gears and did refrigerator pickles because I could make that a jar at a time.
I also just had no idea on if the plants were coming or going. They yellowed up, so I thought they were dying, then they just kept spitting out the odd cucumber here and there. Even now I have some cucumbers still trying.
Taste-wise, these were really good. I made cucumber sandwiches all summer, and they were great. If they got too big, they were a bit woody. For pickles, they hold up so well in the jar, and keep their crunch. I made them into Alton Brown’s Kinda Sorta Sours and they are still going strong.
This was the most bewildering plant I have ever worked with. They ninja’d out cucumbers out of nowhere, but only one or two at a time, then would go weeks with nothing. I will try them again next year with the watering system, and see.
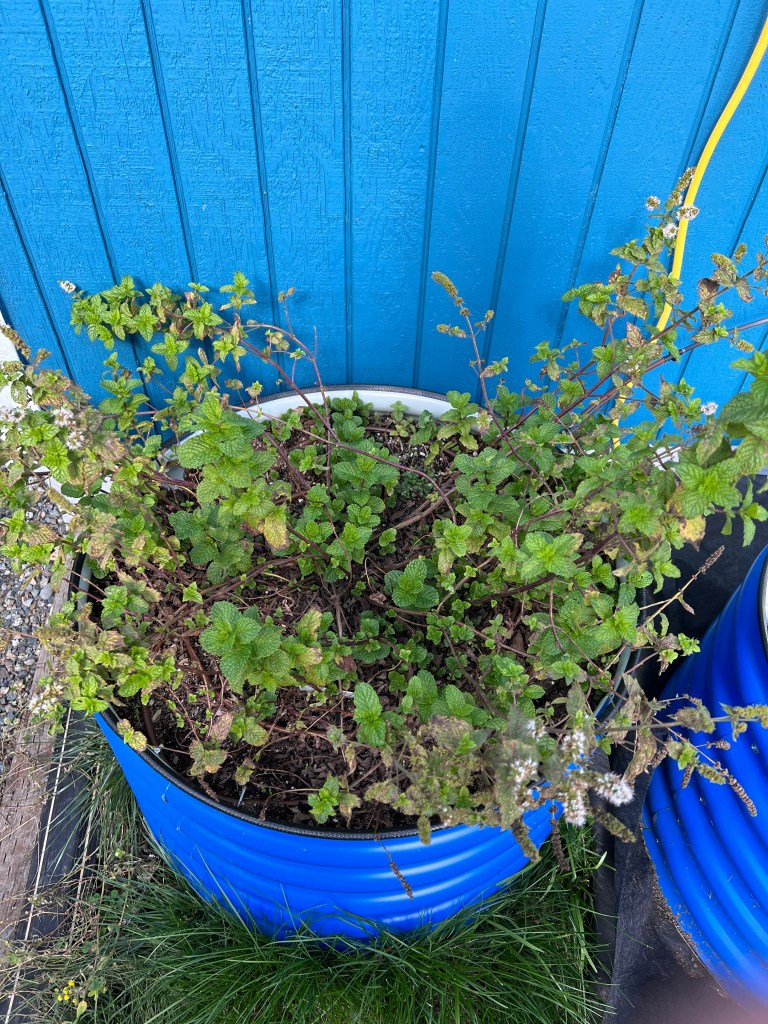
Yeah, I know. Mint gets everywhere. I need it for mint jelly though. I planted them in thier own raised round bed, to keep them contained. The seeds were super slow to come up, and kind of died off. I don’t know if this is because of the random Amazon purchase or not.
Mint – Trader Joes
I bought a mint plant on impulse at Trader Joes that came in its own dirt and planter. I planted it, and it blew up. That plant was amazing because it survived the heat, and me forgetting to water it. It attracted tiny butterflies. I love it! I used a bit of it for drinks, and it was great. I think it will be with me forever as it’s taken the whole planter, and it’s now eyeballing my lawn to invade. I knew what I was getting into.
You can see where I just forgot to water it through the heat wave, and now it’s springing back.
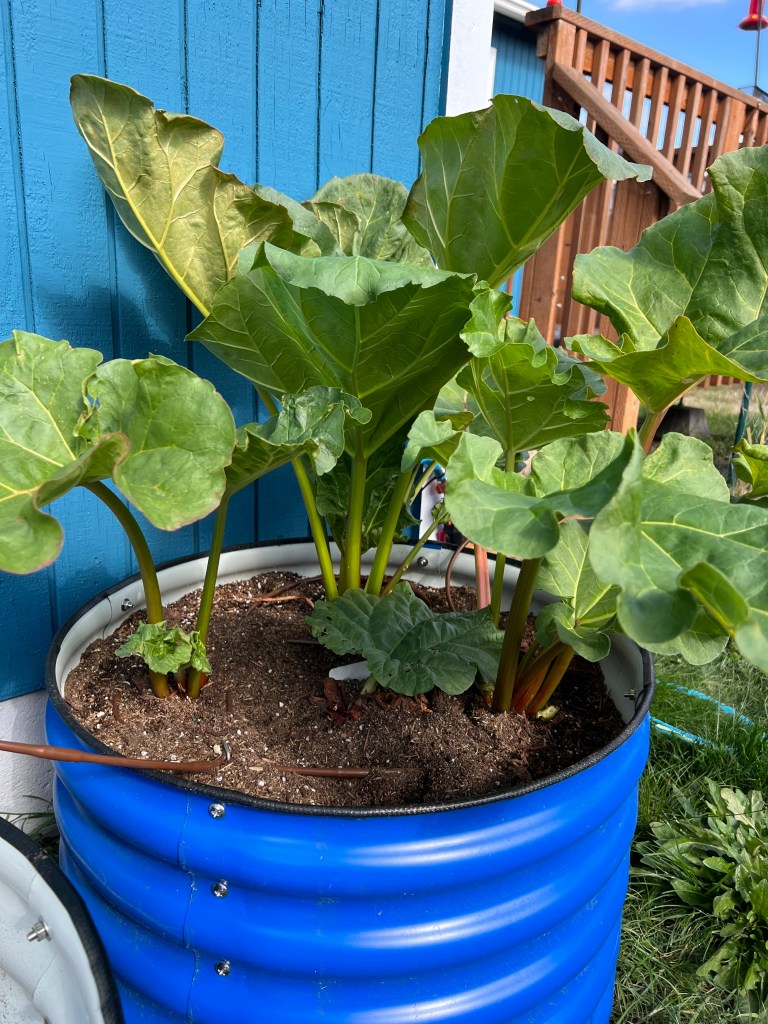
This random Amazon seed pack really worked. I planted four, and three came up. I really only needed one, but was hedging my bets. You can’t harvest any in year one, but they look very promising.
Random Rhubarb
When Andrea, my real estate gal, heard I was trying to grow rhubarb she brought me some from her plants to jam up, and a split of her rhubarb plant. I planted this immediately, and it is slowly sending up leaves. I thought it was going to die, but it stubborning kept on.
It’s got much darker leaves and redder stalks than the Victoria seeds version, but I look forward to it next year because the jam I made was great tasting.
I am not sure why Andrea’s won’t throw those leaves up like the others, but we will see how it goes.
Overall Satisfaction
I have always wanted a garden, and there was no way I could or would do this in a rental. Home ownership was the only way I could do this. I am still so grateful I am in such a safe space, and have access to these possibilities. It still doesn’t feel real.
I don’t like using disposable products so I thought I would buy myself some wool dryer balls.
5 Wool Dryer balls stacked on the washing machine.
I read the directions, and then looked online and read all those directions, and just tossed 3 of them in with a load of laundry. It was nothing special, just some of my microfiber towels, and clothing. Like just about every load of laundry I have. We don’t sort it, because it’s survival of the fittest in our household. If it can’t survive the wash, it deserves to die!
My first impression was the noise. I am glad I am in a house now, because my old downstairs neighbors sure as hell would have complained about the bouncing sound. I could live with that though, if they reduced static. I don’t care about drying time so I didn’t check that at all.
I was a bit excited to see how it turned out when I pulled a towel out of the dryer. It cracked so loudly with static it startled the cat, and my microfiber towel then suctioned itself against my body, and when I pulled it off, it then suctioned itself to the wash machine.
I thought, okay, maybe I didn’t know how to use them, so I went back to the drawing board. I read the directions, went back online, where everyone assured me they take away static.
My second test was no better than the first. STATIC, in big capital letters. I had to put it all back in the dryer with a dryer sheet to get it to stop.
I feel a bit taken in. In all honesty, I have no idea what a ball of wool or plastic would have as a working mechanism to reduce static cling, but I was hoping.
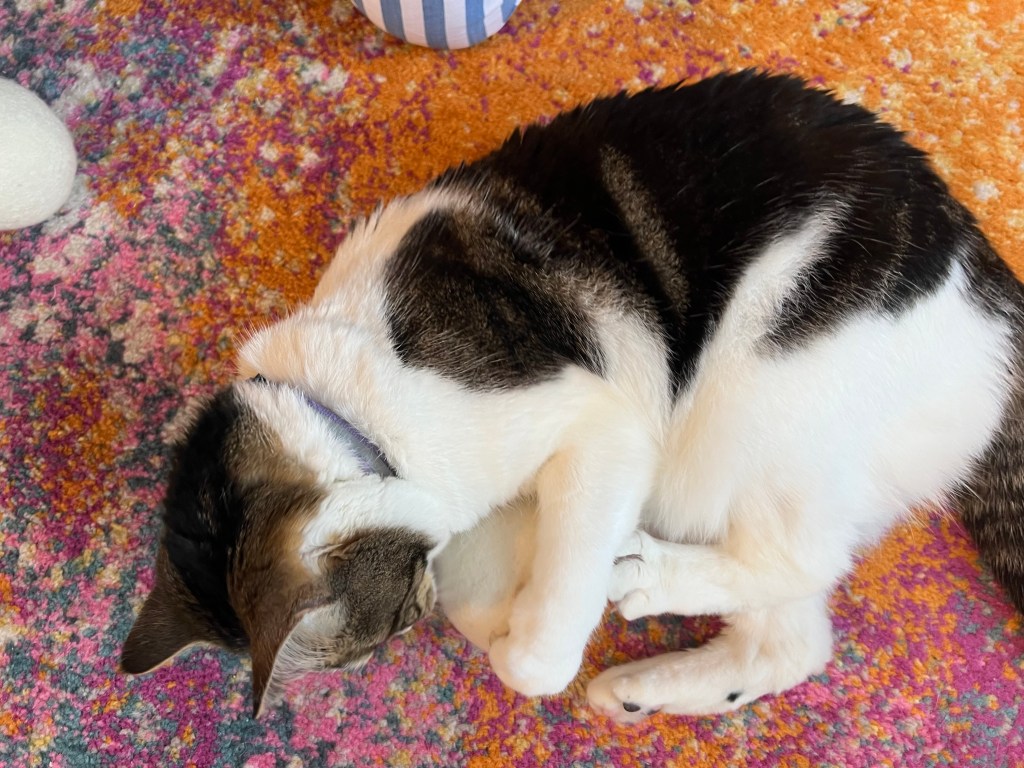
It’s okay, though, because now the cat has some new cat toys. She loves them.
Dryer rate: 0
Cat rating: 10
Tally attacking a wool ball. She lost her damn mind on them, and it was so hard to get a picture because she kept murdering them.