Insulation Baffles

My wife and I started insulating the ceiling of the shed. This was the hardest so far physically for both of us. I am not sure I could have completed it easily if she wasn’t 6’2″ tall with “monkey arms.”

I can only do a few hours of work each week. I mean, if my body was fine, I would do more, but neither my wife or I am in good enough shape that we can do much more. I miss being in my 30s and being able to do a full 8 hours of physical work without being in pain for the next day, and being in bed for the next two.

The first order of business was the ceiling baffles. We got the shed option with a ridge vent. There was a bit of a mix up on the types of venting we needed, so we had a ridge vent and a gable vent. I did not realize the gable vent was on the sides of the shed. I will actually close that in because it’s not needed. Instead I used a 2″ hole cutter on my drill and went around and drilled out 2 holes in each bay of the soffit.

Holes in the soffit that I cut for venting.

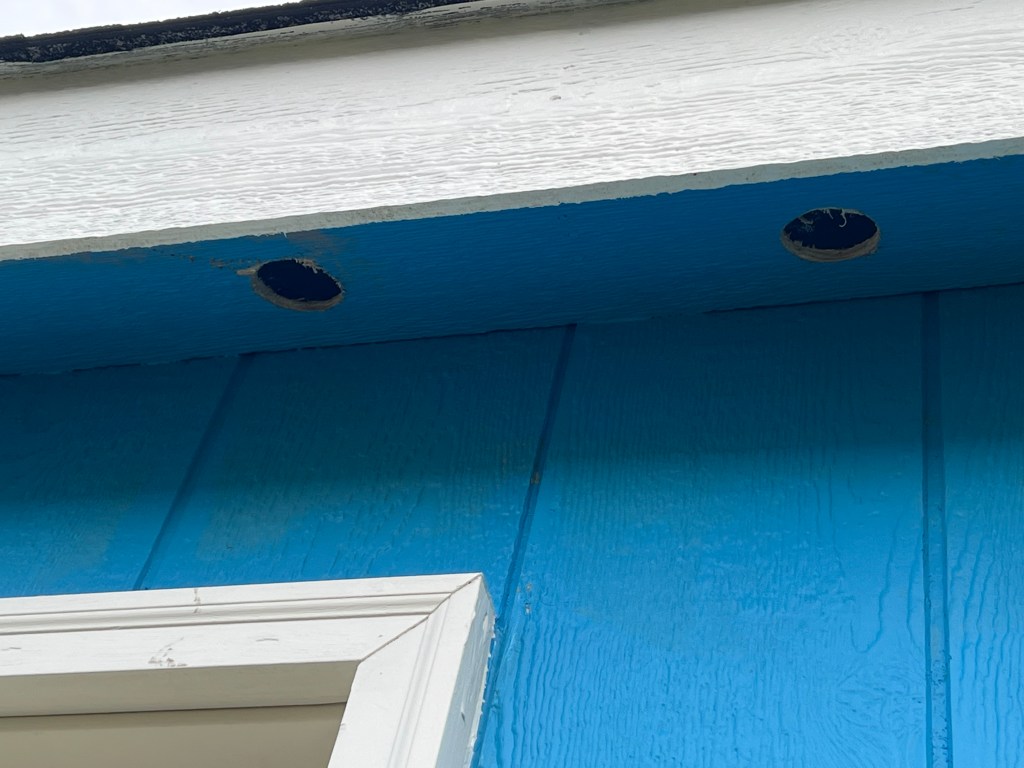
This was harder on my shoulder and collar bone than I would like. It’s at an angle and I no longer have the physical strength to really power through. It only took me a half hour, but it was physically a lot for me.

I don’t have pictures but I didn’t have any drop in vents for it, but I did have some left over replacement window screen, so I cut that and used some liquid nails to glue them in place. Very cheap, effective, and nobody is gonna see anyways. I will have to touch up the paint around the holes though as I had drill drift on some of them.

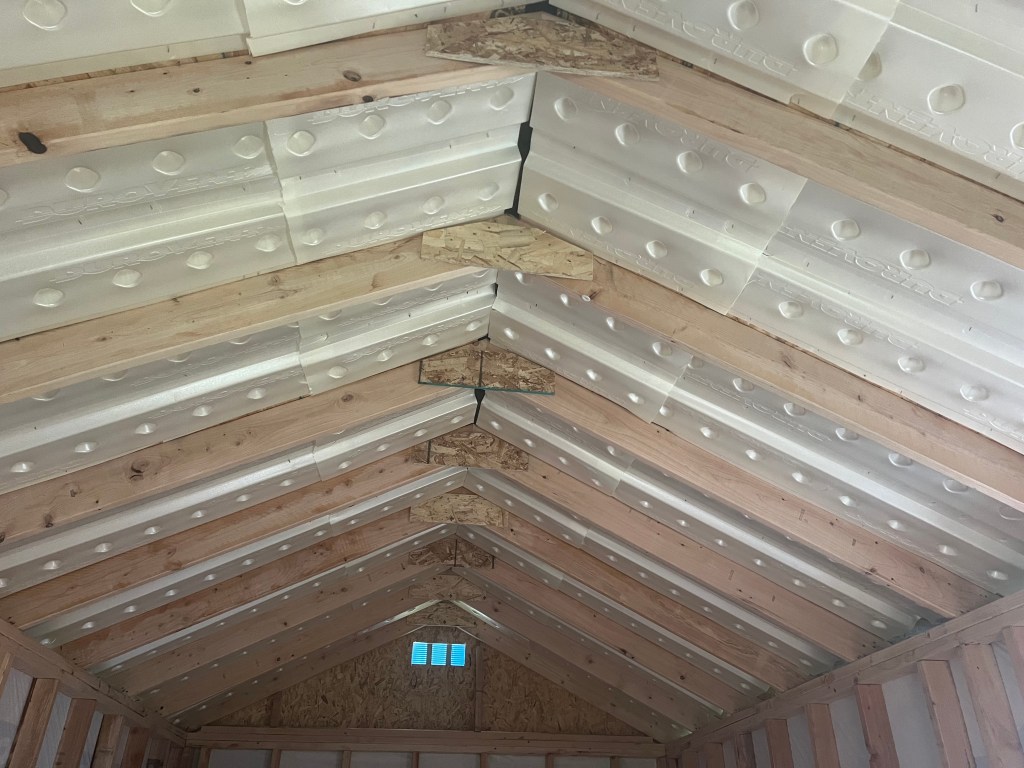
We opted for 2×6″ joists to fit the baffles and the insulation. My wife actually had to do the majority of the baffle work because again, I am short and it was just easier for her.

Wife working on the baffles.

While she did that, I glued the screens in place, added puffy foam around the windows and doors, and generally did everything but put the baffles in. I did not have a handle on the expansion of the insulation “doors and windows” puffy foam, and made a mess. I will have to cut that down later.

Puff foam overextending and making a mess!

As a side note we used a hammer tacker for this. It was the only device I had with staples short enough not to punch through the roof sheathing. It worked all right, but 1) it took a hot minute for me to figure out how to load it, and 2) asking two unfit people to use this device was hilariously hard. It was really hard at an angle, above our heads, to swing with enough force to make it work. I followed my wife with a hammer when needed to sink the stables.

Hammer tacker.

In all, we got it in, and feel really good about it. We were careful to not put the baffles down too low, so that would flow from the soffit vents up along the roof to the sheathing.

Finished baffles!

I think, for two half broken Middle Ages people, we did a pretty good job. I am super proud of my wife, as she doesn’t normally do house fix it stuff, but she did a great job at getting it all in.

Bathroom Drywall

Well, with my wife’s cancer health scare behind us, and my health being more reasonable these days, I am starting to work in things again.

I managed to drywall the hole in my bathroom wall from the HVAC install months and months ago. I was pretty intimidated by the idea of drywall work, but I watched a few YouTube videos, and got the strapping in and the drywall up.

Drywall hung and first bit of joint compound added. I used a brown construction paper to shield the other side.

It was actually easier than expected. What really helped is I own a multitool and was able to cut the old drywall back to where it made sense and could allow me to drill the new stuff into the studs. I made sure to use the natural clean edges of the drywall to where they hit the opening. I used 150 grit sandpaper between to just knock things flat. I am inexperienced so it was easier to build it up and then sand it down. The 150 grit made it quick work, and I was ready in minutes. Clean up was a bit messy, but fine.

I also used Fibafuze instead of paper tape. It’s a fiberglass tape. It was so easy to work with, but I recommend gloves because of the glass bits in the fiberglass. I used duct tape to get all the splinters out of my fingers after. I just stuck the tape to my skin where I felt it, and eventually it lifted them out. Despite that oversight, I would use fibafuze again. It make really easy smooth joints.

Finished joints in the drywall with an orange peel texture over it. There really isn’t any lines between the new and old, but the camera seems to think there is.

I used the same orange peel texture that is over every wall in the house, and it disguises my imperfections. It’s all done, and ready for paint.

I thought I had a bit of leftover paint from the previous owner, but it was a solid puck of acrylic when I opened it. Apparently 2.5 years have gone by since we bought the place, and time does that.

I probably won’t paint until we get the mirror area fixed above the sink. This place was built for a very short elderly lady, so the vanity mirror is very low. I am 5’6″ tall and I am at the very top of the mirror. My 6’2″ wife has to stoop to see herself.

What’s stopping me is the lighting is also right on top the vanity mirror. I need to get an electrician to move the light upwards towards the ceiling because I just don’t fuck with electrical. I have a quote for $454 to move it up where it should go by the ceiling. I’ll pay it just to not fuck with electrical.

Then I will have to rebuild the vanity, and I can install a sink cabinet that isn’t so low my wife has to bend over.

That’s a long way to say I’m not painting and finishing the wall right now.

All in all, though, I feel like I conquered drywall. Am I an expert? No. Can I do it well enough to be happy about it? Absolutely! Even better, I have enough leftovers I can patch anything that comes up now and not have to worry about it. Having the tools on hand really makes a difference.