Chai Oat Milk Ice Cream

I completely forgot about this post while I was removing from surgery. Just totally left my mind. I wrote this about mid to late March 2024. However, I think the ice cream was great so I am still posting it!

I would love to be out in the garden starting for this year, but I had surgery at the beginning of March. It’s really thrown me for a loop, so while I recover I have been puttering around inside the house.

Today’s project was turning a box of chai oat milk into ice cream. We bought a case of this oat milk last fall at Costco, and this is my recipe for the base I’ve been working on. I am trying to keep the ice crystals at bay for texture. It works pretty well.

Ingredients:

I like to lay everything out before I start in case I am missing an ingredient.
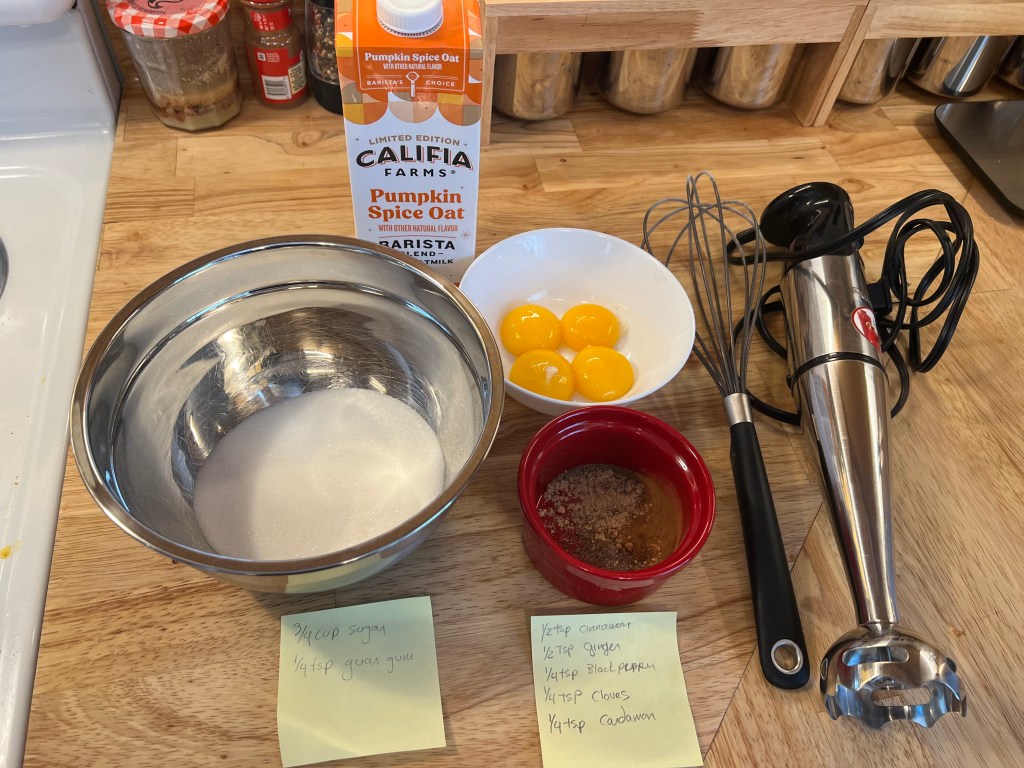
  • 4 Cups Chai Oat Milk, or one full carton.
  • 3/4 Cups Sugar
  • 4 Egg Yolks
  • 1/4 TSP Guar Gum
  • 1/2 TSP Cinnamon
  • 1/2 TSP Ground Ginger
  • 1/4 TSP Black Pepper
  • 1/4 TSP Cloves
  • 1/4 TSP Cardamon
Adding all the spices into the oat milk.

Directions:

  1. Mix the guar gum into the sugar thoroughly.
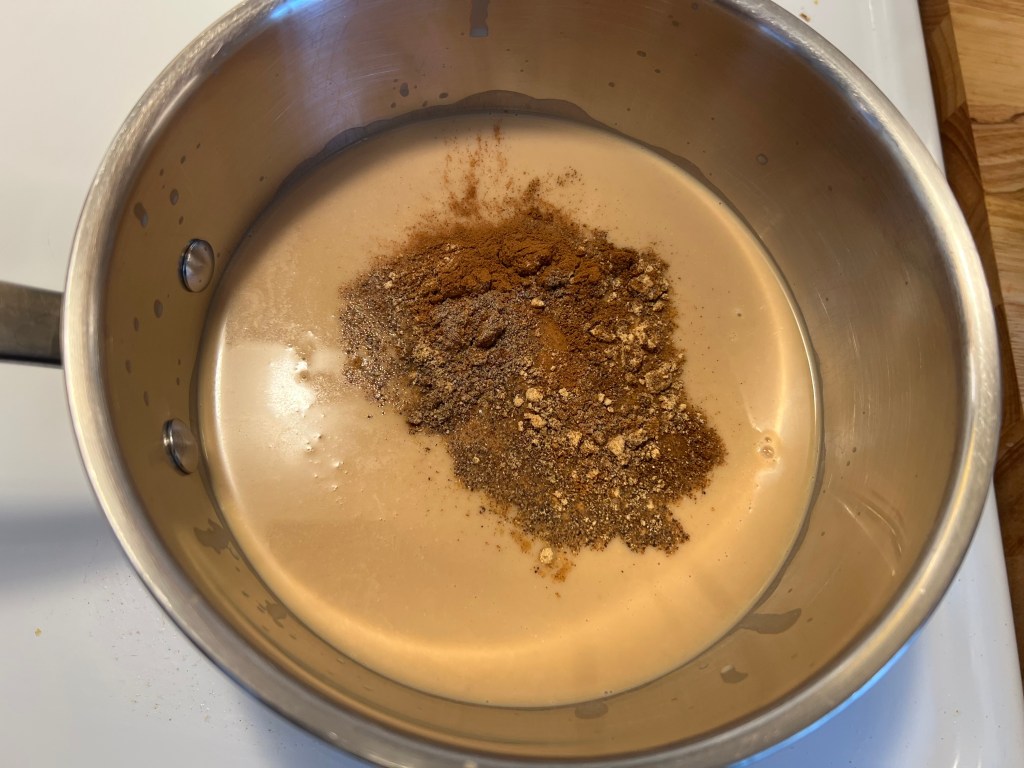
  2. Heat oat milk in a sauce pan.
  3. When it’s warm, add the sugar and guar gum with an immersion blender to ensure it’s not going to clump on you.
  4. Heat milk to hot, but not boiling.
  5. Temper the milk into the eggs in a separate bowl by adding spoonfuls of hot milk into the eggs while whisking, then when the egg yolks are good and hot, add them slowly back into the saucepan with the rest of the milk while whisking it in. How to temper egg video if you need it.
  6. Continue heating for 8 minutes, but don’t boil. Whisk regularly.
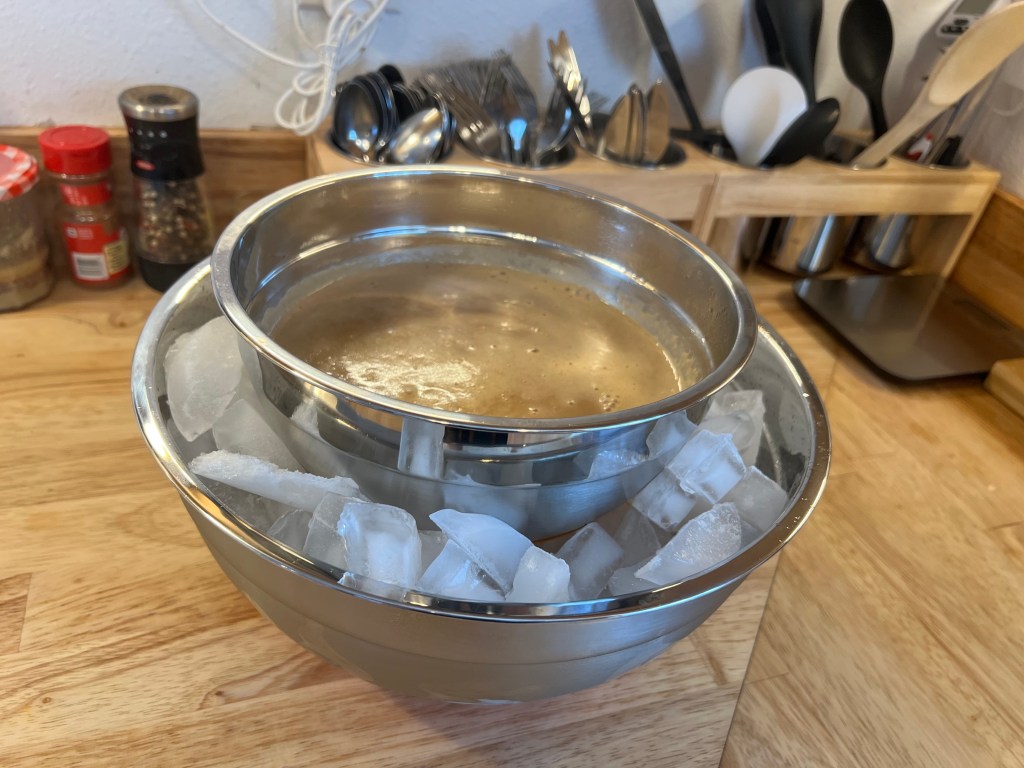
  7. Strain the resulting mix into the bowl. You’ll want to strain out any random clumps and eggy bits or escaped guar gum.
  8. Cool on ice until room temp, then put into the fridge until completely cold.
  9. Use the ice cream maker of your choice.
Tempering the eggs.
My high tech cooling method.
This is my overpriced ice cream maker. If you got the cash to spare, I do recommend it.

Notes

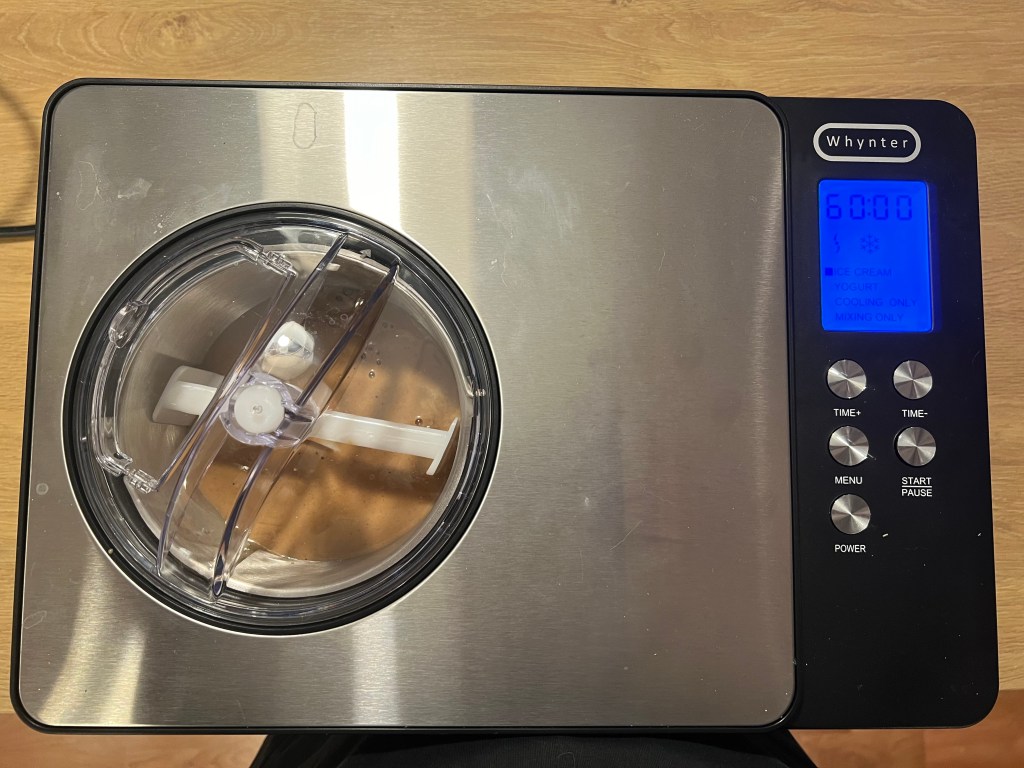
I have been doing a lot of test recipes for ice cream ever since I got my Whynter Ice Cream maker. That’s not an affiliate link, I just liked it. I just wanted an ice cream maker that had its own compressor. It’s a $300 machine, but I was so fed up with store bought ice cream getting weird I threw down the cash on a serious ice cream maker. Plus, getting non dairy ice cream is expensive and never that good.

It’s as if all the corporations out there are hell bent on saving that last tenth of a cent on everything despite all the record profits they rake in from our consumption, so the ingredients are getting cheaper, and the taste is crappier. I never thought I would have nostalgia for junk food from the 70s and 80s, but here we are.

This ice cream maker has its own compressor so you don’t have to freeze anything. You just toss your ice cream mix into it, press go, and it goes. I never have room in my freezer, nor can I organize when I will make ice cream, so this saves me from having to pre-freeze a bowl. This one has a yogurt maker option, but I haven’t delved into yogurt making at this point in my life. It’s extravagant, but now that I live in a home I own, I can actually pay for things and expect to keep them long term, instead of however long I have that much space in my rental.

I tried this recipe without the extra spices first, but the cold dulls the chai flavor, which wasn’t that chai forward to begin with. I like a chai that bites back, so I added the spices in from my favorite chai recipe. I think I could have honestly doubled the amount, but it’s still quite good.

I have also been experimenting with stabilizers, and I have found without the guar gum, you get a very icy crystal texture to varying degrees. The eggs are also an ice cream stabilizer, but I find without them, you don’t get a rich ice cream texture and it feels thin. Together, it comes out pretty good. This has worked with milk, cream, and now oat milk as my base.

Frozen Tomato Harvest

I did some tomato sauce processing this morning. I actually had two big giant batches. I had my dutch oven and my big pot going together at one point. The pictures below is after I cleaned it mostly up and it was just simmering down with the last batch. There was tom sauce literally everywhere before I cleaned, so I’ll keep that mess as a memory snapshot.

Toma Toes sauce and jars waiting to be filled.

In hindsight, with ten 16oz jars I could have canned it up, but I think I need more research. Since I don’t eat onions or garlic because they are my mortal gastroenterology enemy, it makes finding approved and safe recipes harder. So many of them have so many onions in them.

I also don’t really want to add any acid to them, like you would do with water batch or pressure canning, because my wife has GERD already. I don’t need to throw more fuel on that fire.

Instead, I just blanched them like before, and peeled and cored out the stems. I then just cooked them down. I initially mashed them with a potato masher, and when I had cooked them down to a close to desired thickness, I used my immersion blender to blend the remaining solid toms, and some basil and green onions in from the garden. (Green onions don’t have it in for me, so I can reasonably eat those.)

Then I just filled the jars, labeled and froze them.

Tomato sauce filling 16 oz jars.

I am initially freezing them in the house freezer, but then I will take some out to the chest freezer later, as I won’t have to worry about them falling over then.

Ten jars of Toma Toes sauce waiting to freeze in the freezer. Also, so many Costco corn dogs. So so many.

My last task fo the day is reheating some of the pickle brine I had left over from last time, and doing one last 16 oz jar of pickles with the last of my cucumbers from the garden.

Brine and cucumbers slices waiting to become refrigerator pickles.

I did not get a big enough harvest of these, or enough at one time to even bother with canning pickles. Refrigerator pickles work just as well, and are just as good.

Now, that I am done, I am going down for a good long nap. I am still exhausted from surgery. It’s very true, when you get over 50, these things take longer to come back from.

Incoming Tomatoes!

So many tomatoes.

There are only two of us in my household, and one of us had GERD and does not eat tomatoes much at all. That’s a lot for one, and maybe a half person at best.

I have a lot of toms coming up in the garden. This is after giving a big bag away two both my side neighbors. There’s more coming. It’s by far my most successful crop.

However, My experiment with freezing them was kinda sorta successful. They are so filled with juice, that a 16 oz frozen can of whole tom’s is more like an 8 oz can with another 8 oz’s of juice.

So I am going to cook it all down in a giant pot of crushed tomatoes and freeze it after I have cooked out some of the juice. It’ll take a few hours, but at last when I pull a 16 oz jar from the freezer, I will have something that will be usable like a 16 oz store-bought can without additional fussing.

I’m going to do the same boil and skin process before, but instead of tossing them directly into jars, I will toss them in a pot to cook down.

You know, once I go out and collect today’s pile, to add to this.

Unintended Consequences

I was cooking some cabbage stir fry for dinner. It’s the same red cabbage from the garden. It was all good until I added the wine and the cabbage went from bright red to dark indigo blue/black.

It tastes the same, and is good, but it sure looks funky.

In all my years cooking I have never had this happen. Apparently the acids evaporate when you cook it, and it can turn blue. They say you have to add lemon or vinegar to turn it back.

I over did the cooking I think. Notes for next time, I guess.

Air Fryer Grilled Cheese

I wasn’t sure what to do for lunch today, but I had some garden grown red cabbage and some leftover feta cheese.

I decided to make air fryer grilled cheese sandwiches. I like doing them this way because I can toss two of them in the air fryer at a time, and they have a very crunchy exterior and soft interior that just is melty perfect. Then my wife and I get them both at the same time.

All the fixings for grilled cheese. Tally is the background judging me.

I assemble the grilled cheese right in the fryer basket. For these I did a layer of cheddar on my buttered bread than sliced up little diced cubes of feta to lay on top, before topping it with another layer of bread. This is some sort of sourdough sandwich bread.

Two assembled grilled cheese in an air fryer just waiting to be grilled.

I toss it in for 350F for 5 minutes, flip them over, and 380F for 6 minutes. Then I pull them, slice them and they are done.

The Cole slaw was super easy, too. I just made the slaw dressing as follows:

  • 3/4 Cup mayo – we use low fat.
  • 3 TBSP Apple cider vinegar – I prefer Braggs
  • 2 TBSP sugar
  • Salt and pepper to taste.

I mix that up and keep it in the fridge and just toss it in a bowl with some diced red cabbage from the garden. It’s a favorite in our house. I usually keep a container of this slaw sauce in the fridge at all times. It’s also tasty on carrot sticks.

Two plates with the grilled cheese, slaw, and sugar wafer cookies.

This literally takes me about 15 minutes to make. I keep diced cabbage in the fridge with premade slaw sauce, and that way I can toss it together on a work day, and then go back to tying out financials to source documents with a nice hot meal in front of me.

You can’t have this in an office environment! Well, I mean, you are not supposed to. We do have a forbidden panini press hidden in the closet that my coworkers and I use in the office, but this is much less likely to get me in trouble.

Gardens make breakfast better

I never thought my strawberries would make it, and about half of them decided to grow like mad, and the other half produced berries. Not enough for jam, but enough for strawberries for my breakfast.

Breakfast of champions. Garden strawberries and yogurt, and hot cocoa. I know it’s like 90F every day, but I still have to start the day with hot cocoa.

The strawberries I got from Scenic Hills Farms on Etsy. They are called Eversweet. They are definitely sweet, and red all the way through. Very worth it.

Garden mini update:

I may have misjudged my ability to preserve and can, and work with so many tomatoes. My Ball book has crushed tomatoes that I can make per jar so I will probably can a jar at a time until the majority come up.

The problem is I am getting more than I can use at once, but not enough I can process into canning jars. I need 2 and 2/3 pounds per jar. I have close to 2 pounds sitting on my counter until tonight or tomorrow morning. I would rather do it today as I have today off, but I may have to can it up tomorrow for just one jar before or after work. Which, with my nature being inherently lazy, seems like a lot in one day.

The cucumbers are kind of doing the same thing. I am getting two or three at a shot, often enough I have to pull them or risk my plant giving up on me and dying, but not enough to can. I might have to make refrigerator pickles out of a bunch of them unless or until a huge batch comes up.

I am working it out, but there are definitely logistic issues about planning to can and preserve these that I never considered. Gardener Scott, on his Youtube channel, has a freeze dryer, and now I can see the appeal. You can do a small bit at a time once you own the machine. That’s not even close to being in my budget though. Nor do I have a powered shed to plug it into.

As for my latest crop I planted, the beets? They are already starting to come up. I just have to keep everything watered during this 90F+ week.

Watering has been a bit of a challenge with the overwhelming record heat. We don’t normally do this kind of hot extended sunshine here in the Pacific Northwest, so I am glad I put in the irrigation drip lines. I would not be happy standing out in it, watering for hours, with the sun on my head. Good job past me!

For a first year garden, these are all great problems to have. It’s already making me consider next year and how I want to handle that. So far, so good though.

Blueberry Jam and Syrup

Yesterday was blueberry canning day. We got up super early, and went to the business Costco that is open at 7am. We bought 8 flats of 18oz blueberries. We only needed 6.5 flats, but that meant we could have blueberry smoothies, and my wife can make a blueberry cobbler later. We paid under $40 for all of them.

As an aside, I have purchased canning berries all over town. Trader Joes, Fred Meyers, QFC, and some farmers market stands. They don’t hold a candle to the quality and price of Costco where I am at.

I used two recipes:

  • Blueberry Syrup – Ball complete Book of Home Preserving – page 193
  • Blueberry Jam – Ball Back to Basics – page 63

I only use ball or USDA recipes. I follow them religiously, as if my life depended on it. Which it kind of does with canning, because botulism is not how I want to end my time on earth.

The first thing I did was prep the syrup blueberries because they have to drain for like 2+ hours. I used one of those jelly bag rigs that you can buy on amazon, (not an affiliate link) and just set it up on a bowl to drain. It was a rather macabre scene, and I felt like a witch making a potion.

This actually took more like 4 hours and it probably could have been left a few more.

There are recipes like Ball’s 2-in-1 that lets you make blueberry butter with the solids that remain, but honestly, I tasted the solids after I let it drain. They taste flat, and are all the flavor is very reduced. I just composted the solids that were left in the bag, which was quite a bit more than I expected. My compost bin now looks like a murder scene.

Once that was set up, I then started with the blueberry jam. My jam recipe was small, so I had to do it twice to get the yield I wanted. That was fine. I was expecting to take the day for this.

The biggest amount of time was the water bath heating up. I had to toss the water and start over between the second jam load and the syrup because jam got into the water, and crystalized sugar on all the jars.

Syrup on the stove, and jam cooling on the towel.

The syrup took longer than I expected because my recipe called for heating it to 230F. My wife kept assuring me it takes a while because she’s a candy maker and baker, but this took FOREVER. It was also getting into afternoon and my house was already hot. I am not a patient man when I am sweating.

My jam turned out perfect, but the syrup was very thick. I think between how long it took to boil, and the pectin in the fruit, it ended up thickening up. I basically ended up with 8oz jars of blueberry syrup concentrate.

To remedy this, I made up a simple syrup of 1/2 cup water to 1/2 cup sugar, and added that to my 8oz jar of syrup for the fridge. It did not dilute the blueberry flavor at all.

Costco restaurant squeezie bottles for the win!

Just listening to the canning jars POP when they sealed was cool as hell. Every time a jar popped I ran to my wife and told her. She apparently thinks I am cute when I do this. It’s the best part of canning. It’s when you know you did it right.

We tested the syrup out this morning when I made waffles.

WAFFLES!

These were great. Like the raspberry and strawberry jam, the flavors are through the roof. I cannot buy jam that tastes this good. You just can’t. It’s not blueberry flavoring, but real blueberries. It’s tart and sweet, and so fresh tasting.

I don’t know if I can go back to buying jam. It’s just not the same.

Herbs & Poverty

Today I got to use parsley and basil in my garden for the first time. I mixed them in with my tuna salad for dinner today. Just basic tuna salad. I mixed in some green onions for good measure, and that was it.

However, the parsley and basil were fresh with the green onions. The flavors were shocking to me because it’s been so long since I have had ready access to fresh herbs.

This is what happens when you were steeped in poverty when you were young. I was on my own by the time I was 16, and for reference, once I spent $10 for 2 cases of top ramen and damn near gave myself scurvy because it’s all I ate for three months. Not because I wanted to, but because I was a teenager trying to problem solve not starving to death.

I just didn’t have the education to know what to do with food. It’s not that my family, before I was on my own, were poor. They were anything but, yet their food decisions weren’t really big on fresh raw vegetables and home cooked meals. My mother’s cooking nemesis was the box brownie mix. We either chiseled it out of the pan half burnt, or used a spoon.

My first experience with real fresh well cooked food was when I worked at The Black Cat in my home town. It was a four star restaurant, and I learned the basics of cooking that would put me into the kitchen in every place I worked until my mid-twenties.

When I was 16, I wasn’t even sure I would get food the next day, and I certainly could not have imagined owning a home, and having an honest-to-god food garden.

I also feel like a proud father because my mint plant is blooming.

That manky Trader Joes mint is finally taking off. You know what that means? My mint jelly dreams will be coming true next year. Not to mention the cocktails. Don’t worry. It’s contained in its own 2 foot raised bed. It can have that bed, and no more! If it bleeds into the lawn? It’ll just smell good when I mow.

Cutting up that basil made me grateful all over again that I even got this chance to do this. There’s no way I could in an apartment. Sometimes I think about how far I came from that homeless street rat, and it’s hard to believe. I’d have never believed I could come this far back then.

Rice Porridge – Congee for Breakfast

We eat a lot of rice dishes and my favorite way to use up leftover cooked rice is as a breakfast porridge or congee.

Ingredients

  • 1 TSP ginger paste from those convenient grocery store tubes, or use fresh. Whatever works for you.
  • 1 TBSP Better Than Bouillon Chicken Flavor – Don’t use a cube of bouillon. It’s not as tasty. This stuff is a different world of flavor, and I hate brand name anything.
  • 2 Cups cooked leftover rice. Bonus points if you made it with MSG the night before. Don’t fear the MSG.
  • 2 Cups water, then maybe extra at the end if needed
  • 1/4 Cup Crushed or Chopped Peanuts
  • 1/4 Cup Low Sodium Soy Sauce – Or regular if that’s what you have.
  • Enough chopped green onion to top

Directions:

  1. Add rice, water, ginger, and chicken Better than Bouillon to the sauce pot.
  2. Bring to a low boil for somewhere around 20 minutes, or until your rice reaches a rice pudding texture. You can go longer or less, depending on your time constraints. I often do chores while it’s going and forget for a while.
  3. If it looks too thick, add a bit of extra water, mix thoroughly, then give a minute or so to integrate.
  4. Stir in the crushed or chopped peanuts.
  5. Put in a soup bowl, and drizzle soy sauce on top, then add your green onions.

Notes:

I also sometimes add a fried or over easy egg, or sausage, or leftover chicken teriyaki. Basically whatever I have in the fridge at the time, or whatever I have the energy to make for it. It’s very versatile.

Garden Note:

I have these grocery store green onions I have planted in my garden when I was done with them, and I cannot emphasize enough how much better they taste planted in my garden. They have so much more flavor.

I was not holding my breath as they came from the grocery store, but apparently proper care and growing time makes them a whole different plant.

Blueberry Rolls – Breadmaker Style

My wife got poor kid free breakfast in school, which usually consisted of cinnamon rolls. She mentioned that she loved them, so I started making them. Blueberries are also her favorite, so that’s how this was born.

The blueberry rolls are kind of like if a Danish at a coffee shop wasn’t a flat dry mess, and got its shit together to be actually tasty. Sorry not sorry. I am not a Danish fan. I basically make cinnamon rolls with a different filling.

I like to make a recipe, and then redo it, until I have it perfect. Then I write it up in my notes so I always know how to do it that way. I started making cinnamon rolls (and all sorts of other rolls) a few months back and I have been working on my recipe. This means we have been having them on the weekends more often than not.

I don’t normally do anything with yeast or kneading unless it has a bread maker involved. I have a collarbone that is not fixed in place and kneading dough hurts. However, if I leave the heavy kneading of the dough to a bread maker, then I can do it.

My current recipe for cinnamon rolls came from my Breadman Ultimate Breadmaker manual, with a few adaptations. That manual actually has a lot of great recipes in it. I found it online years back, and have used it for all my subsequent bread makers.

As an aside, that Breadman Ultra machine, which was my first bread maker machine, was one I found at a St. Vincents second hand shop for $4. I had to buy a new paddle for $7 or so online, and get the manual PDF, but that was the best money I could have spent. I make pretzels, bagels, and now cinnamon rolls in additional to bread on occasion. If I didn’t do it this way, I could not knead the dough.

Ingredients – Rolls

  • 1 large egg at room temp (Important!) plus enough warm(!) water to equal 1 cup.
  • 3 TBSP Oil
  • 1/3 cup sugar
  • 1.5 TSP salt
  • 3.5 Cups Breadflour (See AP flour to bread flour conversion below)
  • 2 TSP Active Dry Yeast (See Yeast discussion below)

Converting All Purpose Flour into Bread Flour
For every 1 cup of AP flour, remove 1.5 TSP of flour and replace with 1.5 TSP of Vital Wheat Gluten. For this recipe you will need to replace a total of 5.25 TSP of flour with Vital Wheat Gluten. I tried it without doing this, and they just didn’t have the right texture. The Vital Wheat Gluten lasts forever and makes a huge difference, so it’s worth buying a small bag to keep around.

Yeast
Active dry yeast is not the same as instant yeast. If you have instant yeast, you need to use 1.25 times the amount listed. I also found this out the hard way. Now days I buy a giant Costco sized package of active dry yeast and keep most of it frozen until I need it, but sometimes we buy the wrong thing, and I had to figure out how to convert it.

Blueberry Filling

Frosting

  • Leftover cinnamon cream cheese filling from above
  • 1 cup powdered sugar
  • Enough milk to get to a smooth consistency. Go slow. Try 1 TBSP at a time.

Directions

  1. Add all the ingredients in the order listed into the bread maker, and add the yeast on the very top. You can mix the salt into the flour so it doesn’t mess with the yeast. The water egg mix needs to be room-ish temp. It can’t be ice cold. Yeast don’t like to be cold.
  2. Put your machine on a dough cycle, and go for it. It takes about 1.5 hours in my machine.
  3. While that is working, let the cream cheese sit out and soften until the dough is done, then right before the dough is done, mix in the sugar. You can microwave it for a few seconds if you forget. LEAVE BLUEBERRIES SEPARATE! 
  4. Once dough is done, place on lightly floured surface and roll into a 12 X 6 inch rectangle. You don’t want to make it much bigger than that, because thin dough makes kind of thin lackluster rolls.
  5. Spread about half the cream cheese/sugar mix filling on the dough then add blueberries on top. 
  6. Roll longways into a log. 
  7. Put your roll on a cutting board, and cut into 12 1-inch slices. This is going to get messy. I use a paper towel and wipe my knife between cuts. This cream cheese filling is way messier than the cinnamon roll filling. However, it won’t matter. It all cooks up just fine, even if you make a mess of them.
  8. Place on their sides in a buttered glass casserole dish, or whatever you have around. If you put them on a silpat on a cookie sheet they spread out, and not up. Still good, but kind of weeny in size. I like the glass casserole dish because they seem to rise really well in it.
  9. Preheat oven to 350F.
  10. Cover and let rise in their cooking vessel for 30 minutes until double the size. It helps if your kitchen isn’t freezing for this part because again, yeast hate cold.
  11. Bake for 25-30 minutes. 
  12. While that is baking, mix the frosting ingredients together.  
  13. When rolls are done, let them cool for like a half hour or so, then coat them with frosting. 

I bought my wife this silpat roller thing on Amazon because we have a textured IKEA countertop that is really not optimal for this kind of thing, and it works really well. Rinsing the blueberries and drying them with paper towels really kept the blueberries to themselves. You can see the non rinsed handful at the top, and the rest I rinsed and dried below. I got the cleanest dough to blueberry situation ever doing that.

These are my best rolls to date. They just feel like cinnamon rolls should. Honestly, I would make half of these because there is only two of us, but I can’t split down to less than 1 egg on a recipe, so I guess we will just have to eat them all. Oh, the tragedy!

I was just going to add the extra cream cheese as frosting, but I didn’t have enough. I was out of cream cheese for more, and too damn lazy to go out for it. My wife, who is a good baker, suggested I add powdered sugar and milk. It’s kind of a royal icing and cream cheese icing combo.

This was a happy discovery as cream cheese frosting is not my fave, and the royal icing glaze I was using was too thin. Together it’s perfect. It has body, and a bit of cream cheese tang, but it’s not overwhelming to me.

I think next time I will add some cinnamon to the filling because that works well with blueberries. I am also measuring how much flour I am using by weight so I can come up with a consistent amount by weight. Scooping flour has an annoying variability that I don’t like, and the recipe does not have a by weight option.

I have to say, again, having my own home, and not a tiny rental kitchen, really lets me make bigger things like this. It’s just so much easier when you have the room to do it. I am so grateful I get the chance to own a home and do this.