My garden is not going to be up to snuff this year. Between having surgery, and finding out the squirrels destroyed every bed I had, I am going to have to reset my expectations.
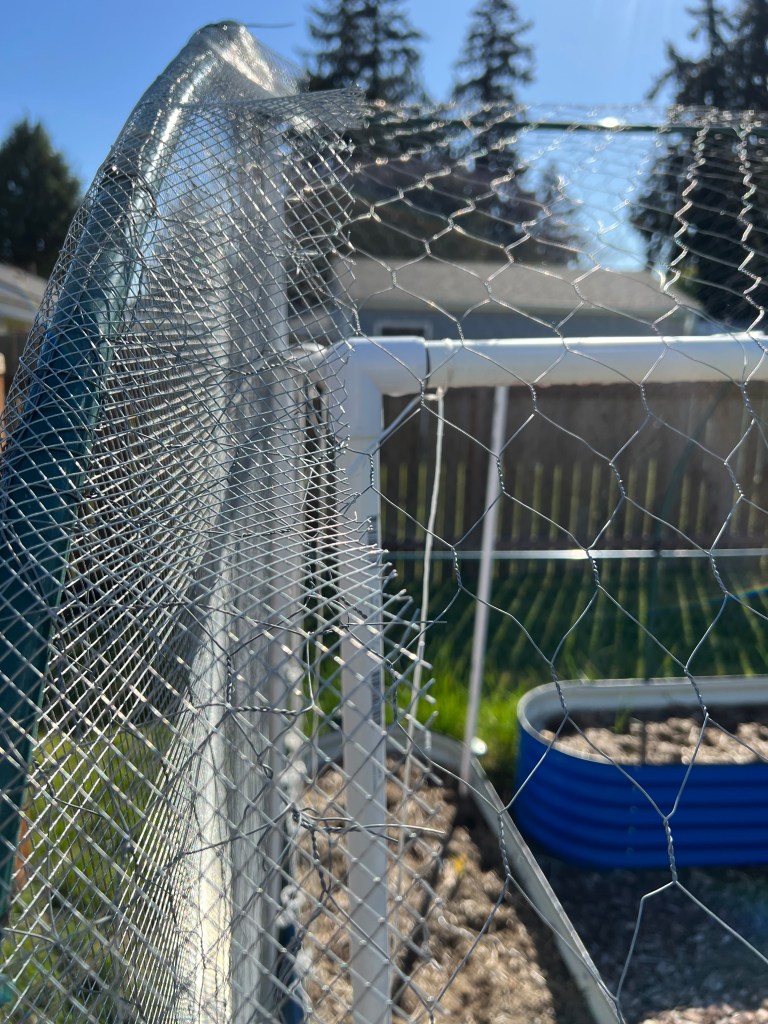
My big plan is to get the original garden space covered in hardware cloth. I did the back wall last weekend and I’ll be damned if the squirrels will get into that side now. The end walls are the hardest and most fiddly to do, so now I have to do the 20 feet overtop wall and roof, and then the last end with the door.
Hardware cloth is a way better option. I had no idea they could get through chicken wire.
Once I get that done, I will top up my soil, and do some late planting. Then move my attention to building squirrel cages for all the new beds I invested in last fall.
Somewhere in there I have this gazebo on the front deck to build too.
It’s going to be slow, but I own the house, so it’s okay. By next spring I will be on a roll.
I had this incredible panic about failing to meet my self imposed spring deadline. Then I realized it’s because I am not used to owning a home. If I didn’t get it done immediately, I might have to move, and never get to do it.
Home ownership is such a kindness. I can do as much are as little as I can realistically do, and there is no rush. I can do it all year and my garden will eventually be up and running.
While I did the wooden butcher block backsplashes, I wanted to extend the backsplash upwards a bit. I cook a lot, and it includes things like canning jam, and frying up things. My kitchen runs hot and heavy, and I would just like to be able to wipe down the walls behind my counters easier. From experience, it’s nicer to have an easy to clean surface.
My first attempt was to buy some self sticking backsplash tiles off amazon. (Not an affiliate link, I don’t have affiliate links.) They said stickers, and I guess they really were, because I would not use them for a backsplash. They also weren’t sticky enough that I trusted them to stay up. Surprisingly some of them came with a pinkish background, so not the colors I was going for.
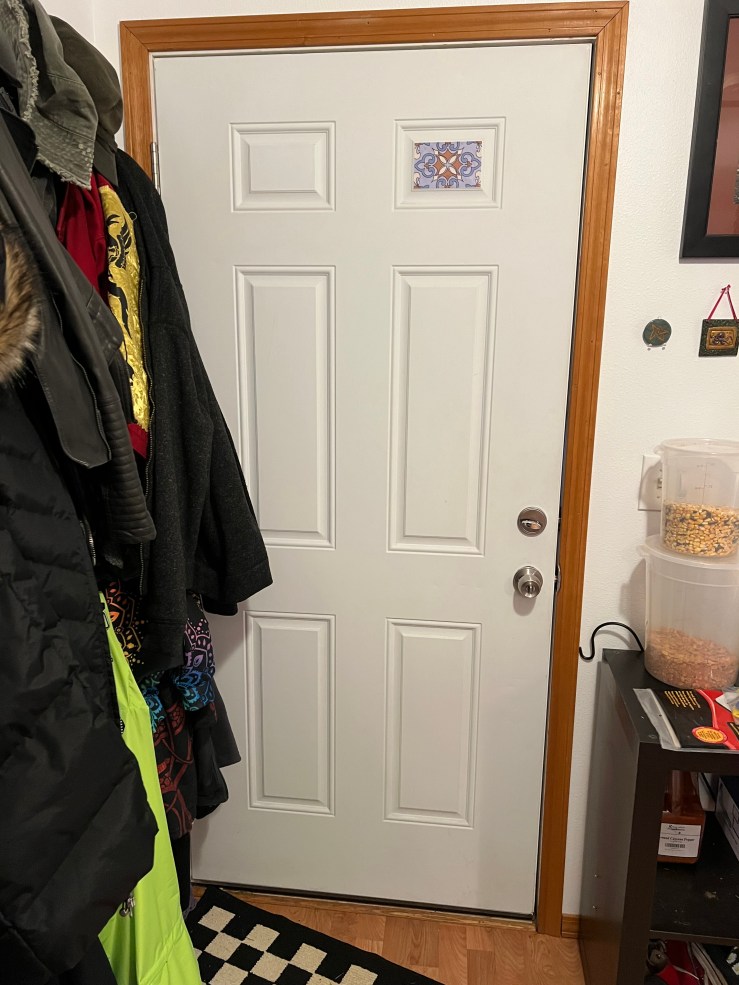
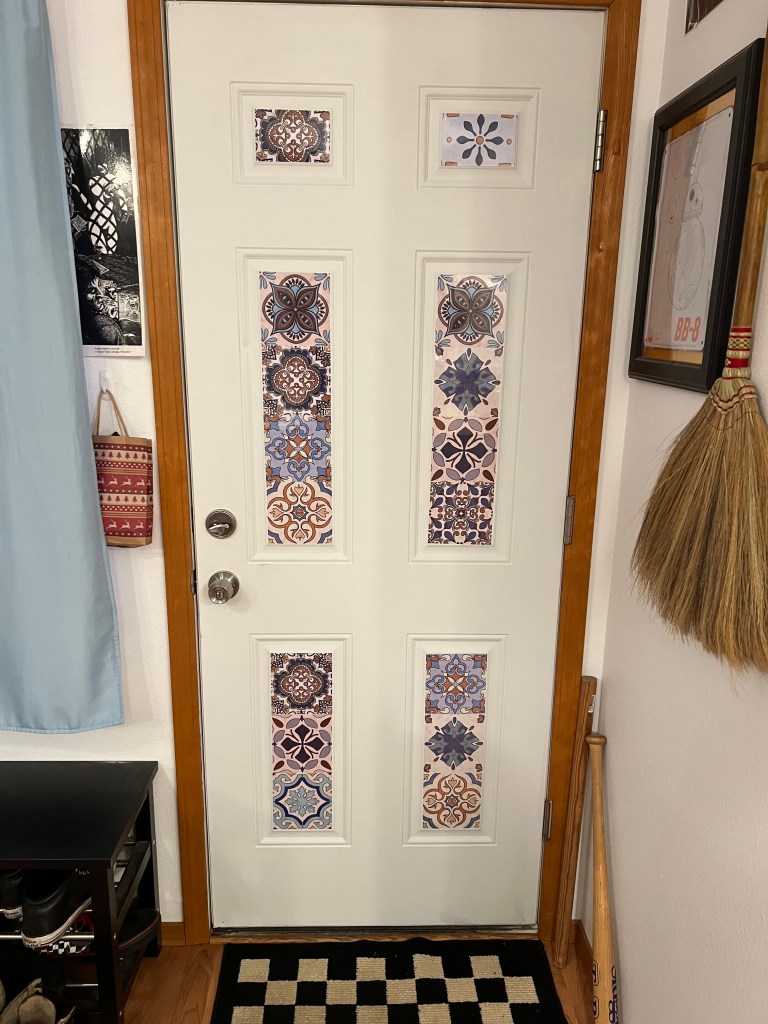
However, I got to thinking about them, and decided to adorn my very white front and back doors with them. I figured it might look nice to have them in the panels of the doors.
I tested one to see if they would stick and work out.
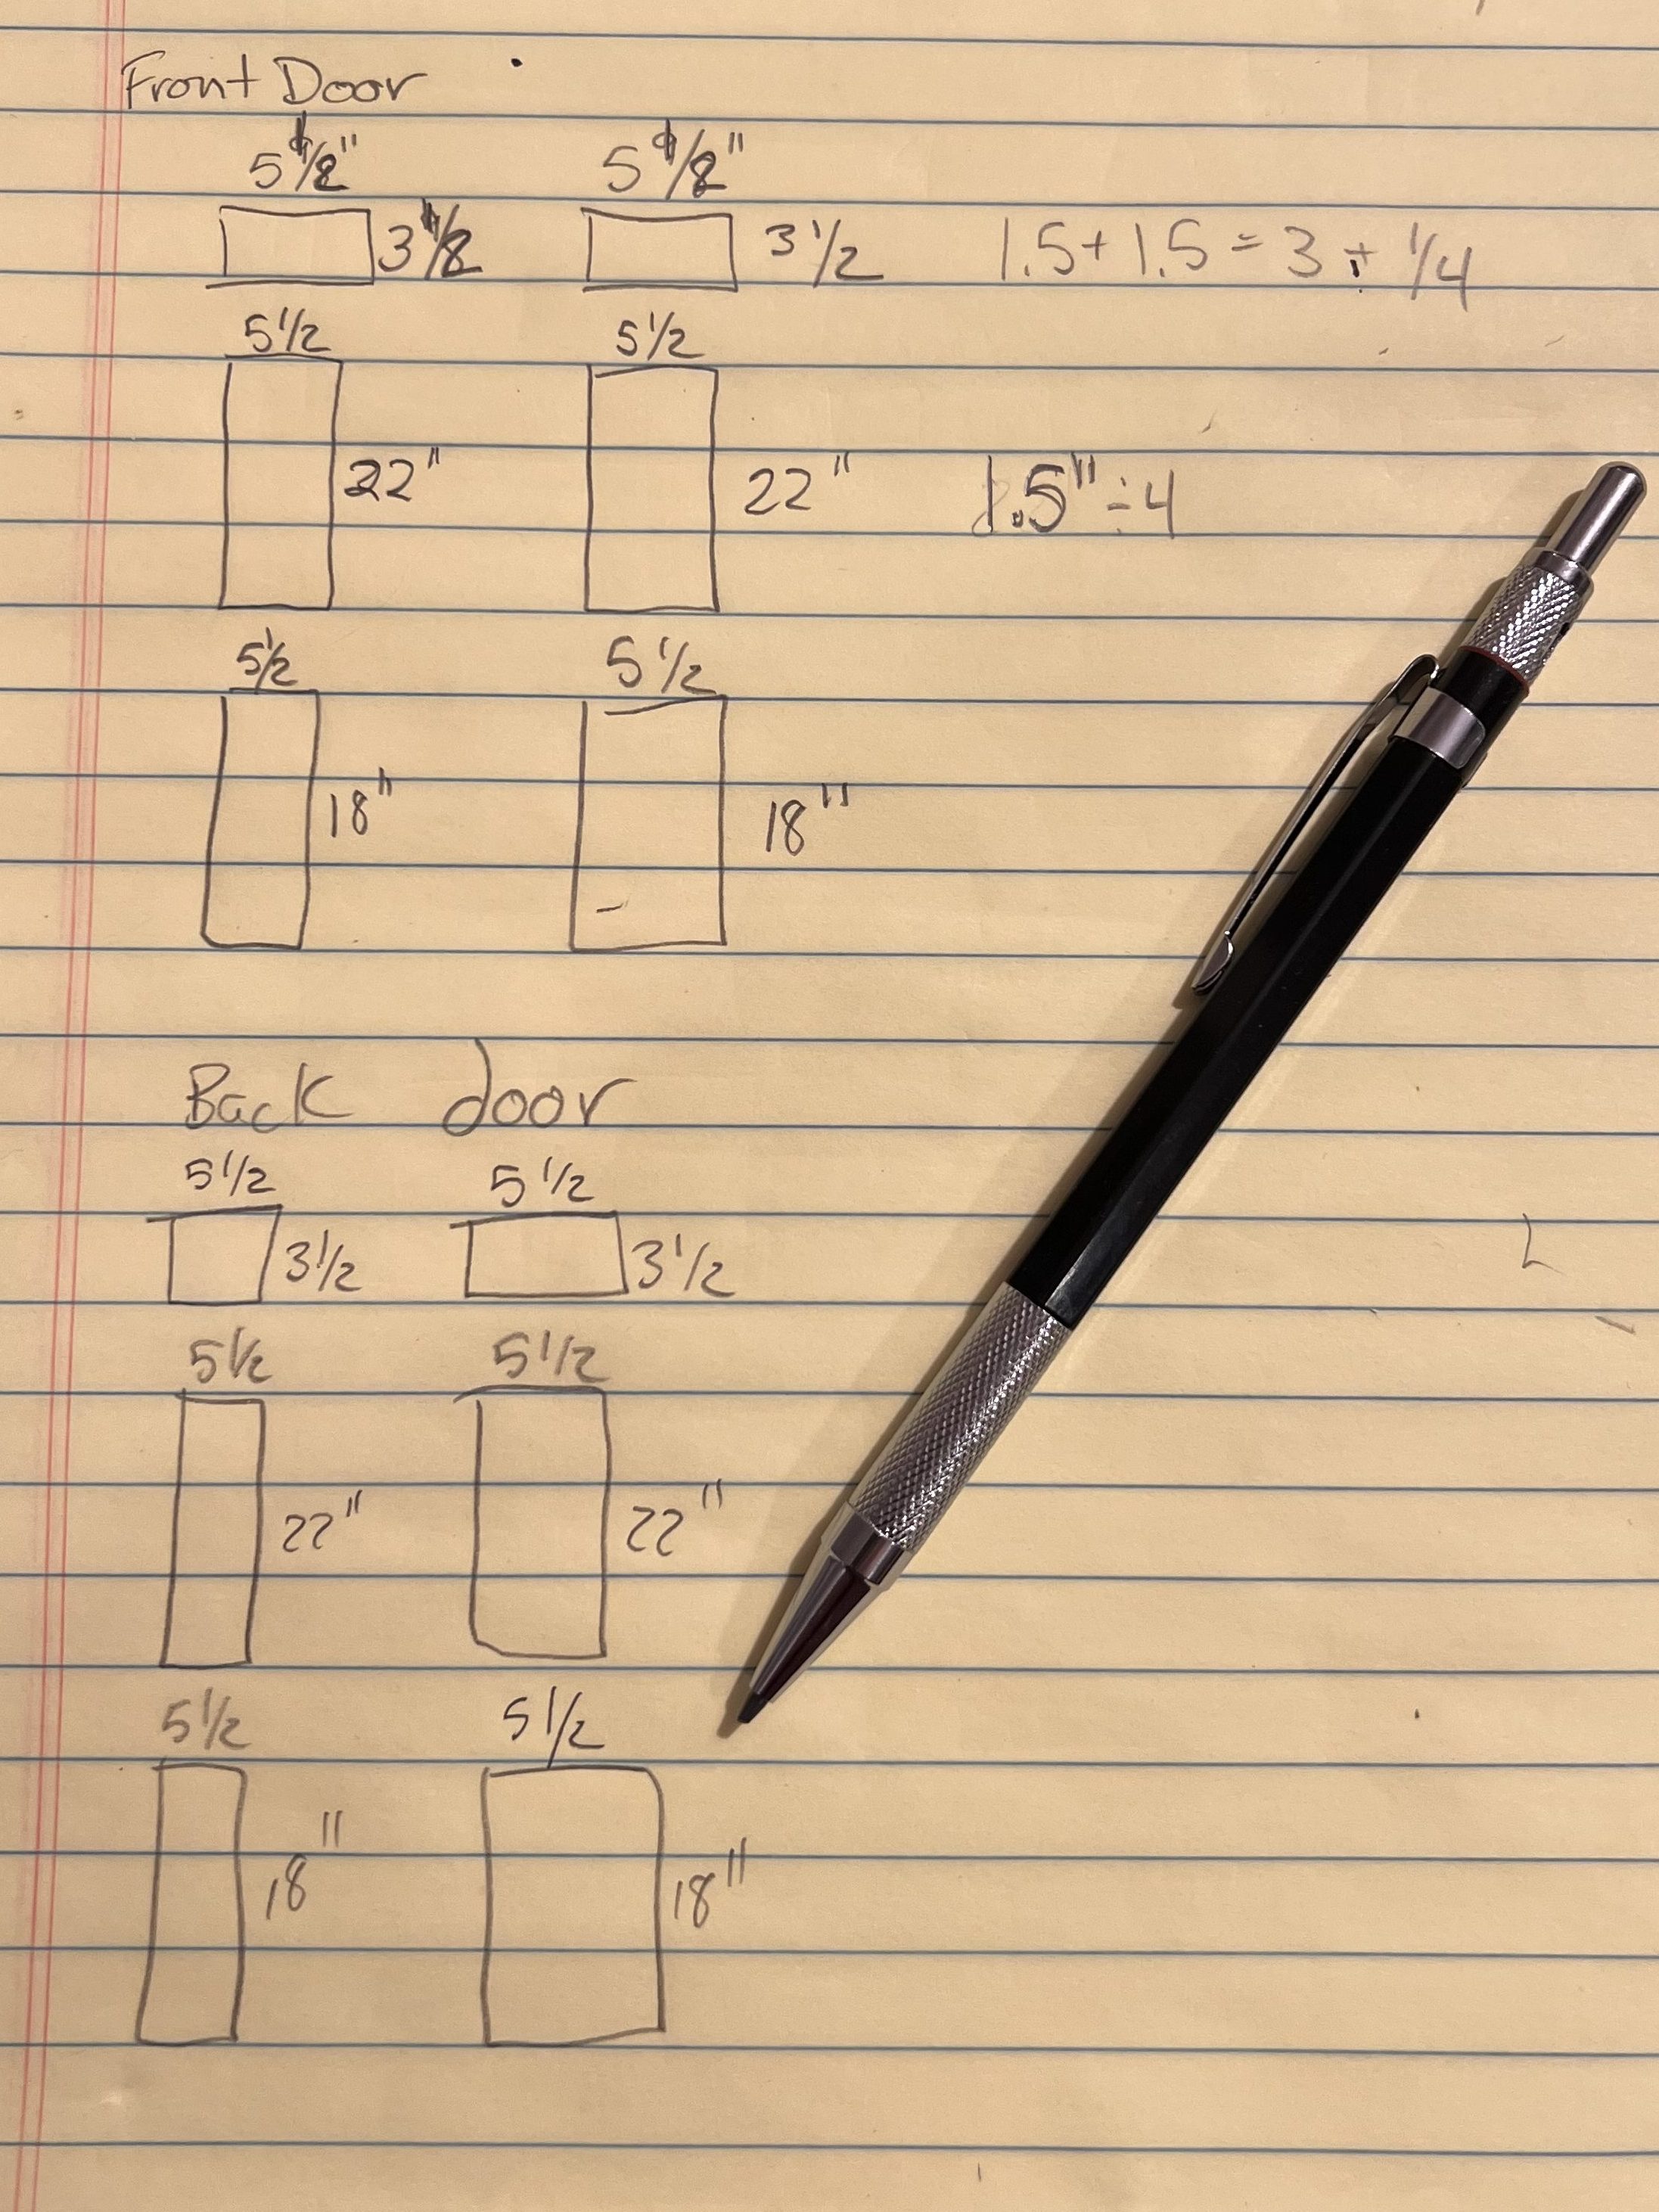
First I measured every panel I wanted to do, in order to make sure every panel’s measurement was what I expected it to be. I like to be thorough on measuring because sometimes things are made off by manufacturers.
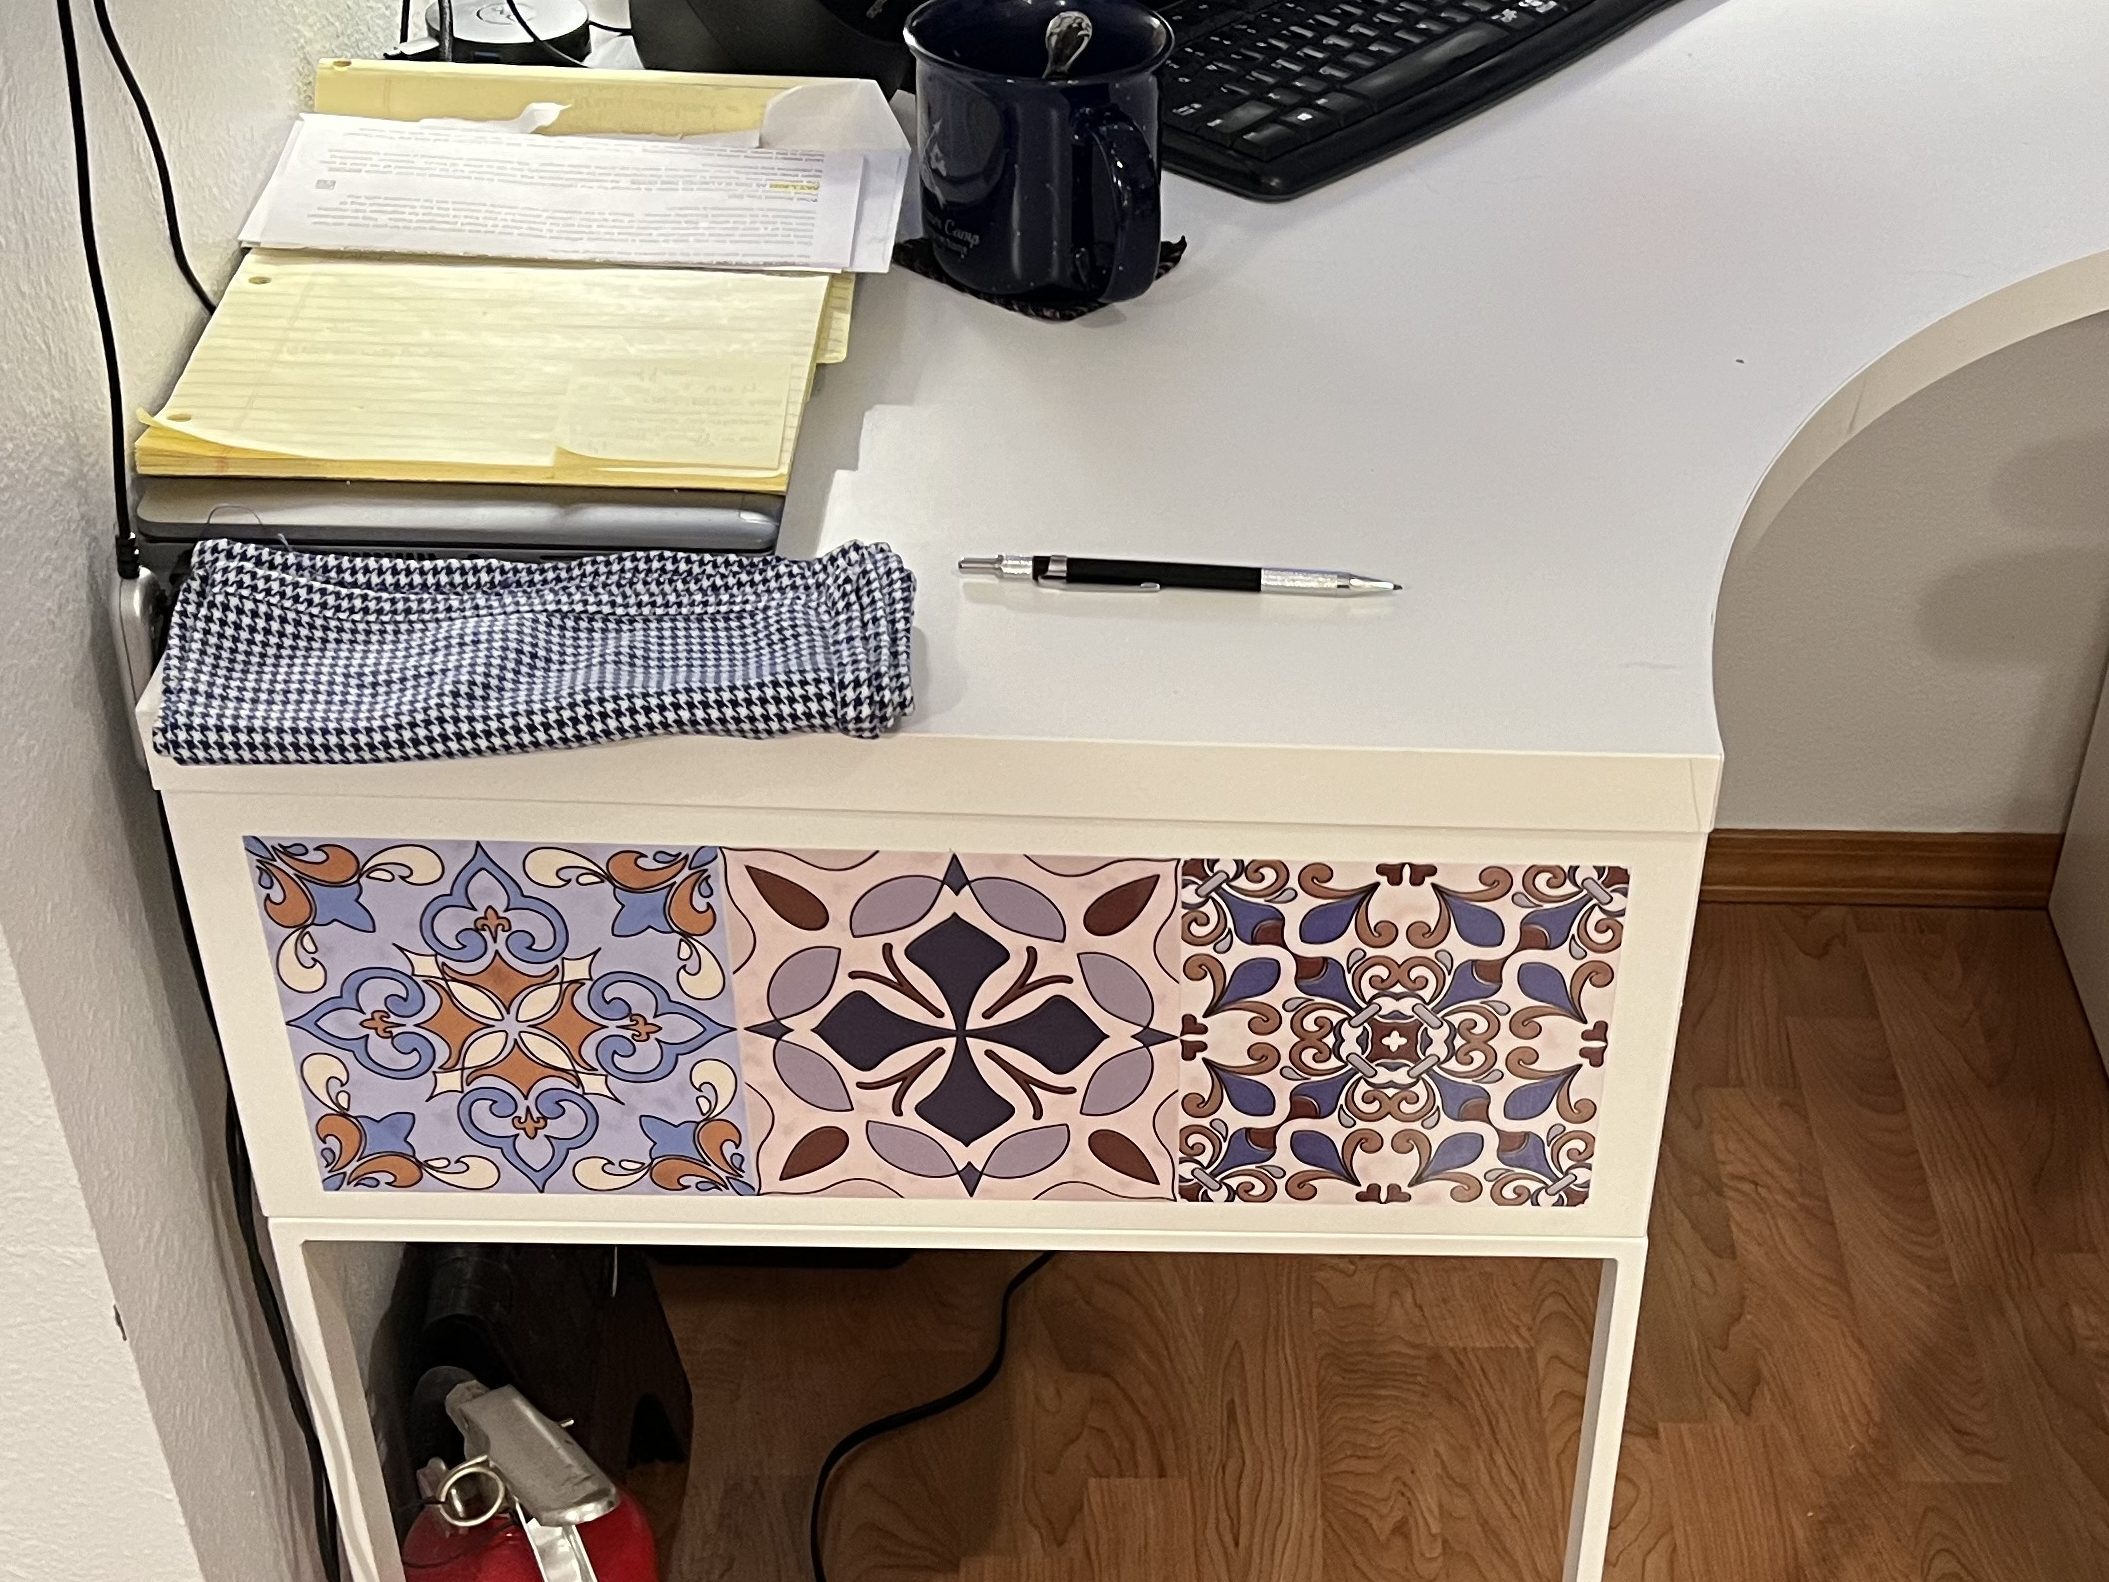
Notice my really cool NicPro Carpenter pencil! OMG, I can’t break the lead on this thing. Sooooo recommended. My hands shake and I always break pencil lead, so that is a cool pencil.
The tiles were supposed to be 6′ square, but they aren’t. They were 5 and 15/16ths. That’s just enough to be annoying.
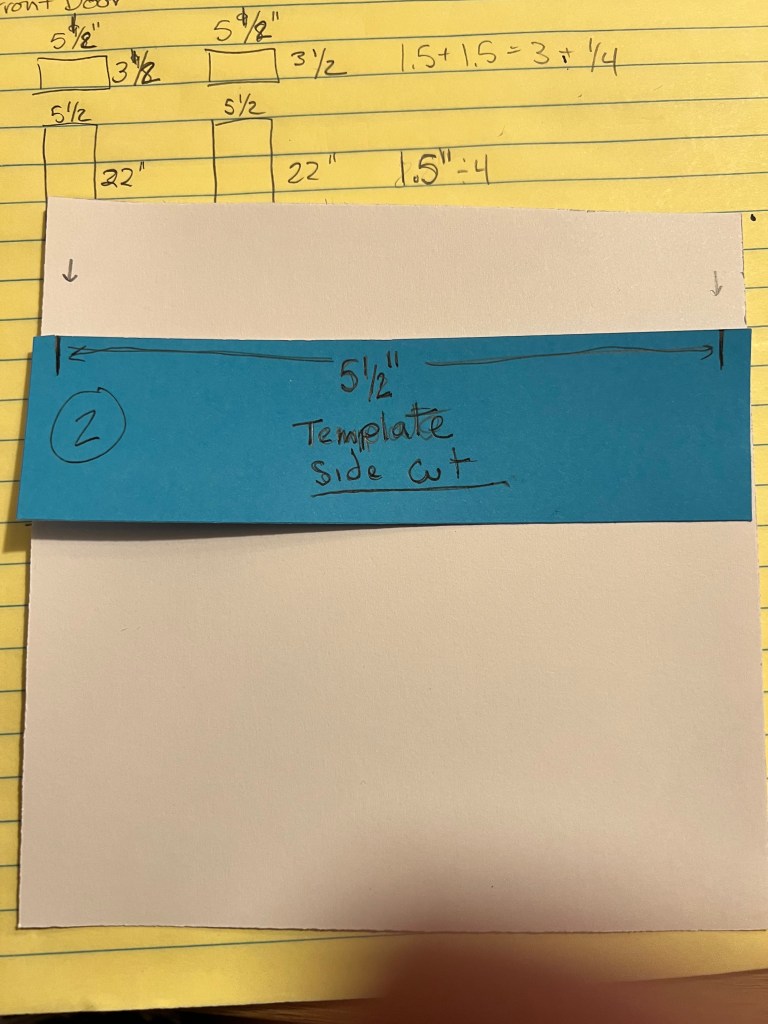
I then used piece of paper with the size of the sticker tile, and then split how much I needed to take off into 2, and marked each side, so I could take an even amount off of each sticker tile.
I used this for every tile I had, so I could get them all at 5 1/2 inches wide without having to measure each one. Safer that way!
I then used a normal Fiskar paper cuter to cut the tiles.
I’ve had this old paper cuter forever, and it works great.
To do the length down in the center panels, it was a little trickier. The center panels were 22″ down, but 4 tiles was 1.5″ longer than that. I divided it by 4 using a fraction calculator online, then divided that by 2, and made another little paper template so I could make marks and cut all four of the tiles, making sure to take the same amount off the top and bottom.
The bottom panel was the opposite problem. It was only 1/4″ longer than the length of 3 tiles, and I did not want to cut down 4 tiles that much. Instead, I just applied those bottom panel tiles 1/8″ lower than the true top, and you couldn’t even tell.
Applying the tiles is similar to applying a Cricut vinyl project. I used a scraper to smooth out the bubbles. The sticker tiles were not especially sticky, and if I had an issue with a bubble they were easy to peal off and do again.
One thing I think was important for me, was to accept that was it was impossible to make it perfect. The tiles slid, and cut funky, and applying them was a little odd from the normal vinyl I was used to. However, with the white door background, you could not tell unless you got nose to door with where there were imperfections.
I think sometimes it’s easy, especially for me, to just give up if I can’t make things mathematically perfect. However the tiles themselves did not have a perfect printing run with some uncentered tiles, so I just went with it, and I am glad I did.
Finished front door.
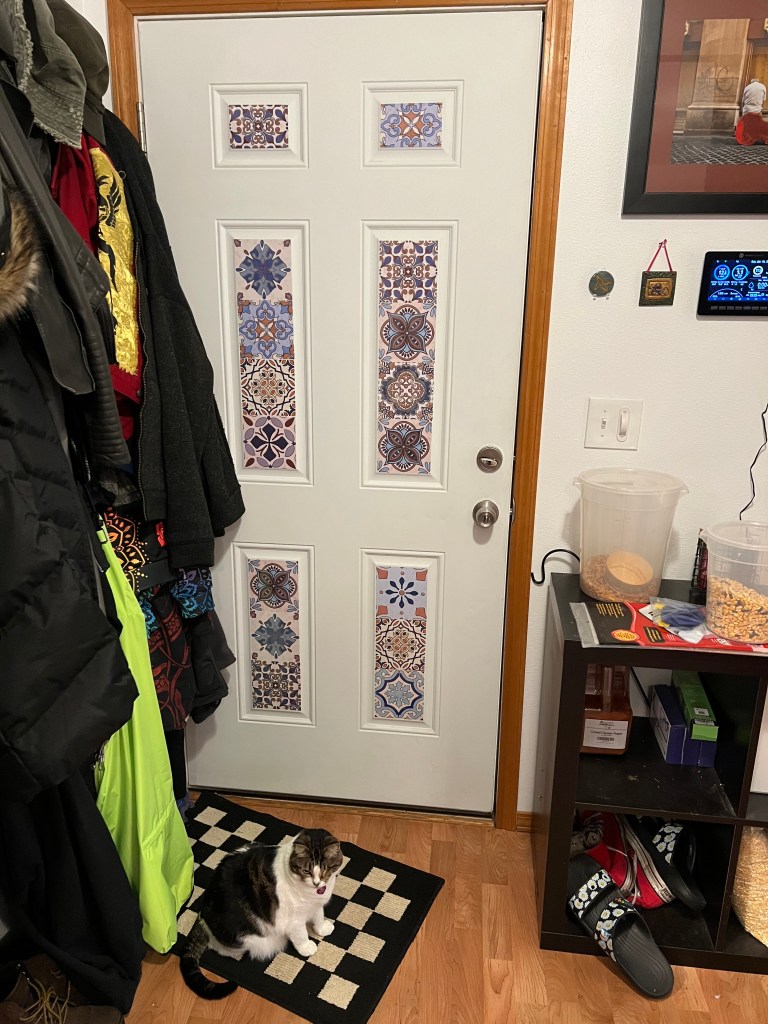
Finished back door with Tally, who “helped” the entire time for certain definitions of “helping”.
I’m pretty glad I did this. I like it. My home is not a show home, or a “normal” home, but it is my home. I don’t ever plan to leave it, and I want to live in a place that feels good for me. I don’t want plane white doors.
I did have enough extra I added some to my super cheap white IKEA desk, too.
This cheap IKEA desk was what I got when we moved in. Most of our furniture was super cheap as the house cost was a lot! Personalizing it is a good step until I need to replace it for a longer lasting desk.
This was a last minute project because I had these stickers and I didn’t want to return them. I am glad I did it. It took me an hour or so, and nothing is better than a project with instant gratification.
To recap, I had hired this grifter to remove a floor to ceiling skinny cabinet, install my dishwasher in it’s place, lay a butcher block counter across the cabinets instead of the plastic countertops, build a cabinet box on the other side of the dishwasher, and then install a sink, a hot water dispenser, and the faucets.
I found him on Angi’s List and it was so bad, I won a judgment against him for the work he screwed up. It’s just stunning. I basically had to redo all his work, or fix his work, because it was so terrible.
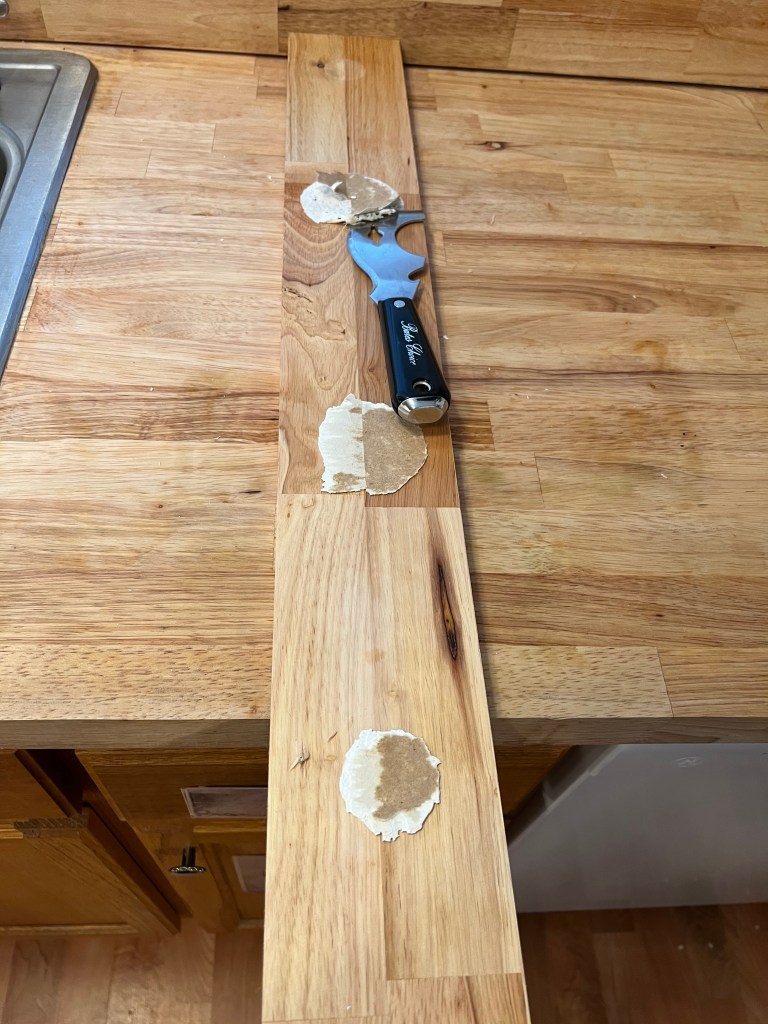
One of the things that killed me was that he installed the butcher block backsplashes crooked with up to 3/8ths between the back splash and the counters, and cut all the backsplashes short from the counters.
His work as a self professed “finish carpenter.”
Every edge was like this. It’s like he didn’t take his saw blade position in account when he cut the backsplashes.
The backsplash was raised up at least 3/8″ off the counters.
Turns out the backsplashes were super easy to pop off. They were held on with white silicone sealant which scrapped off super easy.
Blobs of silicone sealant I just scraped off the backsplashes after I popped them off.
The galling thing was I had an entire new board he could have used in case he’d made mistakes and had told him to use it freely, and I didn’t care because I could not return it.
Before I cut any new boards, I dry fitted the existing boards he had across the back, with the biggest gaps, and I’ll be damned if it didn’t just sit fine? Like no gaps. He’d just installed it crooked and running upwards at an angle.
I’d asked him about the gaps when I saw it the day of the install, and he’d told me “you have to expect irregularities in wood and it would not be perfect.” He’d also told me he was a finish carpenter, so that was a fascinating bit of bullshit. I told him I needed it fixed and he said it was impossible.
I am a total amateur, but if I can fit the backsplash pieces better than a self professed finish carpenter, I think I have some issues with his credentials.
I was able to recycle most of the pieces of backsplash, use some liquid nails and finish nails, and cut them to the right length. I even filled the nail holes, and sealed it with clear silicone sealer across all the edges, especially behind the sink where water is a concern.
I guess my amateur self can cut wood to length.
I paid him a lot, and he took advantage of my wife and I because I guess I was too forthcoming with having a disability that prevented me from doing the work. He never paid us the settlement he owed from arbitration with Angi’s List, either. They eventually yanked his business from the site.
No gaps.
The side piece was a bit wonky, so I scribed it, and made it fit. It was the first time I have ever done that. It took me 20 minutes to fix it so it had no gaps.
My wife came in and said it best. We were not looking for perfection at all, but we could have done it together with just me directing and her helping and get this result the first time.
I guess I was really lucky I could afford to take the hit financially, and had the ability to fix it myself when it was clear there was a problem. I don’t know how long I have where I can work like this with my degenerative joint issues, but at least for now I can. I am grateful for that.
I am also grateful that I can now look at my kitchen counters and know it’s done. They may not be finish carpenter level, but they are good enough. That’s all I ever wanted.
The last thing I need to do, is have the electrician we have coming in this year look at his electrical install of the dishwasher and make sure it’s not a problem. Then I will be able to put this all behind me.
On the exact opposite side of the wall is my wife’s workspace. Our living room is actually the front bedroom in the house as we live in 899 square feet, and it’s not a huge place. My wife has her desk literally in the bedroom closet, and it’s worked out great for soundproofing for her video creation.
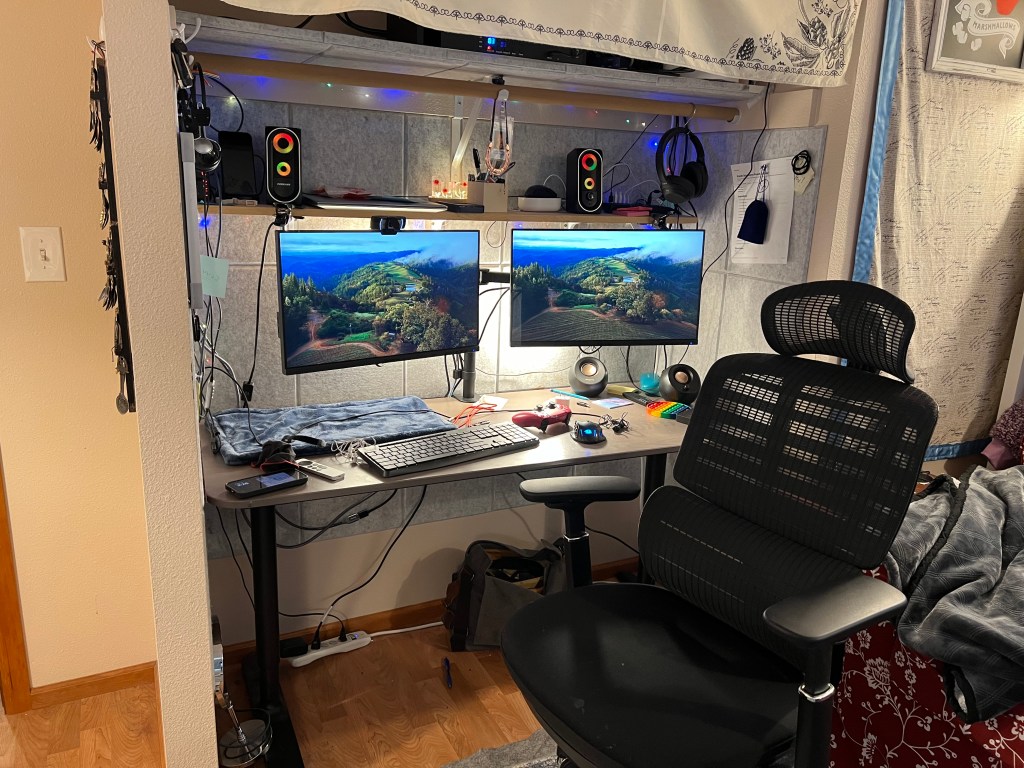
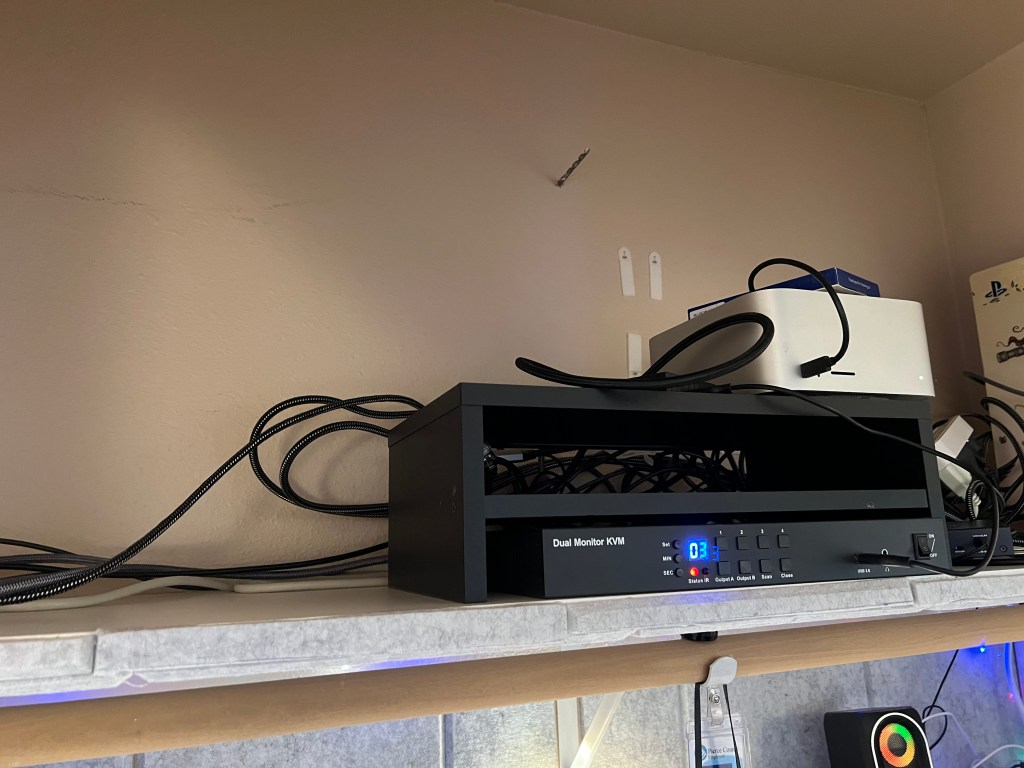
My wife’s desk.
The top shelf is where she keeps her gaming PC, and KVM switch, and all the other wired things. We wanted to punch a hole between the modem and router shelf in that room into the top shelf of my wife’s workspace in our living room.
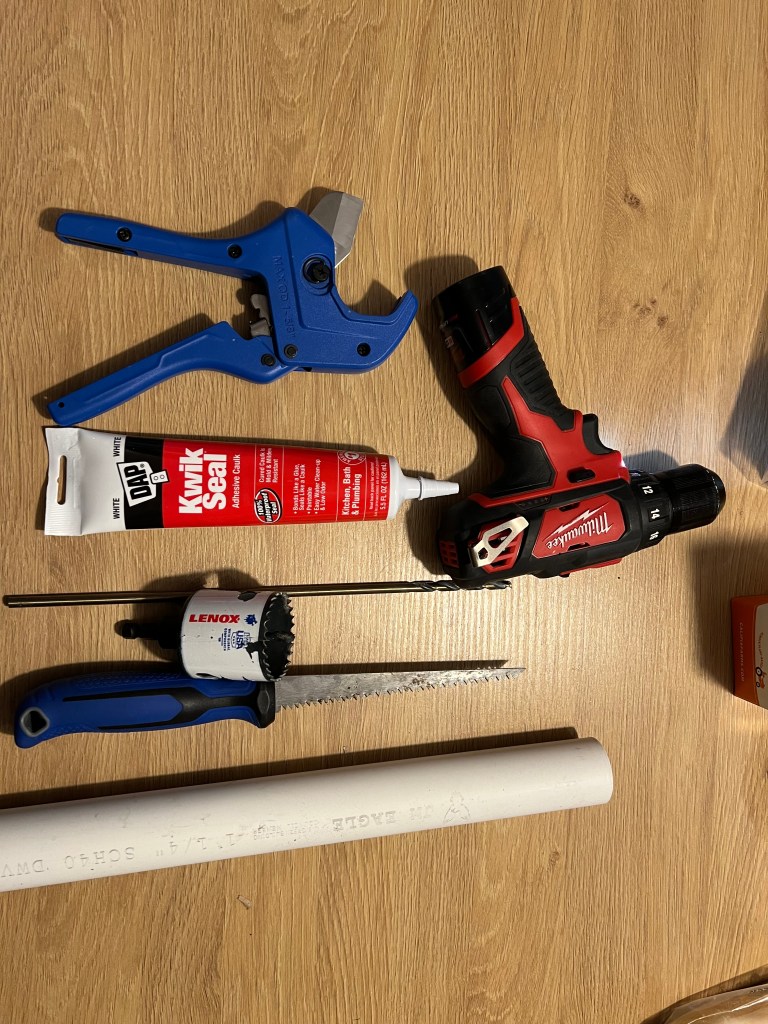
Needed Tools.
The plan is to use a long drill bit to drill a guide hole, then use that to use a large hole bit to drill into each side, then put in a 1.25″ PVC pipe, cut it off, and use paintable caulk to glue it in. it’s pretty easy, and you don’t need much to do it. PVC is easy to work with, and can be cut with a hand tool, and the drill bits were not expensive.
Drilling with an extra long drill bit to make a pilot hole between both sides of the wall.
I knew where the studs were already from hanging the shelves, so I just put the hole along side the stud.
Drill bit sticking out of the other side of the wall.
The long drill bit creates the hole so you can use it to line up the hole bit, and it will match on both sides.
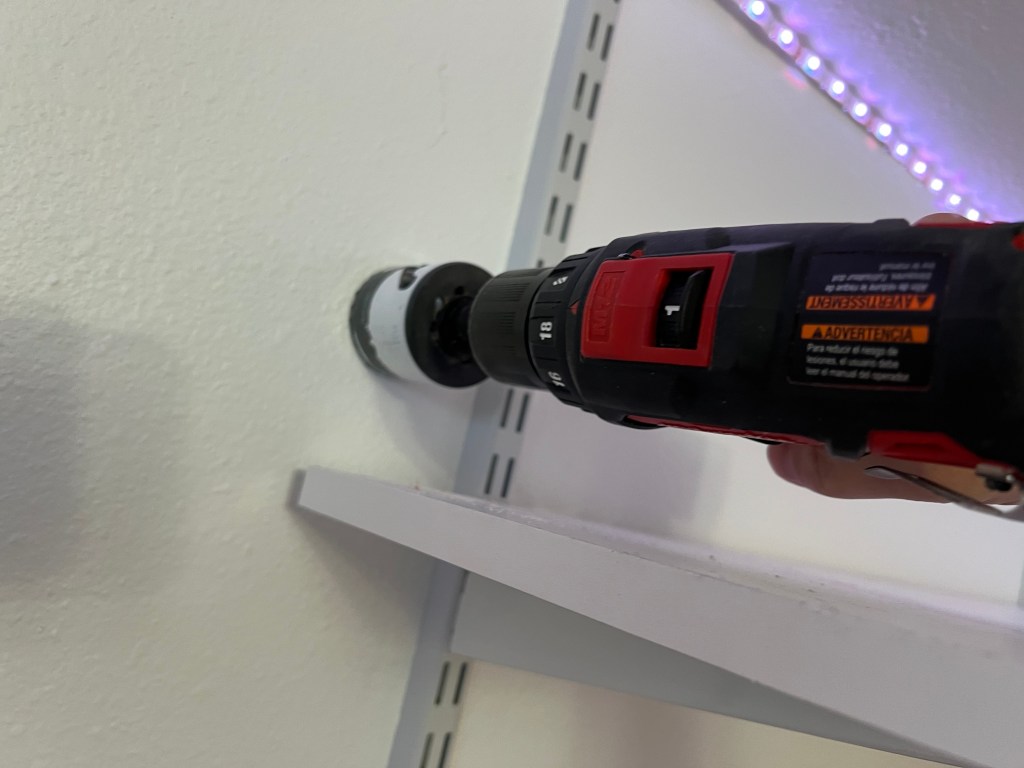
Using a hole bit for my drill.
It’s important to drill the hole in from the outside, on both walls. That way if you have any blow out, it will be in the interior of the wall. It just gives a cleaner round hole to work with.
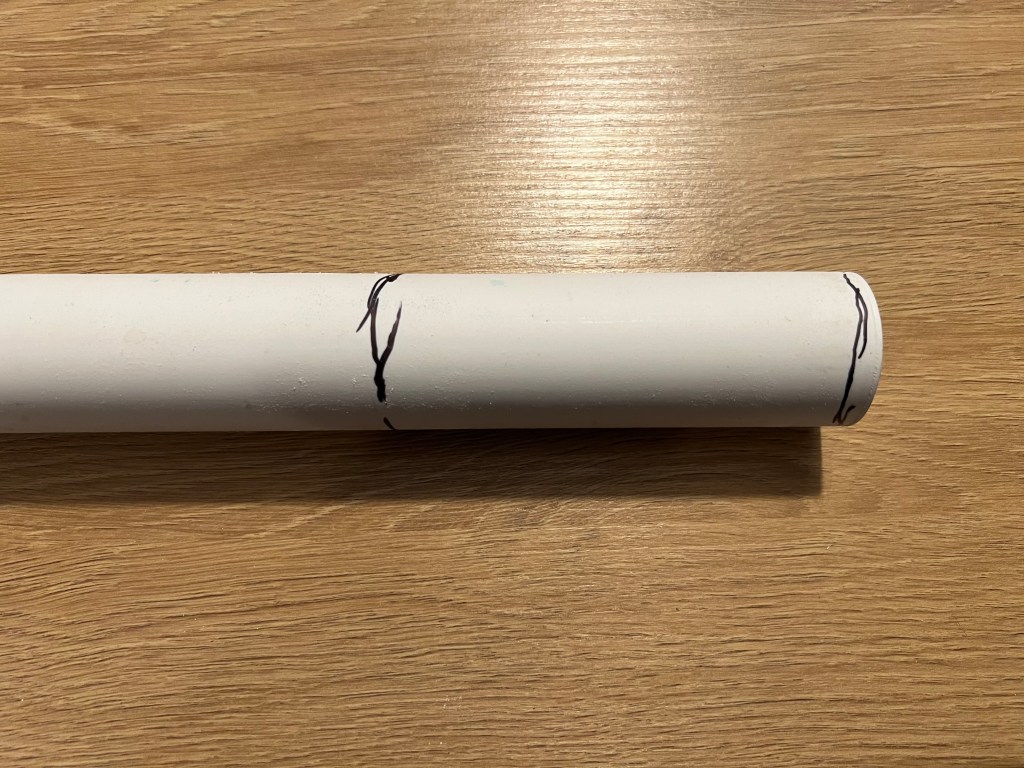
PVC Pipe to put in the hole.
I didn’t want to just have a hole in the sheetrock. I was worried cable and cord movement would degrade the sheetrock in the wall over time and I didn’t like how it looked to just see inside the wall. Not to mention I didn’t need anything important falling into the wall, where I’d have to rip it apart to get it out later.
The PVC pipe was a good solution for me, as it could be just caulked in, and would protect the sheet work, and keep me from dropping anything in the wall.
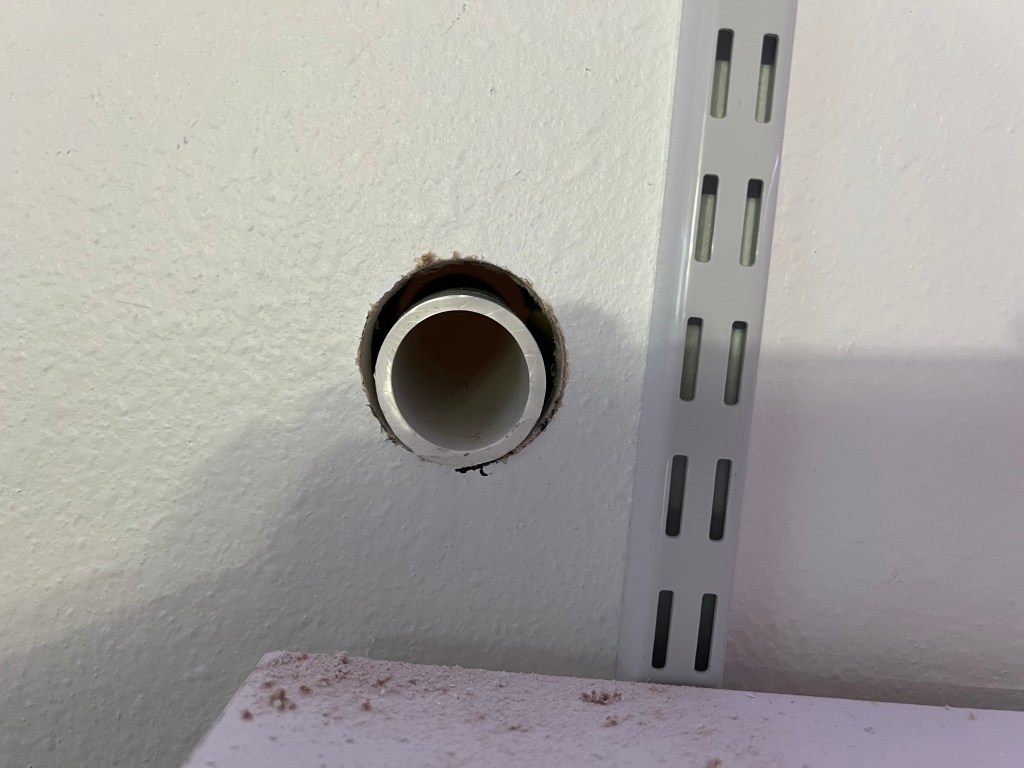
PVC in the hole of the wall.
This is where I realized, I had grabbed my larger sized hole saw, and had a full on panic that it would not work well. The last time I did this, I had the exact hole size as the PVC, and it was a bit more slick, but this worked too with enough paintable caulk.
Caulked in PVC pipe so you can run cables from the other room.
I just caulked it in with a bit of extra caulk. This is still wet in the above picture. It needs sanded down, but I am lazy, and I’ll sand it down when I go to repaint that room.
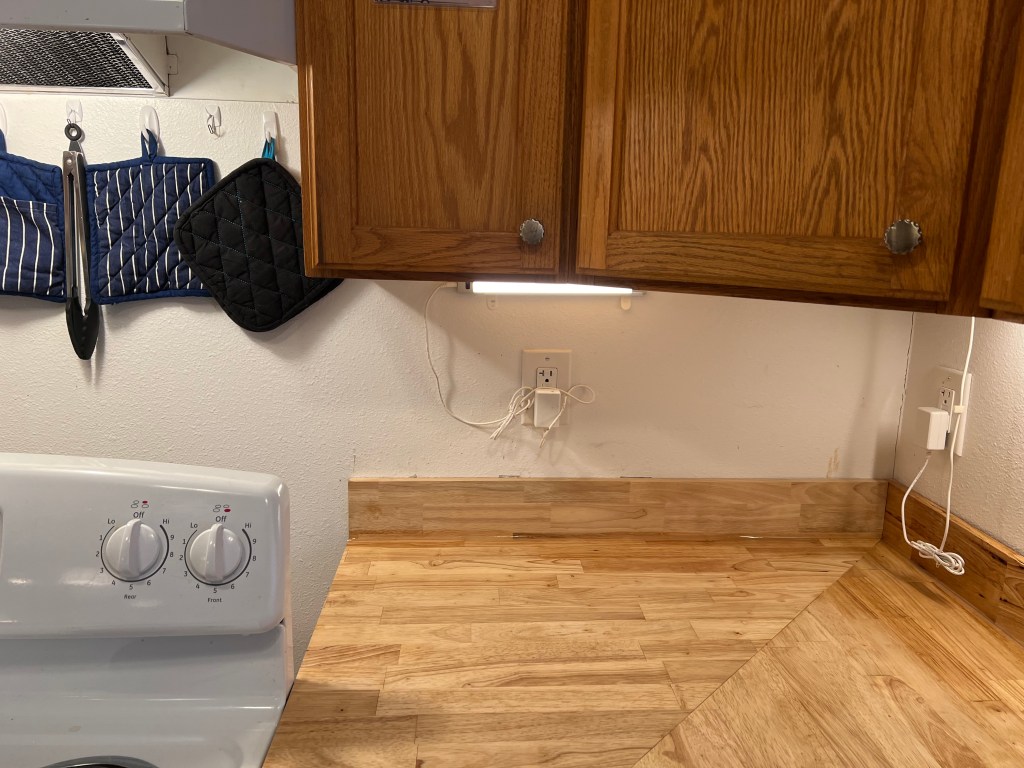
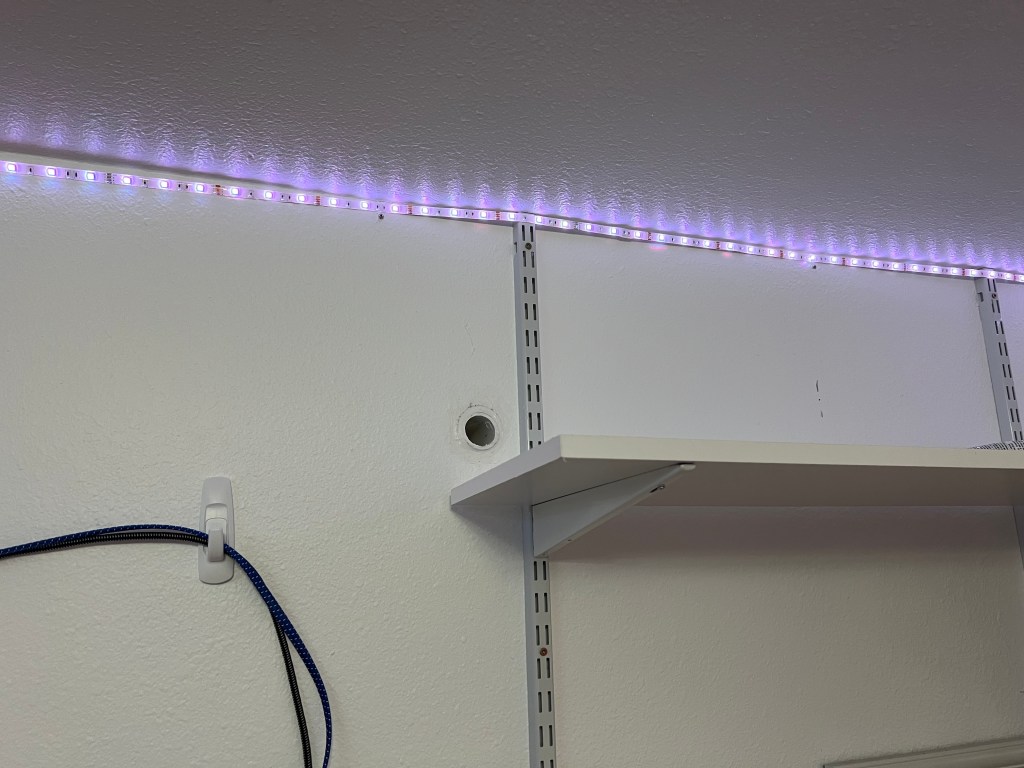
Finished hole into my wife’s work space.
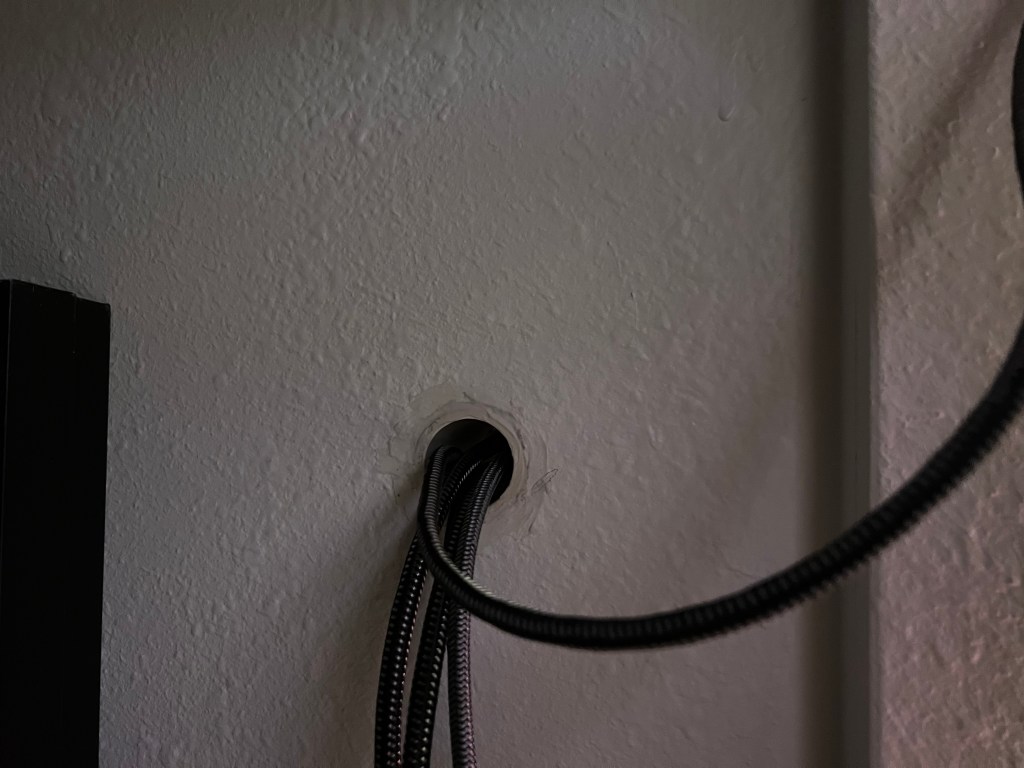
Cables in another cord run from one closet to the other.
It actually worked out really well. My wife likes to wire her computer gear in instead of using the wifi, so she can now do that without running cables around the doors into the other room.
I know there are some grommets you can buy, but they didn’t extend through the wall and only were on the surface, like a desk grommet for wires. I also have exceptionally thin walls in this circa 1910, so an out of the box solution probably wouldn’t fit my house.
They do need a little sanding and painting, but that’s for another day. I am just happy my wife’s workspace set up and be organized the way she likes it.
I have been down for the count a bit this last month. I have to go have a surgery, which I did not want to have. It’s not like I am going to die, but it will greatly improve my life. It gets in the way of my projects, and my life in general, but what are you going to do?
I did manage to get myself together enough to get some shelves installed. In our spare bedroom we have a wardrobe/walk in closet area for my wife, with her makeup desk and its large lighted mirror. I get the small closet for my hanging clothing, and a small table for my sewing machine. It’s also where the home wifi, router, and modem come into the house. It’s all utilitarian, and as such we needed more shelves.
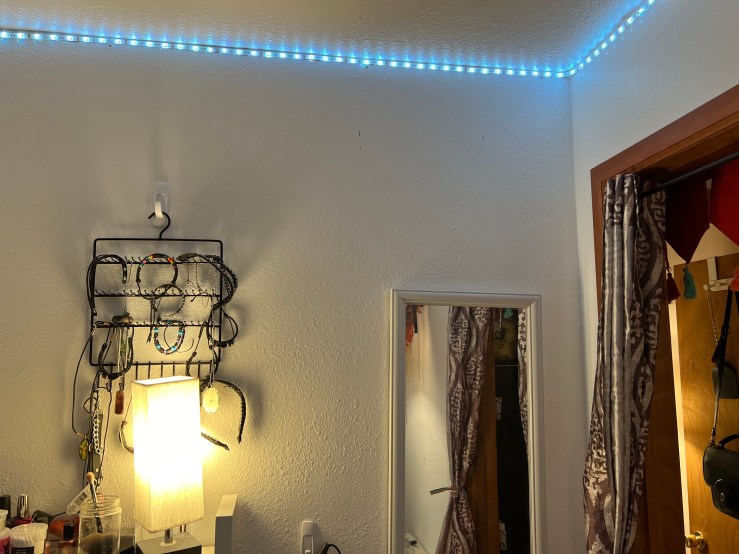
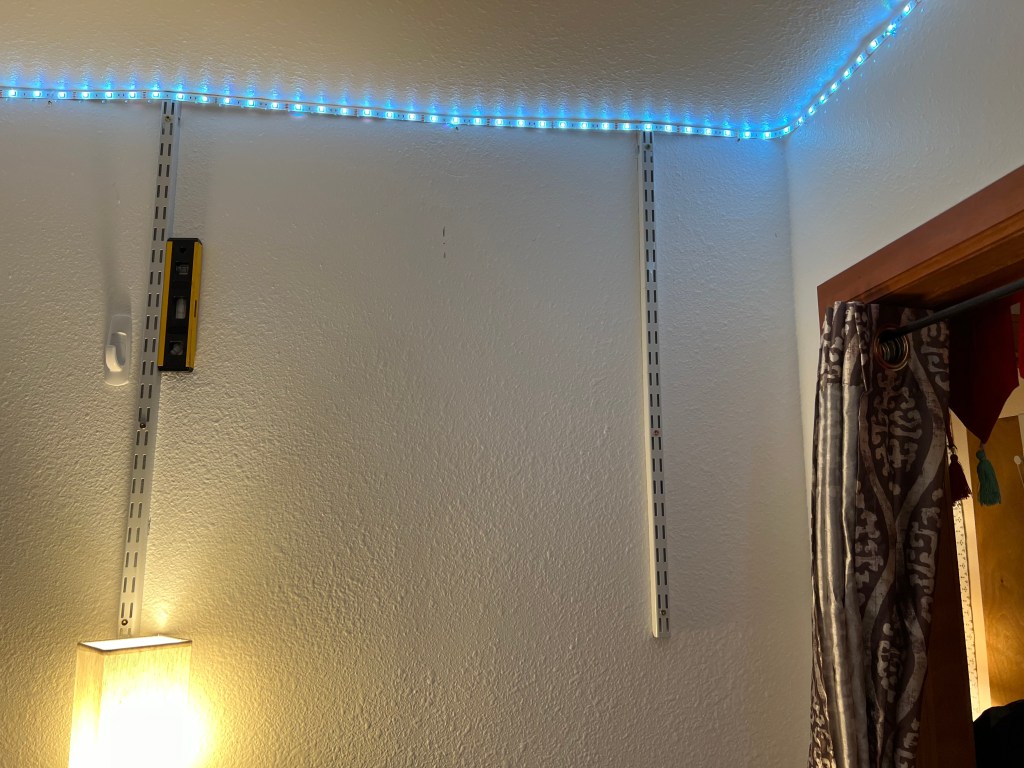
I had two sections of shelves to put up, the first being a wifi and router shelf above my wife’s makeup table.
I will move the mirror and the jewelry hanger, slightly, and put up the shelves.
I used my stud finder to find the studs, and actually drilled an extra screw hole in the brackets. They are technically supposed to go into a closet made system, but will hold to the wall studs just fine for what we are doing.
The studs aren’t always where I expected them to be in this ancient little house so a stud finder is invaluable.
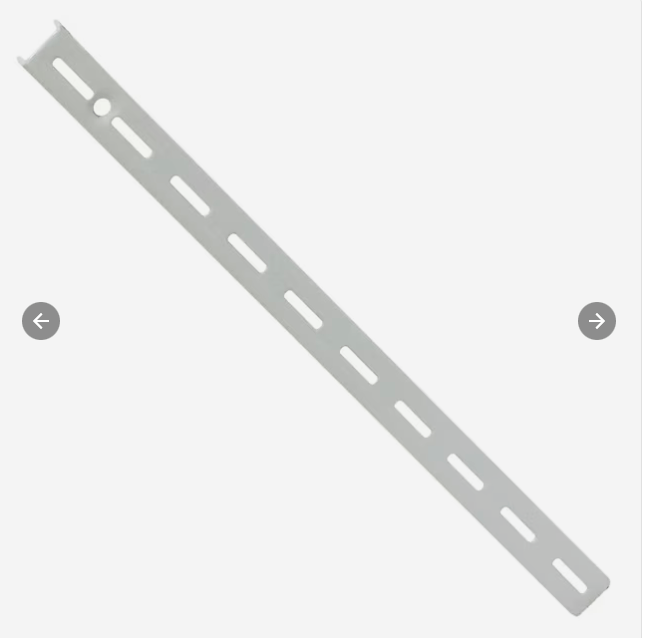
I prefer these double hook hanger style shelf brackets. I have the single ones pictured below in the bathroom and they are not that secure. Sure they won’t fall off the wall, but the shelves wiggle to much. I will replace them with the double style versions once above when I get around to it because life’s too short to be irritated by wiggly shelves. Plus, the double style brackets have holes to screw the shelves to the brackets so you never have to worry about accidentally knocking them down.
Sure the brackets are long, but we might want that later. The mirror isn’t up yet because I am waiting on more command strip picture hangers to put it back.
The router and wifi will fit up there, and it’s tall enough my wife can’t bonk her head. Few people are taller than her, so I think it will work.
Part of the reason for it’s placement here is to get it away from the electrical panel so there’s less interference, put it closer to the center of the house, for better wifi coverage, and to place it on the other side of the wall from my wife’s desk so she can hard wife into it for YouTube uploads. Her desk is actually set into a closet, and her computer equipment is on the top shelf, so I will be putting a hole through it so we can run cords through for her to hard wire to it.
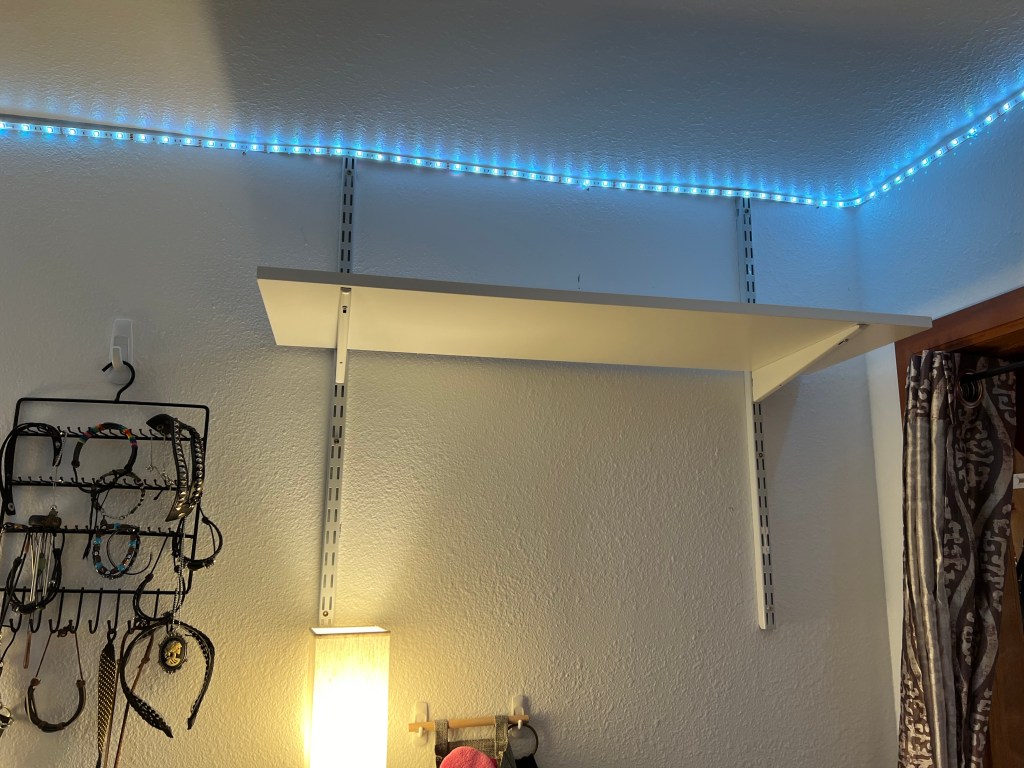
The second set is above my wife’s dresser. I wanted to center them over the printer, but the studs were not where you’d expect, and it was just more secure to do it this way. I will have to forever live with it not being centered. It won’t bother my wife, but I will probably rework this problem in my head for as long as this is set up this way. Maybe by next year when we repaint, I will think of something.
You can see the issue with why we need somewhere to put the papers.
My wife makes these great 5 x 7 laminated card stock game cards for her tabletop games. She creates them for missions, characters, NPCs, items, and locations. They are amazing and look like professionally made game pieces. We bought an Epson liquid toner printer for it, which as a great bargain as we’ve done hundreds of prints on the original cartridges. This means she needs space to put her supplies.
Once again, this was as easy as using a stud finder to find the wonky stud placement. Interior walls in the little blue house are sometimes not there? Like you’d expect them to be 18 on center, but they skimped. This means, sometimes there are no studs at all in places you’d expect them. Old houses are weird. The external walls are fine, but just the interior ones are like this.
It took me very little time to get the shelves up and secured.
Shelves for my wife.
This would probably not be optimal if it was for me, because I am 5’6″. However at my wife’s 6’2″ she can reach the top shelf without a ladder.
I am sure she will organize these when she gets to it. We are thinking baskets or bins, as that works with her ADHD, and my need for organization both.
I can’t tell you how grateful I am to have a home because I can do this. If we find we don’t like it? I’ll just rip it out, patch it and do something else. Just having that freedom is astounding. I wish everyone could have a home they could do that with.
The funniest part of this entire process is now my shelves are level and straight to a degree the rest of the house isn’t. The little blue house isn’t terrible, but it’s old, and not as level as you’d hope.
My real estate gal, who sold us the house we are in, is an absolute hero. She got the sale despite multiple bids, by telling the seller our history. We are first time home owners, and we’ve both been homeless as kids. That we’ve fought our entire lives, and now that we can buy a house, we didn’t have enough to win a bid war of any kind.
The owner was older, and he chose our bid because he wanted to give us a chance, and even left us a lawn mower, and extra light bulbs, and fridge filters. The guy was a saint.
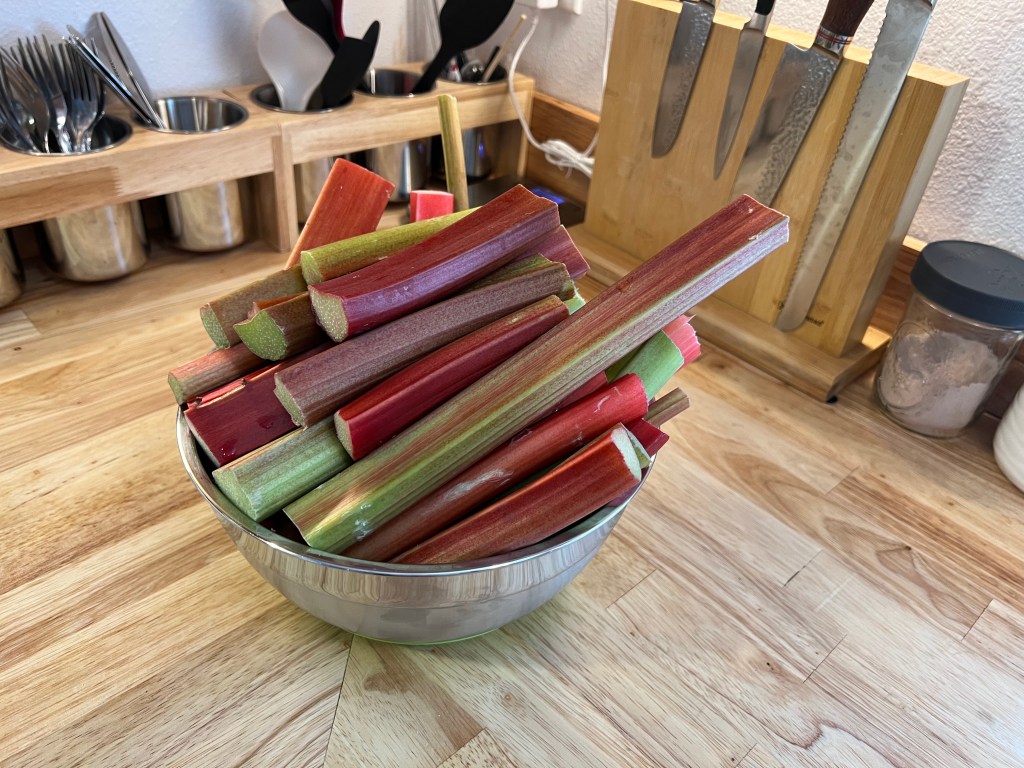
She still comes and checks in on us from time to time, and last weekend she brought me some rhubarb. My rhubarb plants are tiny, and won’t be ready for harvest for a year or more and she’s a gardener too, and had enough to spare. I was very touched by her gifts.
6.5 pounds of cleaned and cut rhubarb!
My plan was not to do more jam canning until this coming Friday, but with the lovely gift, I felt I should probably do it Sunday anyways. So I went to bed Saturday night fully intending on getting to the store in the morning.
Unfortunately for me, my body was not cooperative. Standing all day and jam canning on Friday, after a full work week was already as much as I could do. I woke up Sunday, and that was it. I was done. I was already sore upon waking. I would have liked to be able to just go go go, but I have a disability and sometimes I just can’t.
Then, I remember I could process the rhubarb by freezing it, and could do the jam this weekend. That gave me days to rest up in preparation for this.
Processing rhubarb.
I cleaned, and cut up all the rhubarb. I peeled the bigger stalks, but left the smaller ones whole. I laid them out on cookie sheets and froze them in batches.
I then packed them into freezer ziplock. I packed two jam bags with the exact amount I need for the jam I am making, and I still have pounds of it leftover. My wife is thinking of making a pie out of some of it. This is honestly garden gold right here.
Sometimes you can only do what you can do. I do have a physical disability, but it would be the same if my disability wasn’t physical in nature. Sometimes you just have to slow down. I have to remind myself that it’s okay to slow down.
I am trying to give myself the grace I would give someone else. If someone came to me and said I can’t do this today. I am already sore, and it might push me into a painful situation where I will go to work the next day and struggle? I’d totally give them the out.
But I think it’s harder to give ourselves that same grace. It’s easy to tell ourselves we can power through, that everyone else is fine, why not us? It think that is a hidden struggle with disability, especially if you have an invisible one.
When I first started having problems with my joints, I did that all the time. It ended up with me in pain, flat on my back. Now, if I slow down, and just do what I can? It just works out better.
I am still going to get that rhubarb jam made, but it will be on my timeline, when I am able. That’s okay.
My wife has ADHD. Amongst other issues, if she doesn’t see it, it ceases to exist in her memory. Sometimes this means she re-buys things she has in abundance, or puts things away in a fascinating way.
When we moved into this home, I wanted to make sure she could be as at home there as I was. She loves to bake and do cooking projects. She researches recipes, often historical, and makes them.
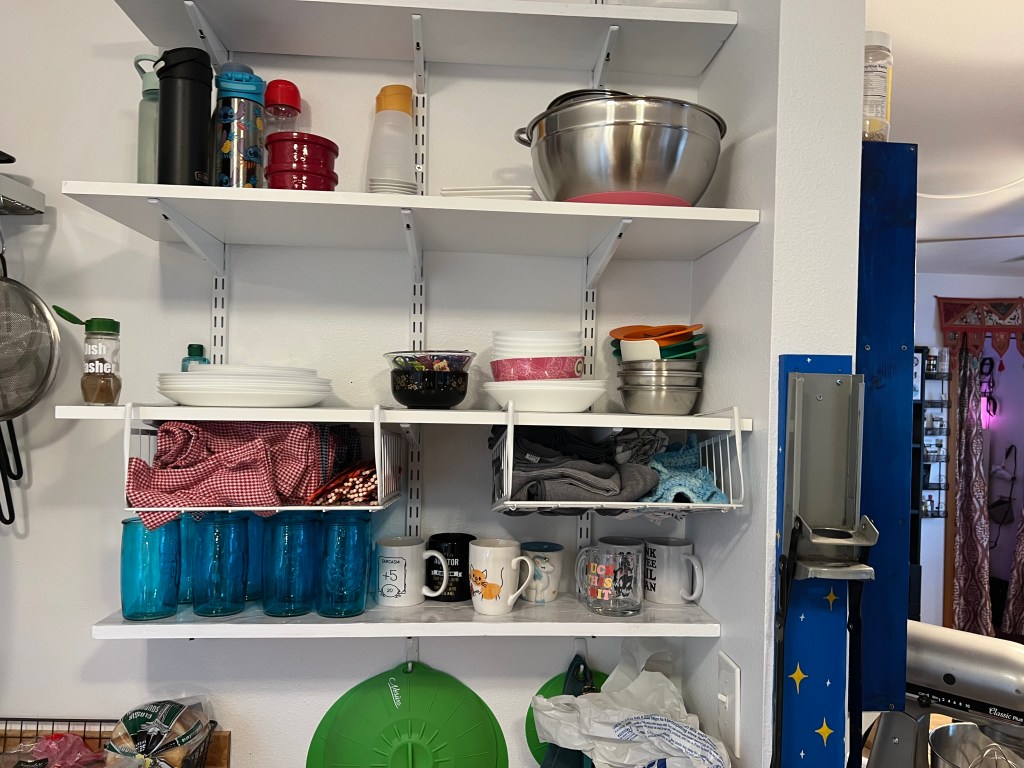
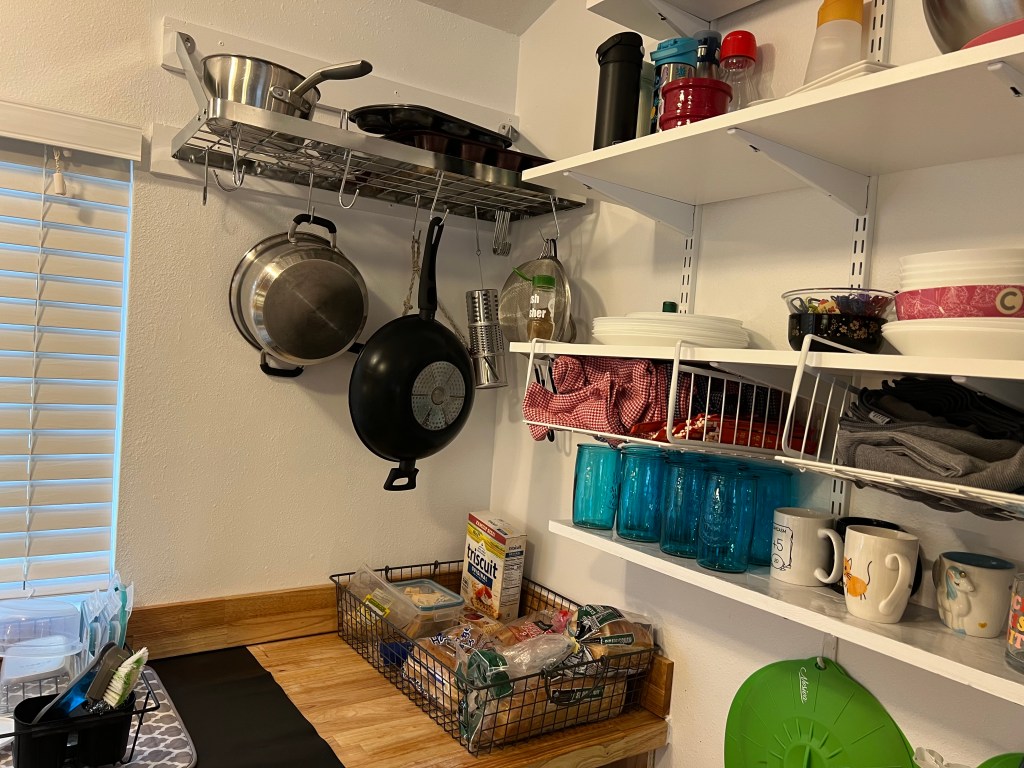
I wanted the kitchen to work for her. To this end I put in open shelves for the things we use day to day the most.
She would lose her coffee cups all the time, but now she always knows where they are. She can find everything, and doesn’t have to search.
I made sure the most used pans were visible, and I put a basket for the bread, and all the snacks. She has stopped losing the snacks now that I’ve set it up this way. She can find everything she wants more easily.
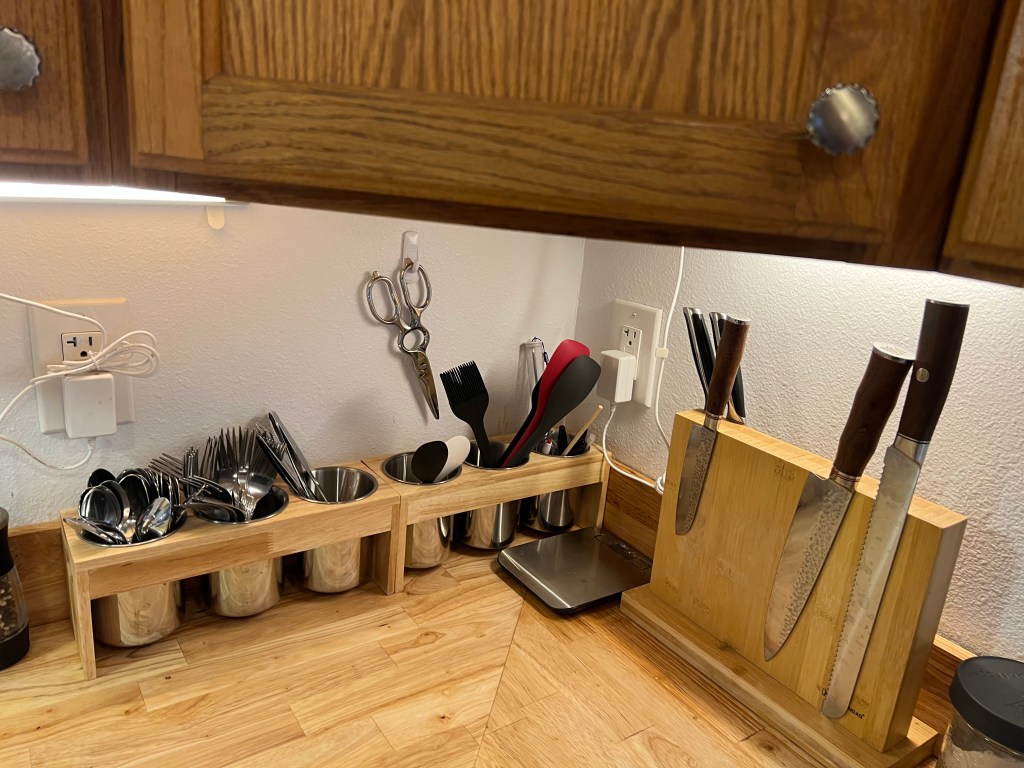
I also put a lot of the utensils she uses most on the countertop visibly, and so she can find them easily. She’s said having the utensils there has been so much easier to work with for her.
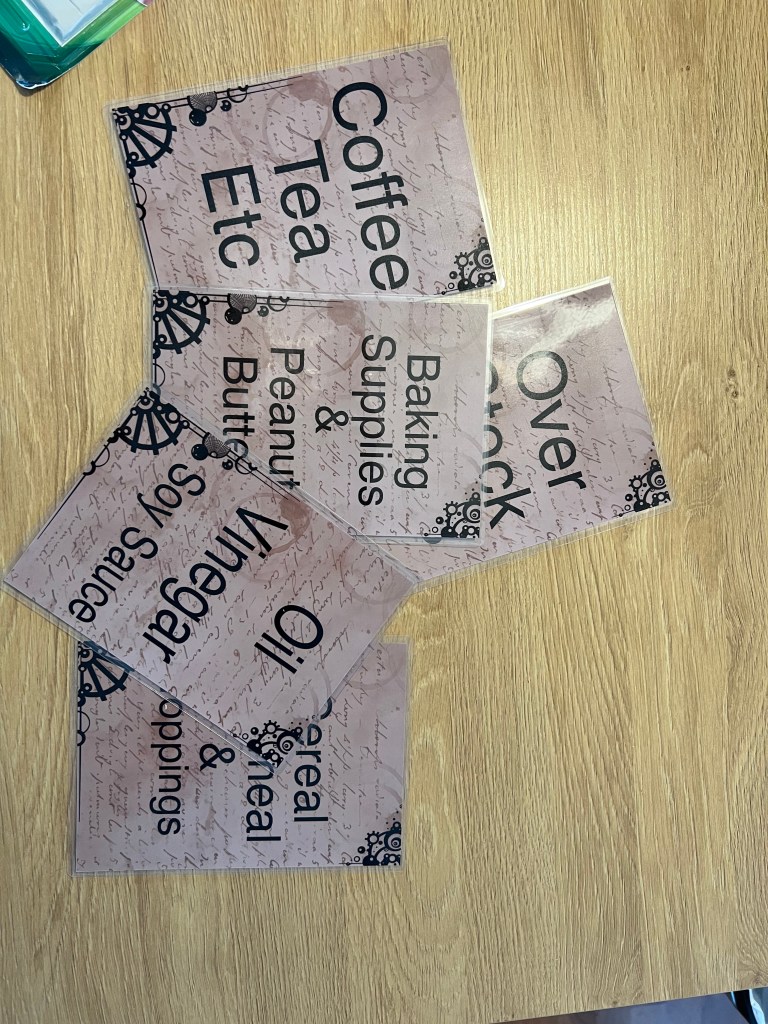
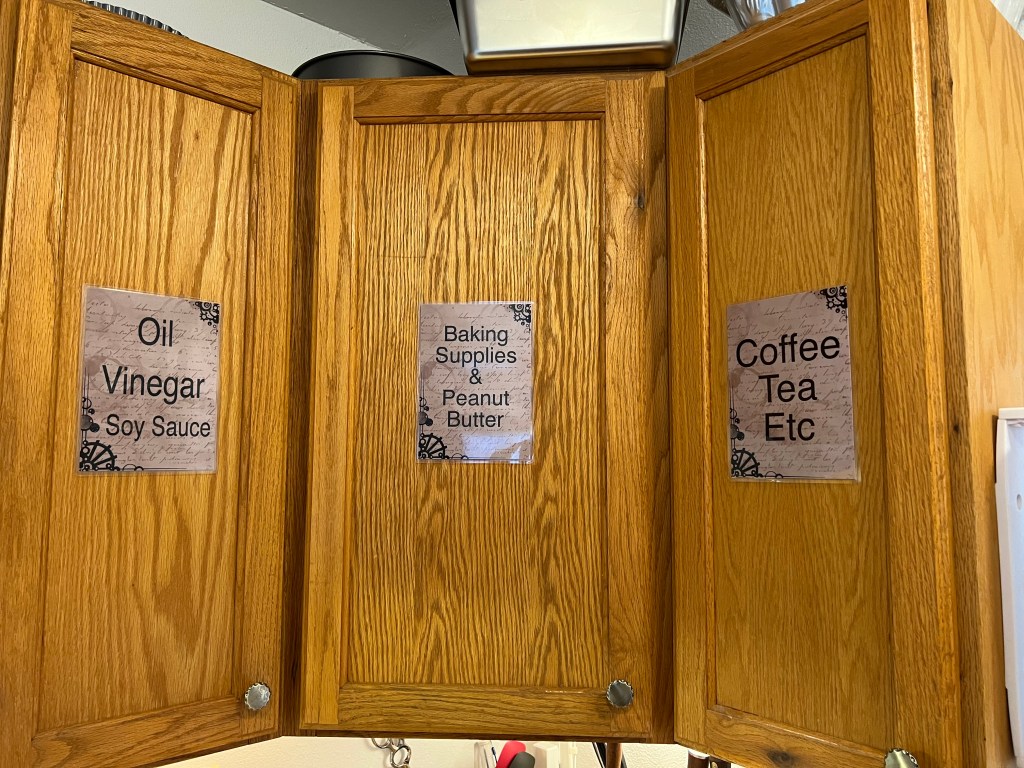
My latest effort is to make labels for the cupboards. This isn’t the most popping color right now, but I plan to paint the cabinets dark dusky orange. Then they will pop!
I created the labels in Affinity Design, and after the first label was done, I just used it to make the rest as a template. Then my wife printed them out and laminated them all. She’s got a whole side project with 5 x 7 ” cards for the game she is running. She hands them to the players as a mission card, so I figured I’d commandeer her process for kitchen labels.
This will look so much better when the cabinets are painted. They are very 1980s right now.
I can’t label everything in every cupboard, because she would be overloaded by it all. So instead I tried very big summaries, and specifics that she uses the most. We are also old, and wear glasses, so I used a HUGE font that she can see without glasses.
So far, it seems to be working. My wife can see what she needs, and it works with her ADHD.
I am interested to see how this works for her going forward, and I like to keep checking in with her to make sure there isn’t something better I can do to work for her.
The biggest challenge is to make it all look like a design choice? However, I don’t care much as long as it works for her, cute or not. I think we managed to make it cute though.
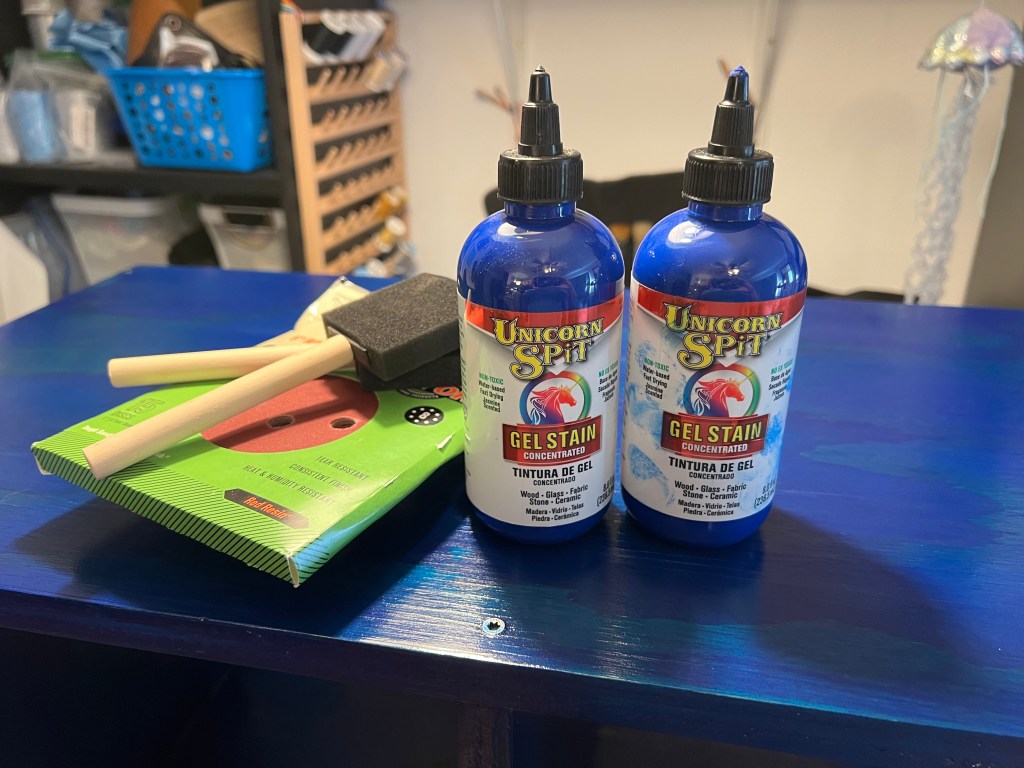
There is this gel stain finish called Unicorn Spit. (This is not a paid for spot, because nobody would ever pay me!) Its claim to fame is it’s near universal in what it covers, and it’s very vibrant. It comes in a rainbow of colors. If you want the official user’s handbook on their website, you will have to pay $27 for it. I’m not really up to paying someone $27 for how to use their product so I read the directions, and watched some clearly promotional YouTube videos.
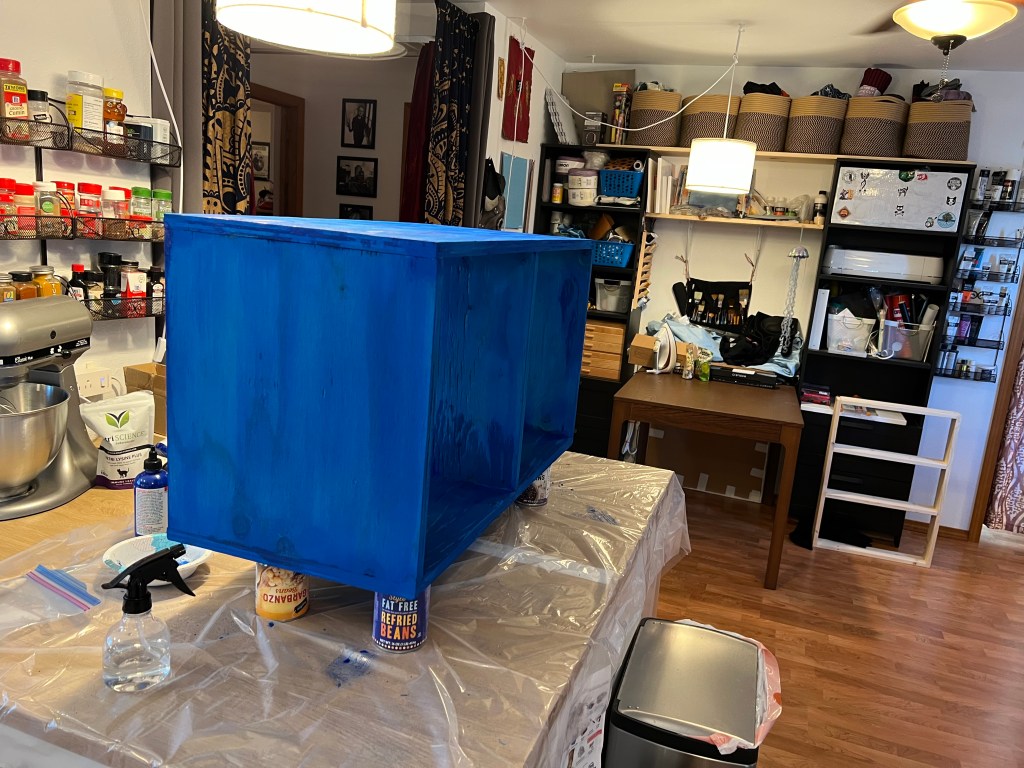
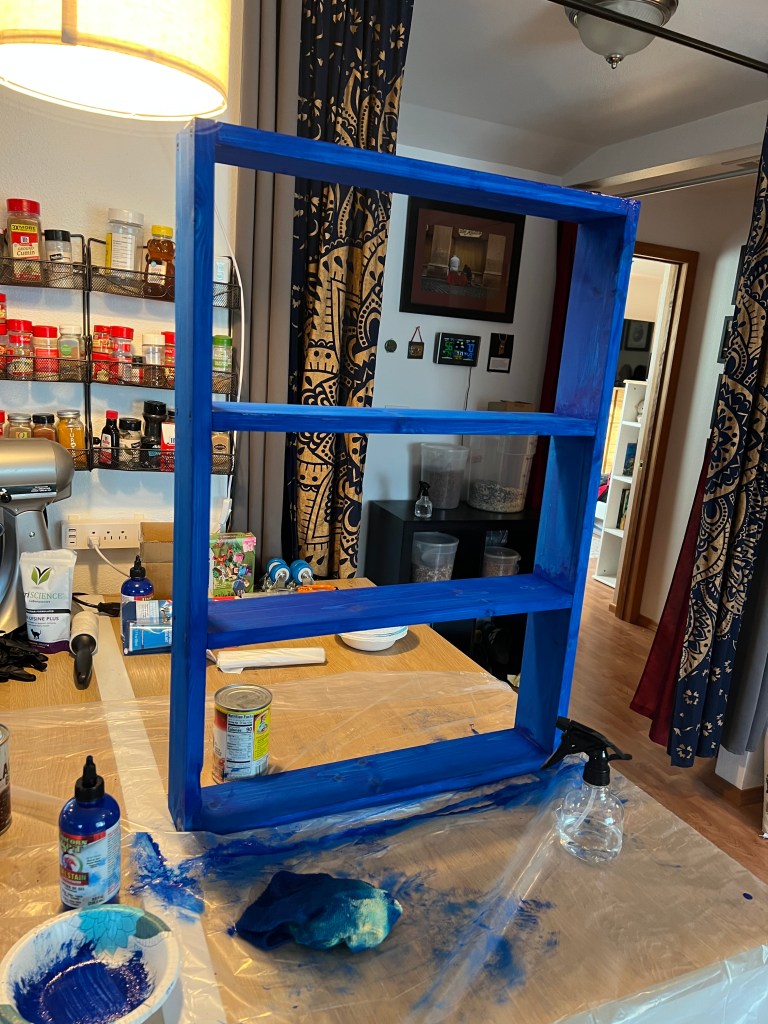
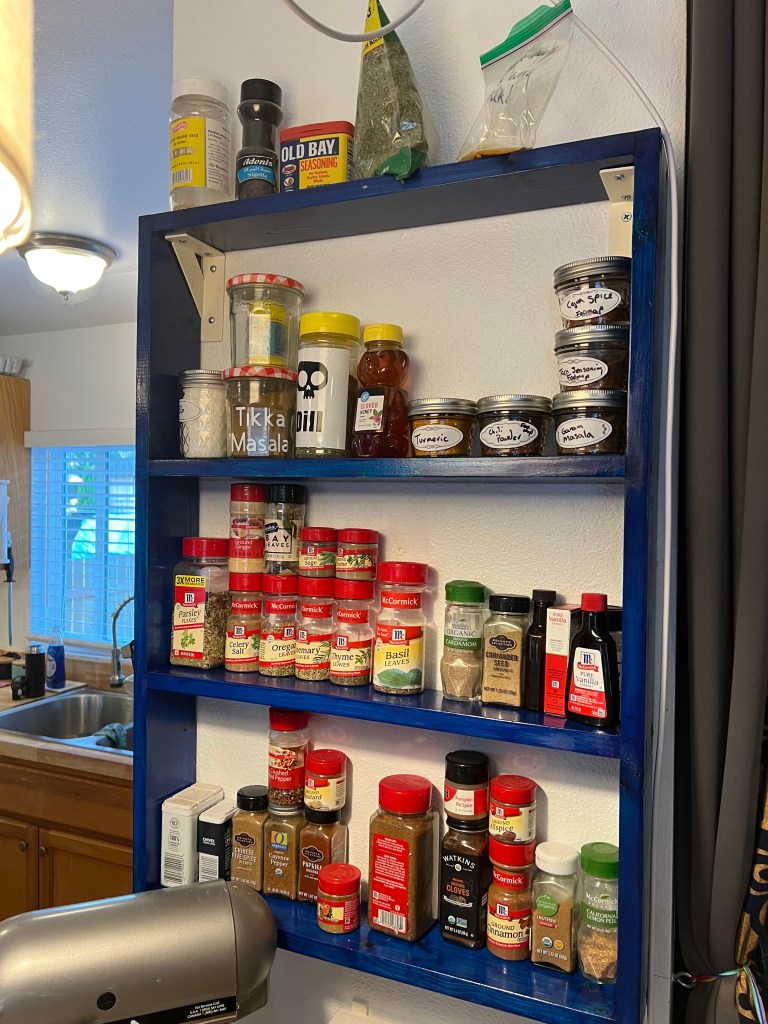
I had two projects I was working on. One is a large wall mounted spice rack for my approximately 10 billion spices, and the other is a basic box for a coffee table made out of plywood.
After I finished making and sanding my projects, I used an old chip brush to paint on the Unicorn Spit. If you use it straight it doesn’t cover raw wood very well, and takes a lot of stain. However, I found using a spray bottle filled with water really worked well. I would dab a bit on the wood, spray spray spray, then brush it back and forth. It covered shockingly well. I was very impressed with that.
I did several coats, and put my brush in a ziplock bag and froze it between coats so I didn’t have to wash it out. The brush thaws right out, and it’s like you never stopped, when you have to take a break. This works with latex house paint as well, incidentally.
They actually recommend to dilute it and seems like you can dilute it with a lot of options per their directions. I wanted a super deep color so I went with my spray bottle technique and it worked out well.
There were spots that I had a hard time getting, but I just kept touching it up until I was satisfied. I used a rag to rub it around for maximum coverage after I did the first coat.
Yes I do use my can goods to prop up my projects when I paint them.
When it dries, it dries to a chalky texture. The website had some options for finishes, and I was going to use a wax sealant initially. I just wasn’t sure it would cut it. Just touching the wood would give me a light blue dusting on my skin, so I needed something more than that. I decided to use Minwax clear poly on it, and put on three coats, with light sanding between it.
You have to be careful if you use poly to seal, I did my second coat too soon, and smudged off the blue in some areas of my 1 x 4 spice rack. I fixed it by mixing some acrylic blue paint with some triple thick varnish and you can’t even tell. So nothing to worry about too much.
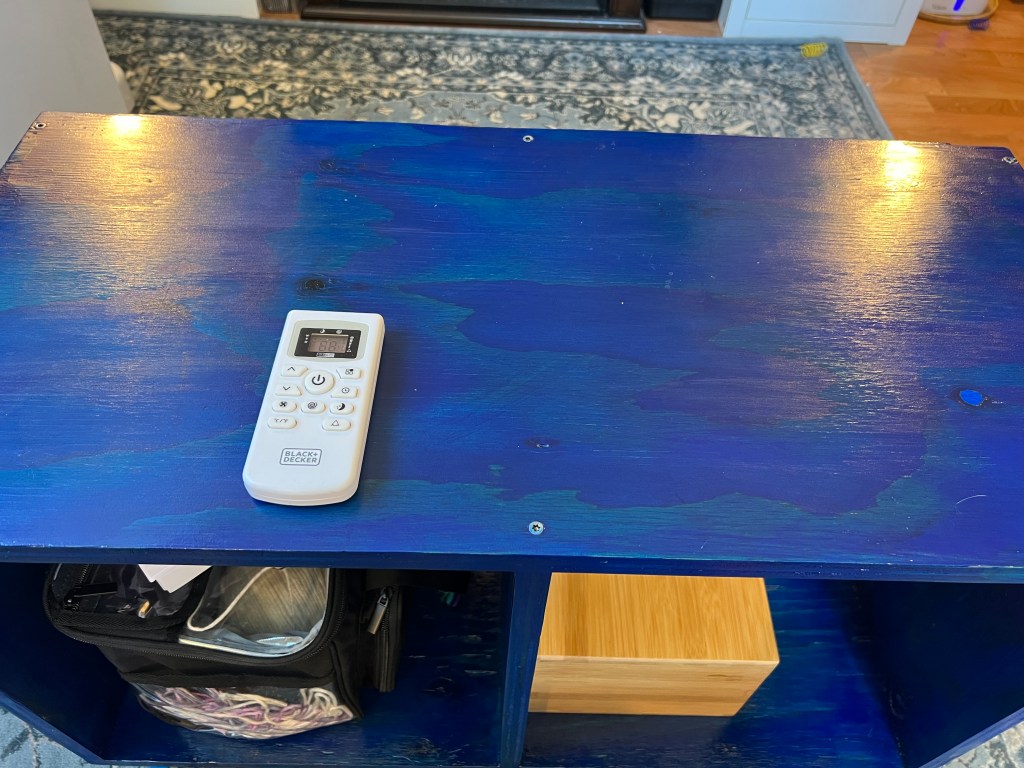
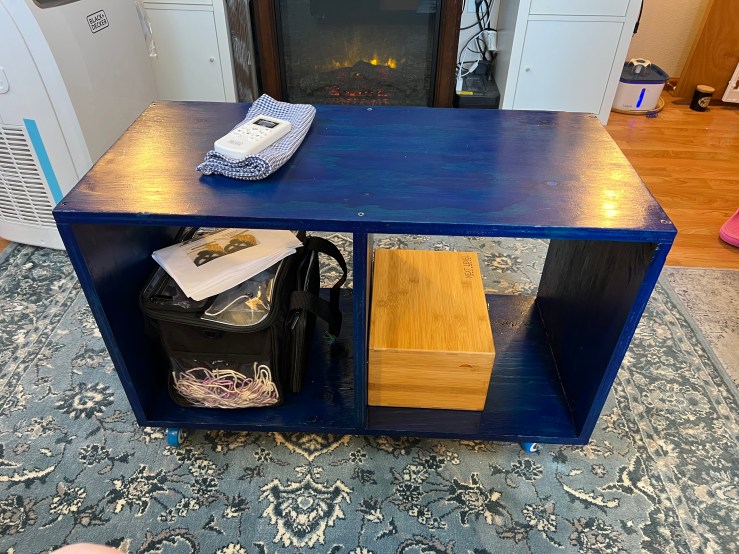
Here is the finished coffee table top. It’s hard to get a photo of the color. In this photo it looks like washed out patches, but in real life, it’s really stunning and nice. It’s like a sea of blue variegations.
This is all I wanted in a coffee table. It holds my crochet bag so the cat can’t get to my yarn, and my pot box, and soon to be home for my Arizer. No longer living in an apartment means I don’t have to hide everything in a closet anymore, so I wanted my coffee table to have space for it all.
I looked at all sorts of options for a coffee table, but I just didn’t like any. It had to be a bit tall because my couch was tall, so I just made a simple plywood box. The ones online seemed overpriced, and cheaply made, and weren’t the right height. Plus, I like to keep my feet on it, and eat off of it so it had to survive me.
For the spices, I have tried numerous organizational processes in the new house. The problem is, I have a lot of spices, and I make my own blends. I can’t digest garlic, it seems, so I do all my own blends for my most used items. Add to that, I cook a lot of different styles, so I need spices for Indian food, Chinese food, Japanese food, Italian food, you name it. My wife also bakes, so we need that too. What we have on hand is usually indicative of what we’ve been cooking in the last 6-9 months or so.
Even better, we can see them all. My wife has ADHD and if it’s out of site, it doesn’t exist. To a certain extent, having them all crammed back in a tiny cupboard meant I was over buying as well.
I will probably use the Unicorn Spit again. I have bedroom night stands I am making out of plywood, so I will probably use the same blue Unicorn Spit process for them.
While I sanded the coffee table, the plywood was still too rough. I think if I do it again, I am going to really sand the crap out of it. The spice rack was sanded 1 x 4’s and it was so glossy smooth and the color came out so great.
I am still learning to work with wood, so while this is a really rough beginners project, I am still super happy with it.
The thing about moving into our own home is that we get to fix things that bother us. The downside is my list of fixit’s is so long that some items, like this morning’s fridge door fix we talked about, but just never made it to the physical list. My list is like a 5 year plan with marvel-esque phase roll outs.
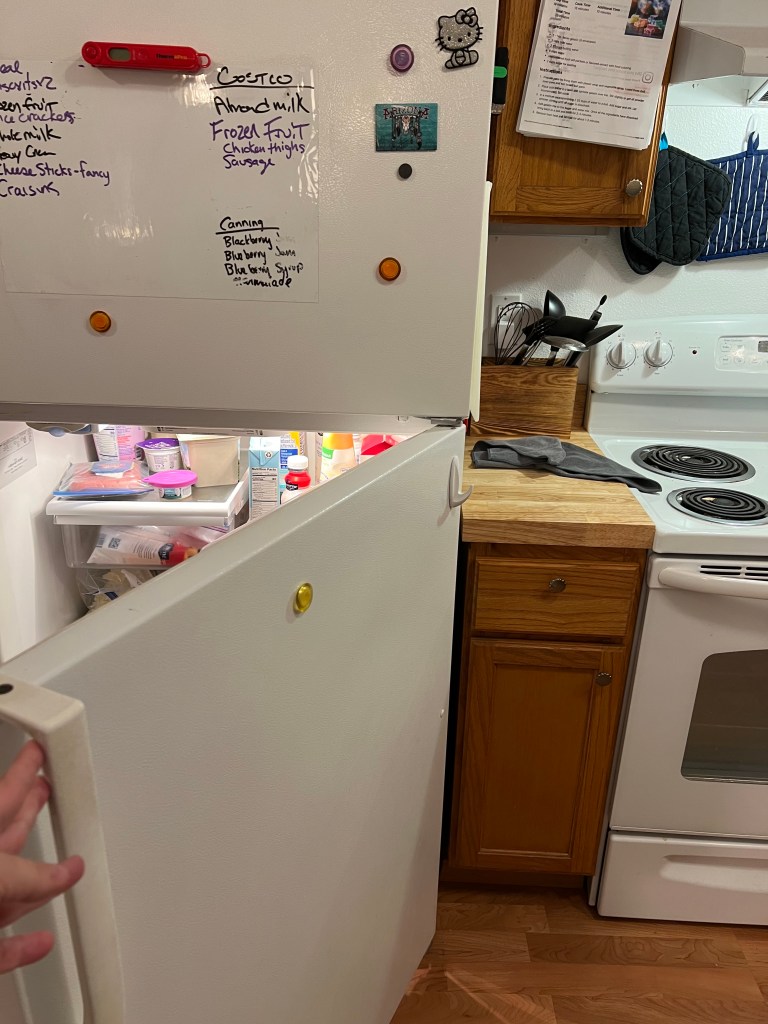
This morning’s issue was the refrigerator door. For some reason, the way the fridge door opened was away from the cooking area in the kitchen. You’d have to walk around it, open it, then bring everything back to the counter.
It kind of breaks my heart that the little old lady that lived here before us had to shuffle around the fridge door every time she cooked. Someone should have fixed this for her.
My wife and I hated it from the day we moved in, but I while I had a hazy idea it was possible to flip them, I didn’t really know how, and honestly there were just so many more pressing things that needed done.
Last night, I had insomnia and was up at 3am, and for some reason when I got a peanut butter and jelly sandwich, the door irritated me again, and with nothing else to do, I started watching videos on it.
I found this video with my make and model fridge, mostly:
Video on how to reverse a refrigerator door.
It took me about a half hour to 45 minutes from gathering tools to putting them back in the shed and then it was fixed!
I had two white plastic door hole caps that were so old they broke, but they were decorative, and you can’t even see them on top the door. I could care less. I am so happy to have the fridge door facing the right direction now. My wife and I are both ecstatic.
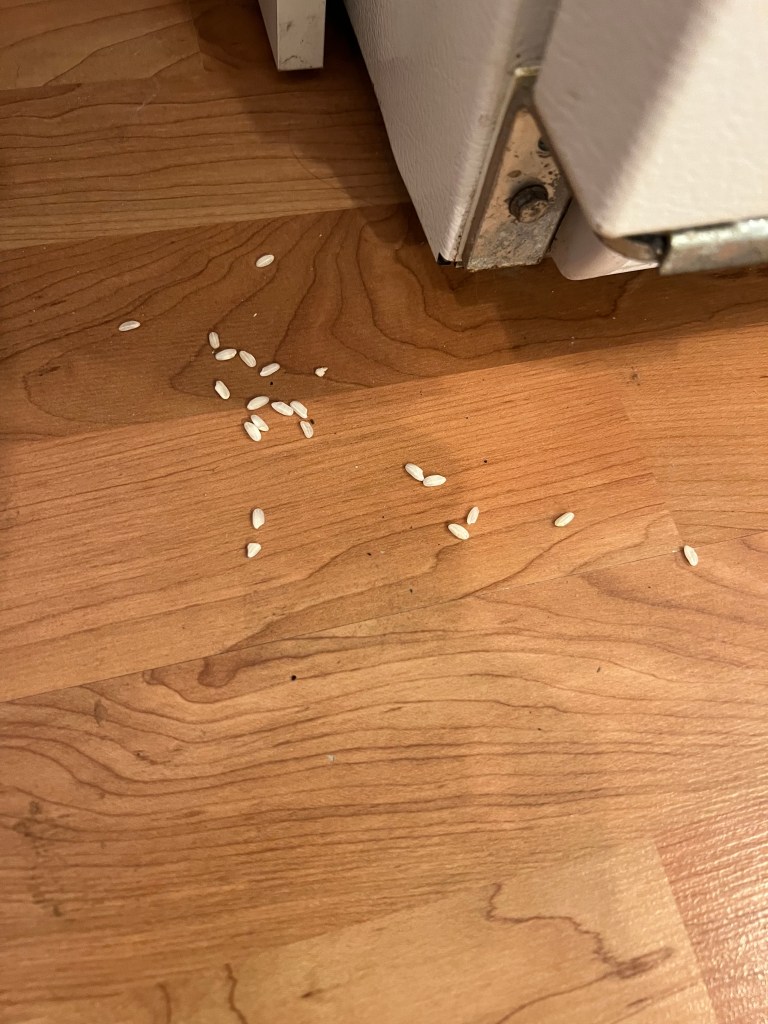
Funnier to me, was when I popped out the bottom grill to move the bottom door post over a bunch of rice came out. That is my rice, from the day I moved in.
I dropped somewhere around 5 pounds of short grain rice in its plastic tub, which spilled literally all over the kitchen. You cannot appreciate how far 5lbs of rice will scatter until you drop it. I was so exhausted and sore from moving that I almost had a five star meltdown. I was in a hurry, and had to get so much else done as I was bringing it over before work that day, then I ended up sitting on the kitchen floor laughing at the absurdity of it all.
I told my wife, even after sweeping it all up, that rice was going to keep showing up for the rest of our lives. This bunch of it came out from inside the refrigerator grill. I guess I was right.
This is one less thing on my giant list, even thought it never made it to the list proper. I can stop thinking about it every time I open the door.
I am in my 50s, and I have a degenerative joint condition. As a consequence I work 4 days a week at a sit down office job, not five, because sitting in an office chair is painful. This is in stark contrast to my younger years, when I would not only work 5 days a week as a floor nurse, but also do 12-16 hour project days on the weekends. This means that small projects can wreck me for a few days.
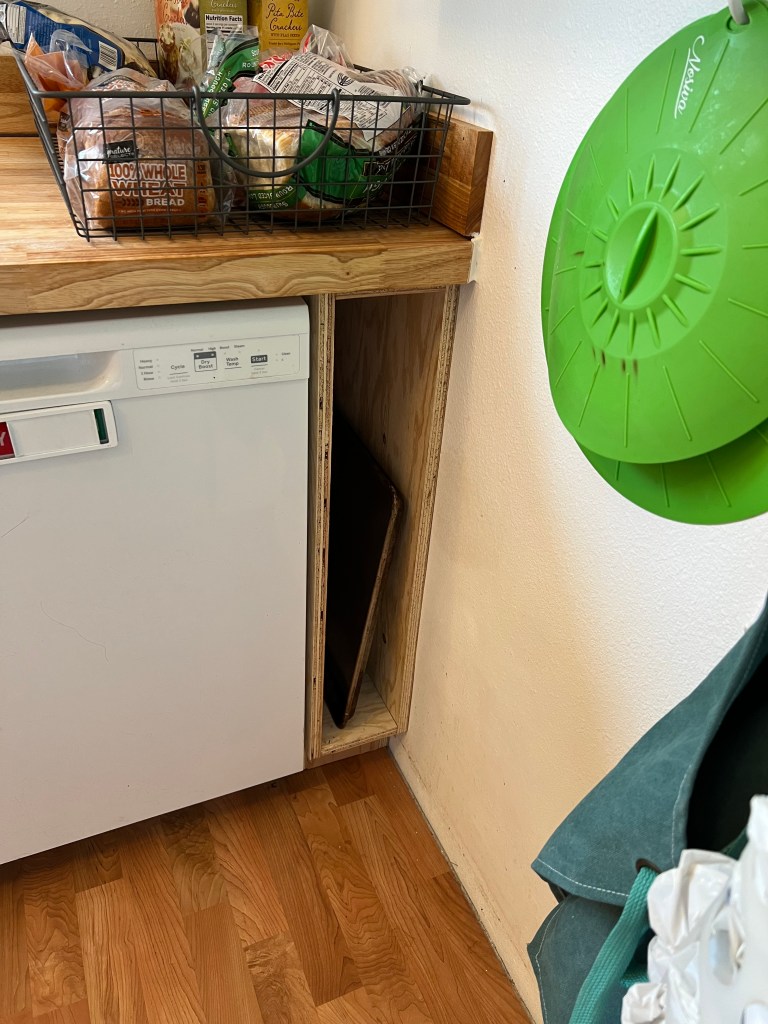
With this in mind, yesterday was a nice day, so I pulled out my saw horses and tools, and built a cabinet box for next to the dishwasher.
I haven’t put the trim molding back because we are contemplating putting some sort of panel on the wall there. Something more water resistant due to the dishwasher. We are waffling between a traditional bead board look, or just abandoning all sense and doing art under acrylic sheeting.
This was just a gaping hole under the unsupported butcher block counter tops that the shit contractor left. He was paid to make a slide out cabinet but didn’t do the work. This is an ugly cabinet box made of 3/4″ plywood. I plan to paint all the cabinets and I will edge band and paint it when I do the rest. I was mostly concerned about the unsupported heavy butcher block drooping onto my $600+ dishwasher. Now I feel my dishwasher investment is protected, and we will be fine.
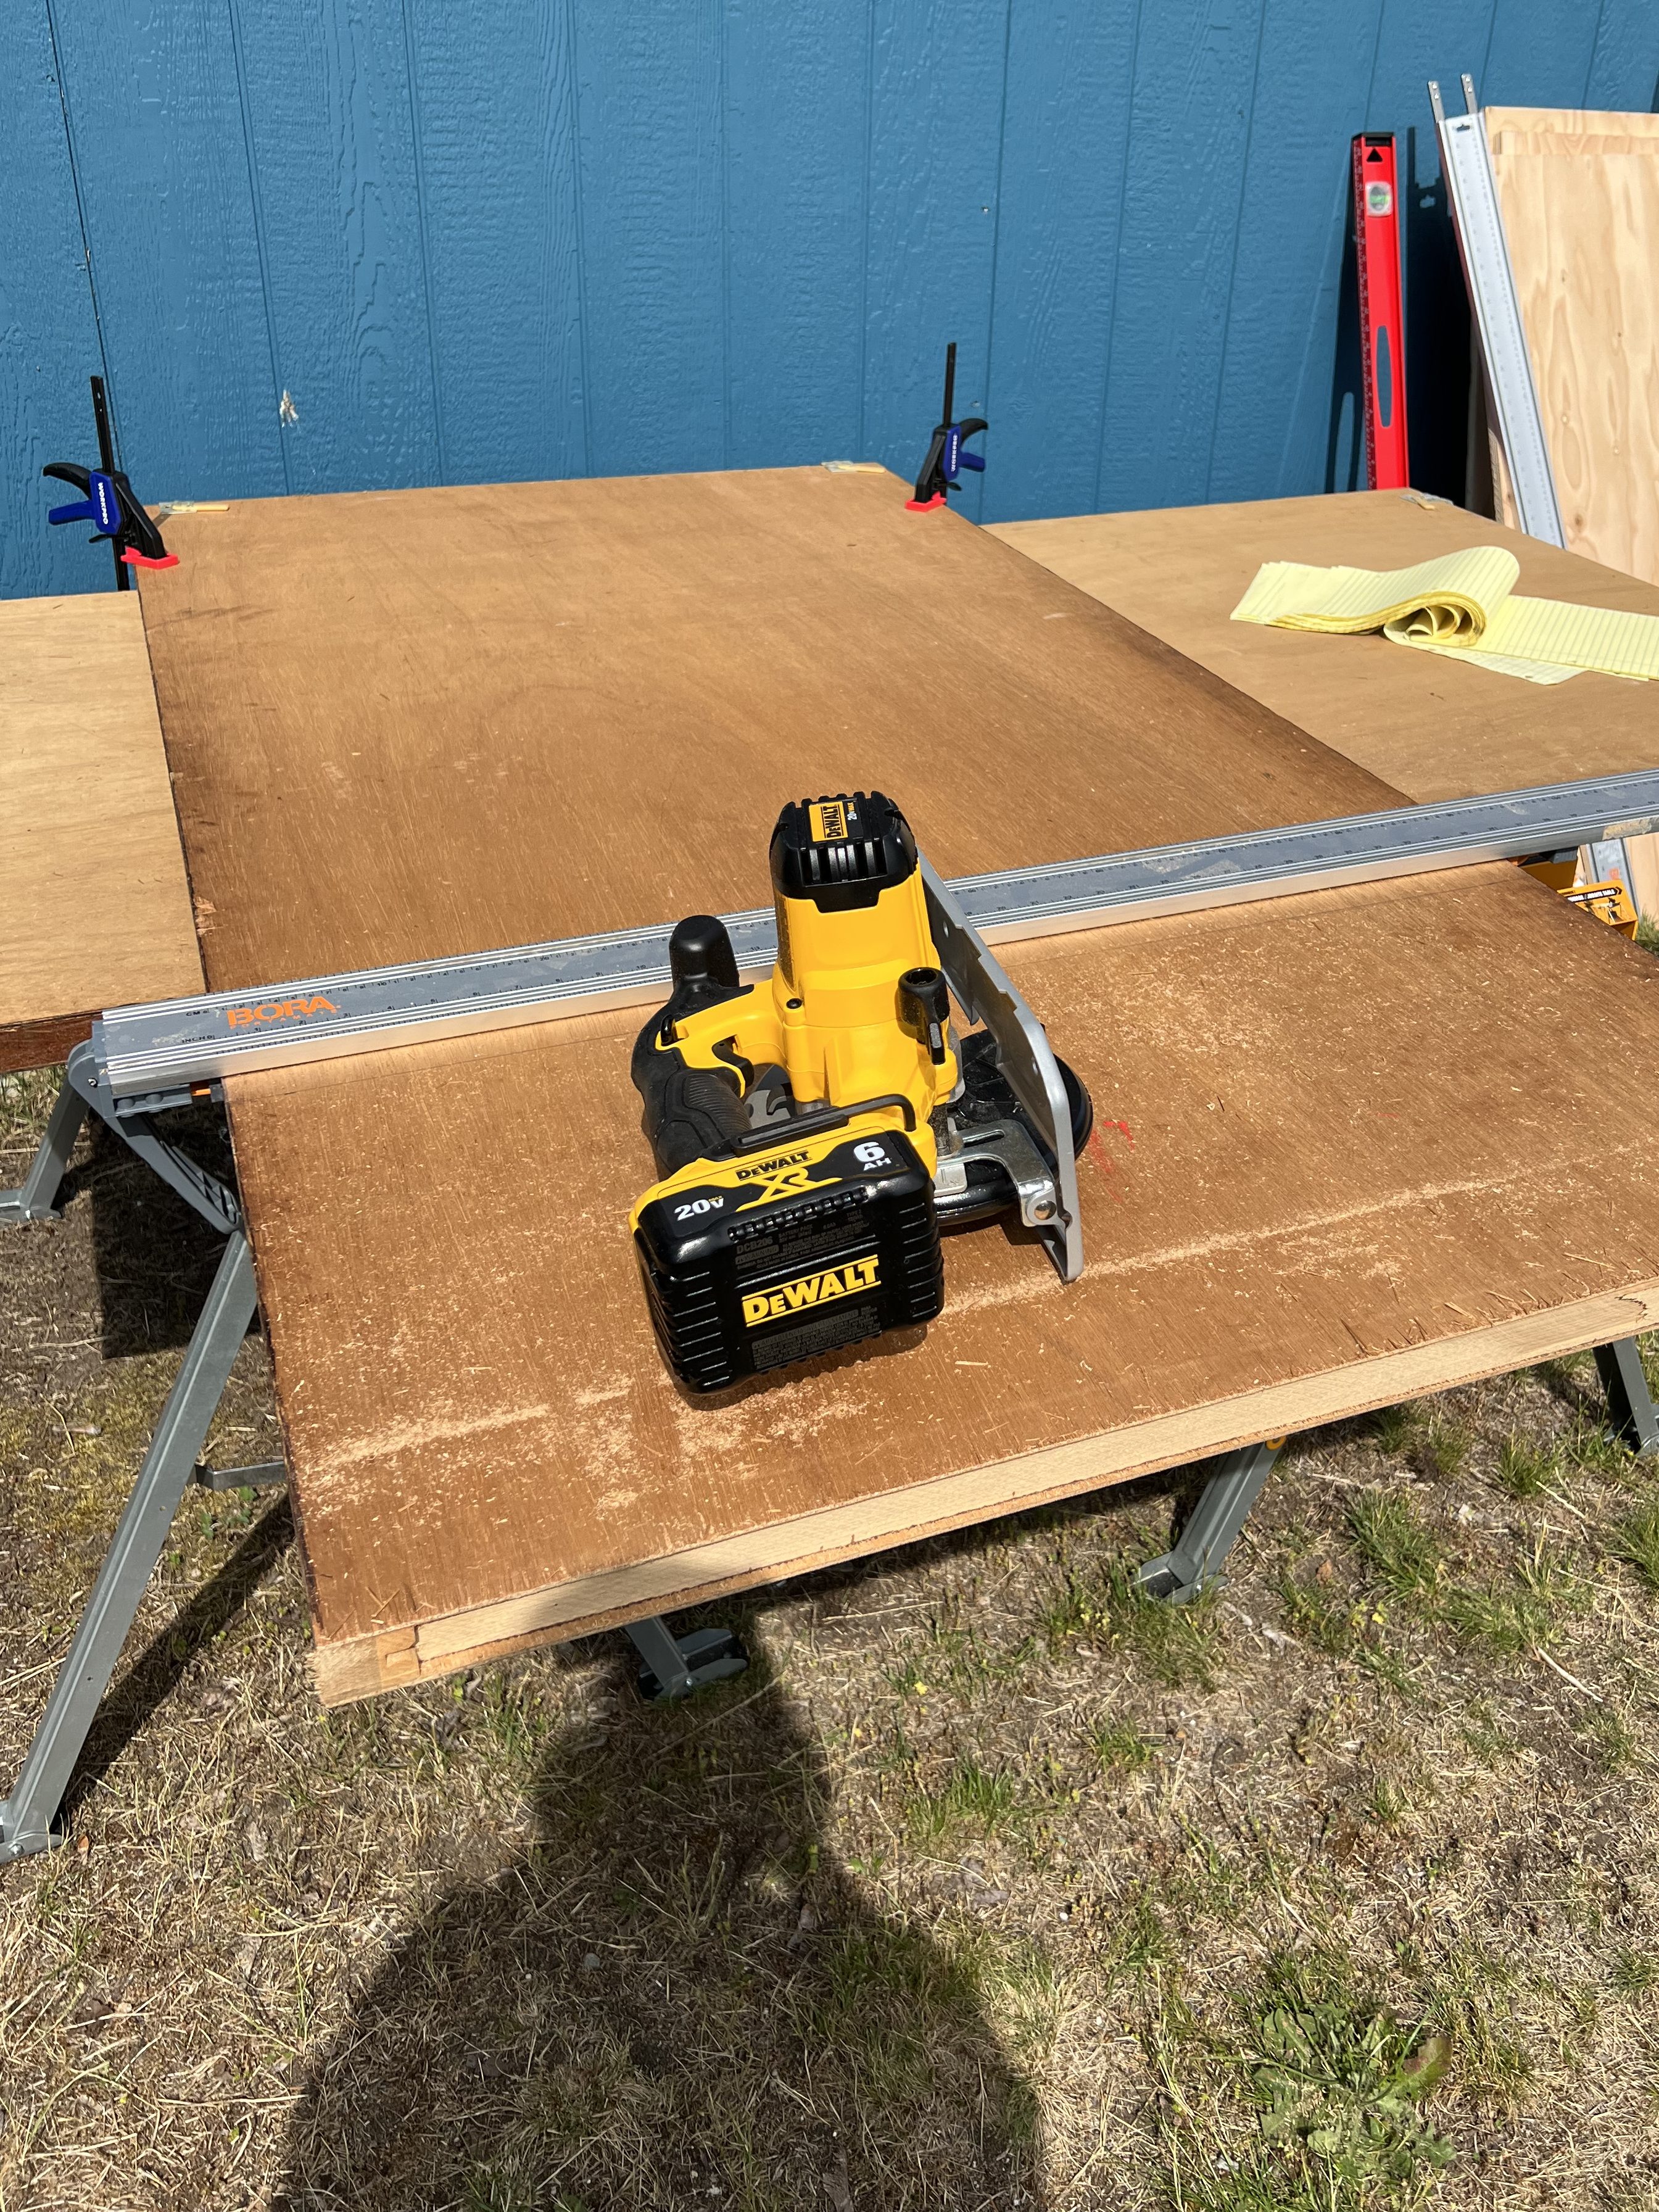
While I did this, I also cut up two closet sliding doors that we had to get rid of, so I can slowly feed them into the garbage can.
It also was good practice for using a circular saw guide that you clamp onto the wood. I’d never used any kind of guide before and this is my first circular saw.
This is a Bora WTX clamp. I really like how it works, but the reviews are right. The sled was just a pain in the butt for my Dewalt saw, so it’s got no use for me. I got straight cuts without the sled just fine.
I don’t have the most experience with circular saws, because when I was a kid I looked like a girl and my father refused to let me use any tool you had to plug in. I’m mostly self taught with the help of online videos. The guide came with a saw sled, which pretty much all the reviews said was garbage, and they were right. I tossed the cheap plastic thing, and just did my thing without it.
Turns out circular saws are not as scary as I had originally thought. I feel pretty comfortable now. It’s definitely weird going from being treated like a girl, and disallowed all access to the tools to make my life easier, to now not only being given access, to being supported and having other men in stores get excited to walk me through it. If transitioning from female to male ever taught me anything, it’s that sexism around home improvement and gender rolls are pretty damn real.
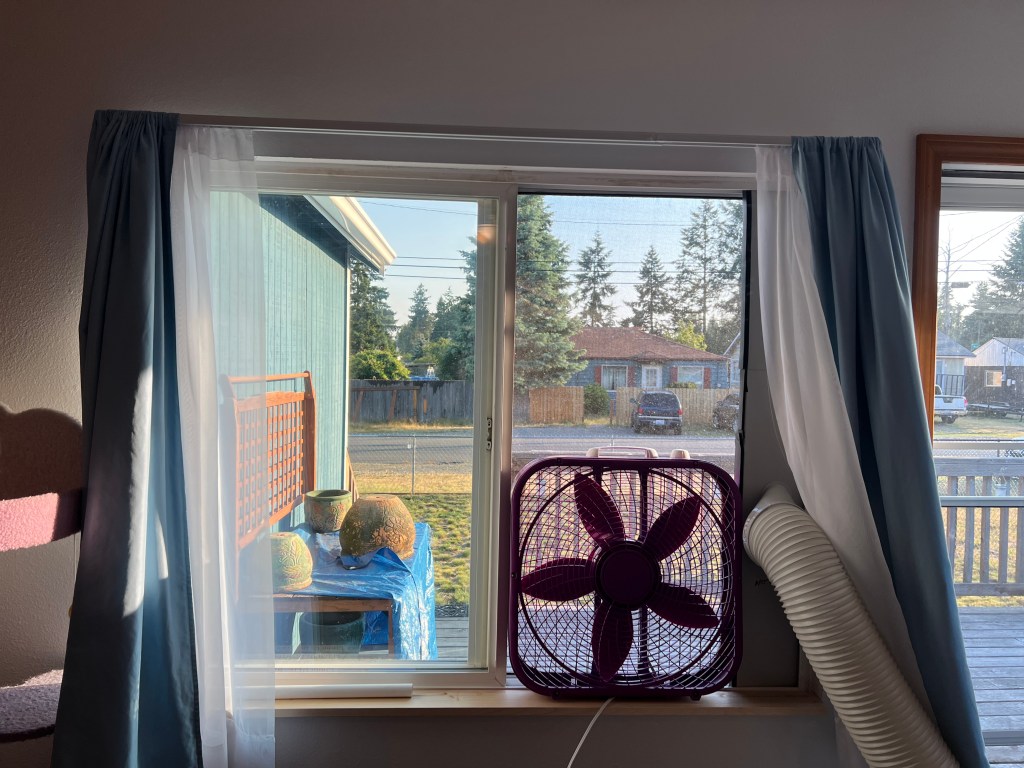
Speaking of ignoring gender rolls, I also finished sewing the curtain for my work room.
The house came with these thick white blinds. They aren’t terrible, but the cat and I hate the blinds. We lost about 6-7 inches of window at the top of these like you see in my half thought out before picture below.
That cat tree is going to be replaced with a built in wall unit for our fat princess. It will take less space and be in less dire threat of being toppled by her antics.
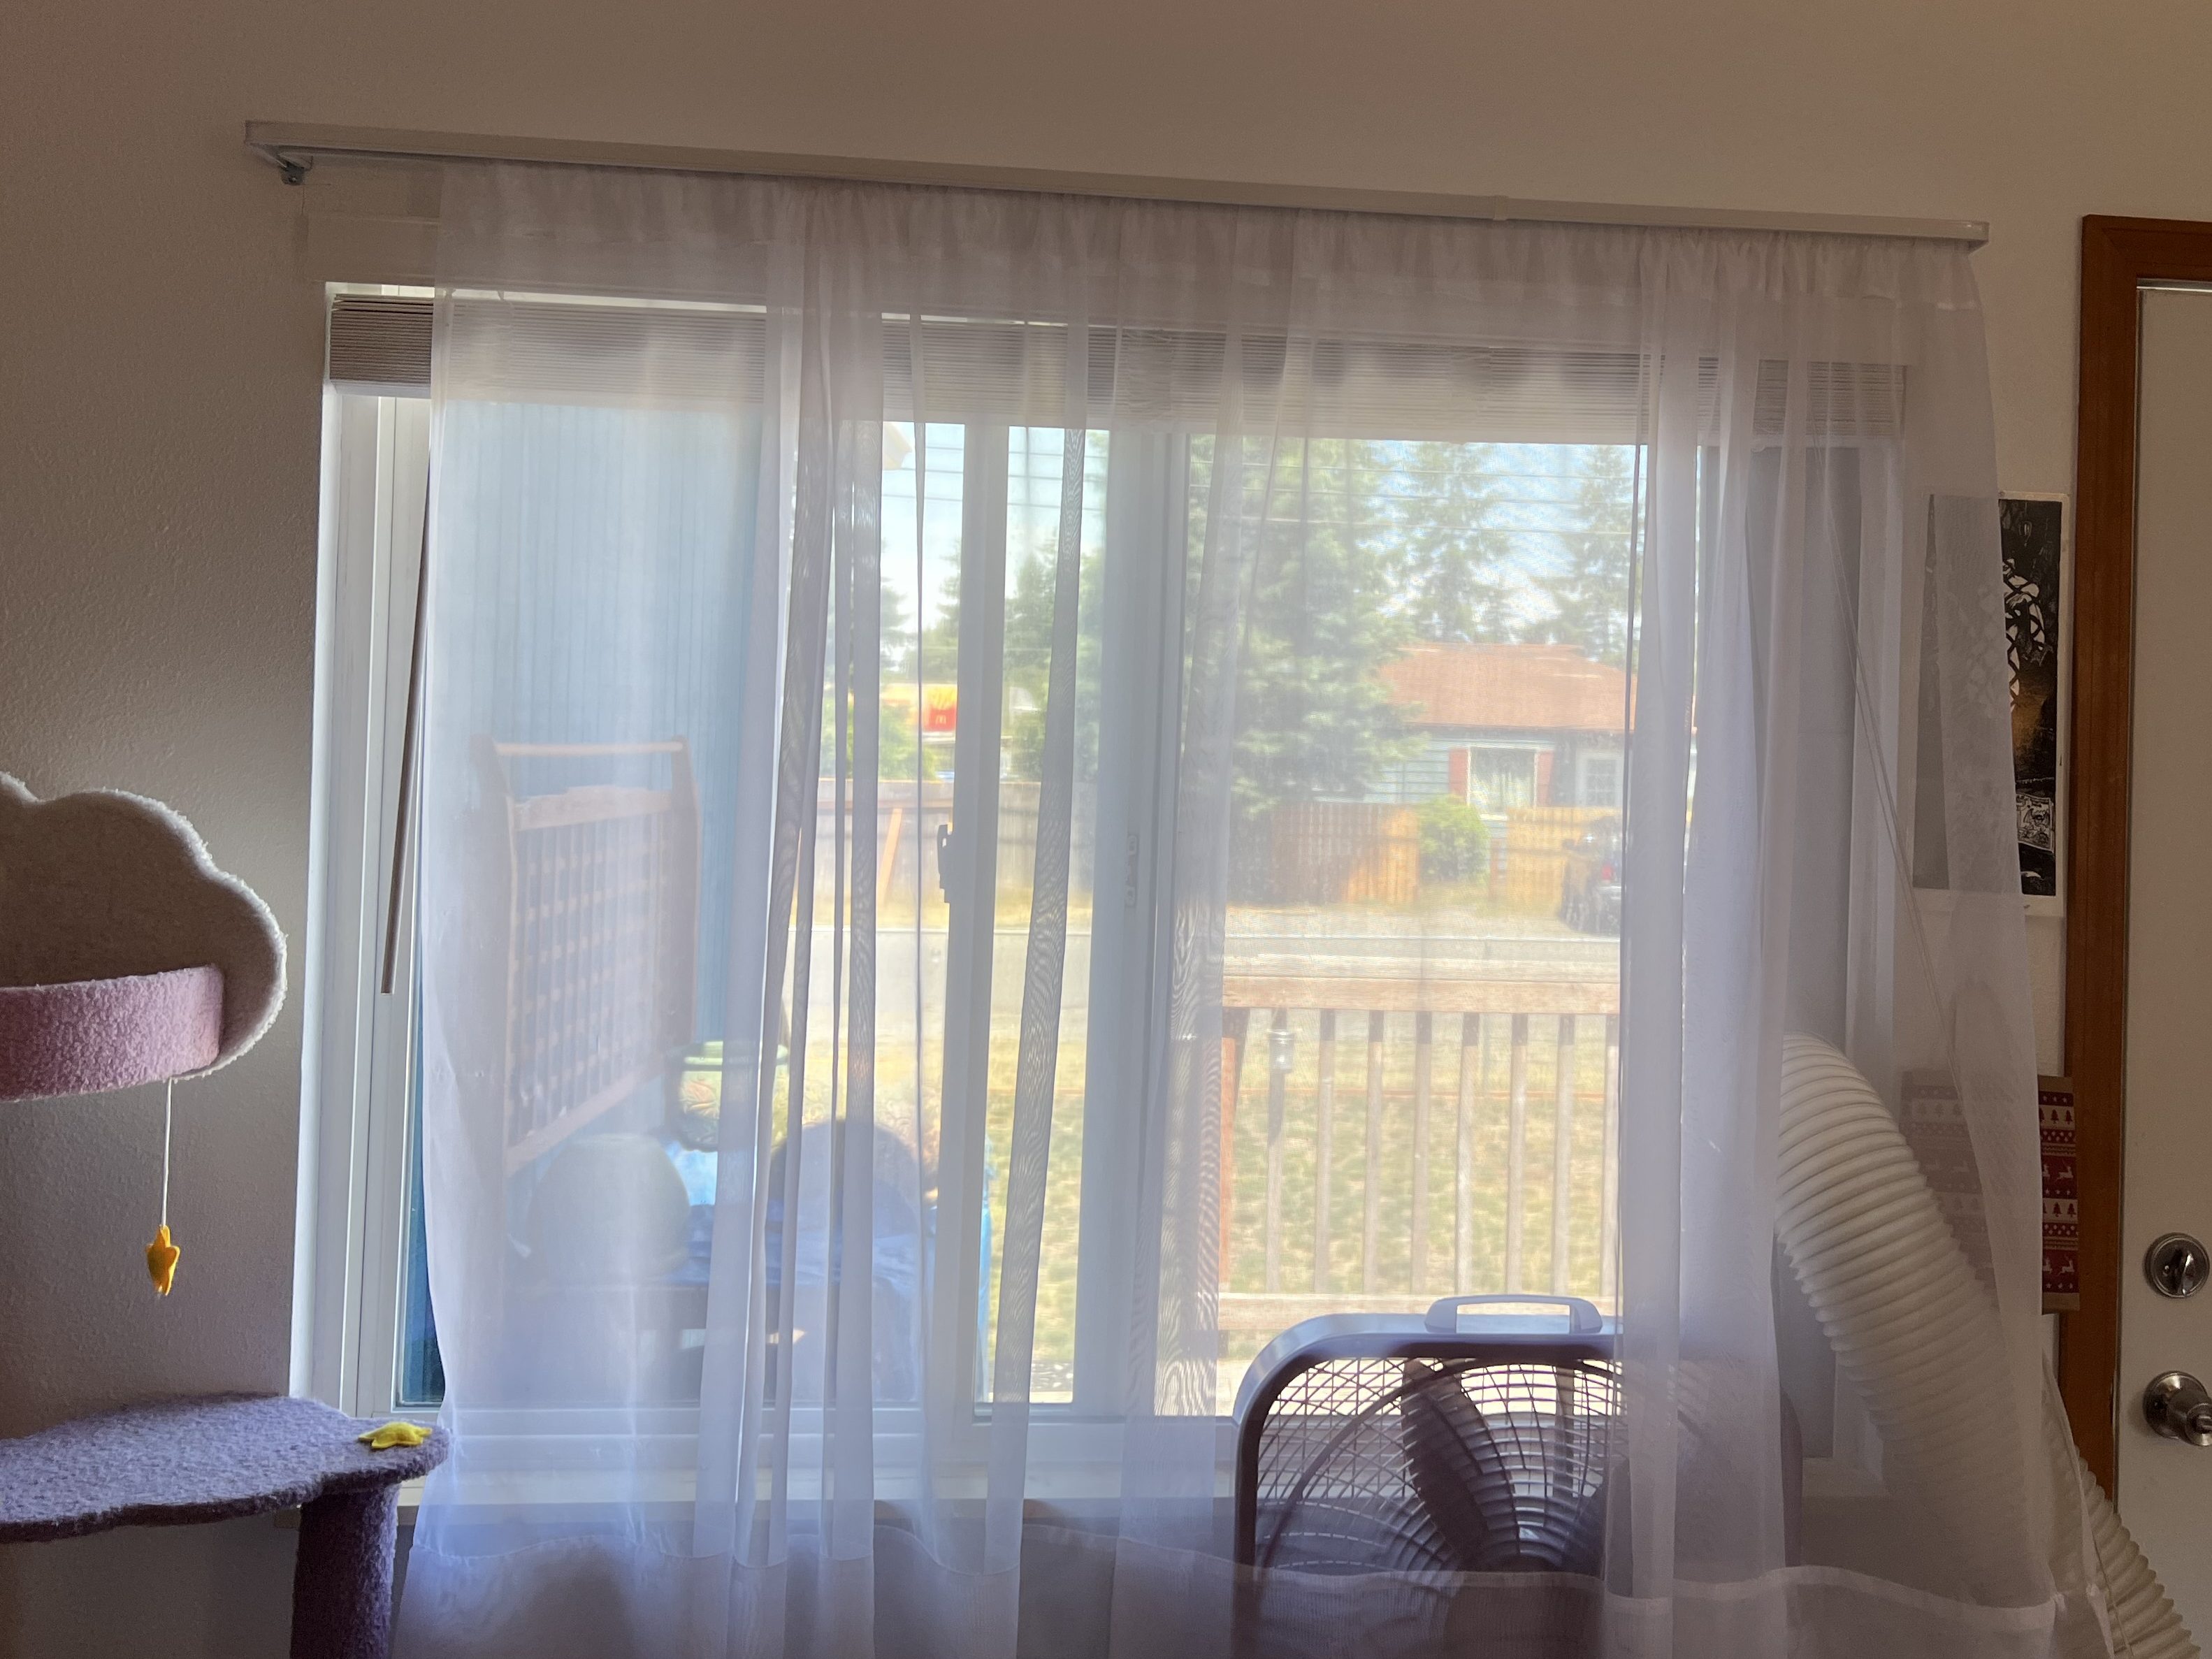
Below here is an unfairly better taken after picture in which I opened both curtains, and also washed the windows because I noticed how filthy it was.
Ignore the potting bench that I am using for delivery drivers to hide packages behind, when they can be bothered. I am buying a bench to put there instead. Also, ignore the portable air conditioner. Getting mini splits for air conditioning is a few years off.
We will probably always keep the sheers closed because there is a lot of . . . activity across the street and we don’t necessarily need to live in a fishbowl.
I mean, The windows look so much bigger with that 6-7″ of space back. Also, look at that nice new window sill! I did that a few weeks ago, mostly because our cat is fat and can’t get up on there without it.
These projects are all a part of Phase 1 of the house plan. When I get all these little things done, I will deep dive into each room. That means better curtain rods, painted walls and cabinets, and finishing touches. Right now? I am just trying to get things functional and ready for a full launch into next year.
After all this, which I don’t think is much, I spent the rest of the day laying in bed sore as hell. I will probably not do much today either. I have to accept I am not 25 anymore, and pushing my body this hard has consequences. I’d be very kind to anyone else fighting with this, but I always feel like I could have done more.
After I finish writing this, I will probably make some breakfast for the wife and I, and go lay in bed again. Not a bad days plan, overall.