Things have been coming together the last few weeks. My wife and I have kept on moving forward with the shed progress. I wish my garden was doing as well as my shed.

The wall insulation took us two days. I cut all the insulation to size from the rolls, and put it in and my wife followed me with the staple gun and stapled it in. We had to do it into two days because all the bending and place for a couple of partially disabled people was like doing an endless series of burpees. However, it went in perfectly fine. The insulation is made to fit into a 16 on center bay so it’s not a hard job at all for a DIYer.
What I found shocking was just how much the sound from the freeway we live by was deadened by the insulation. Like damn. It also kept the sun from heating the shed up too much. I am sure it will be appreciated in winter.

This is all of the wall insulation in. I used Tyvek tape to tape the seams that didn’t have side insulation flaps, where we cut it thin. I also used the Tyvek tape to cover any holes we accidentally punched in the vapor barrier because we are clumsy.
I was really sweating the paneling stage. I had never done it before, and I am reflexively nervous about power tools no matter how often I use them.
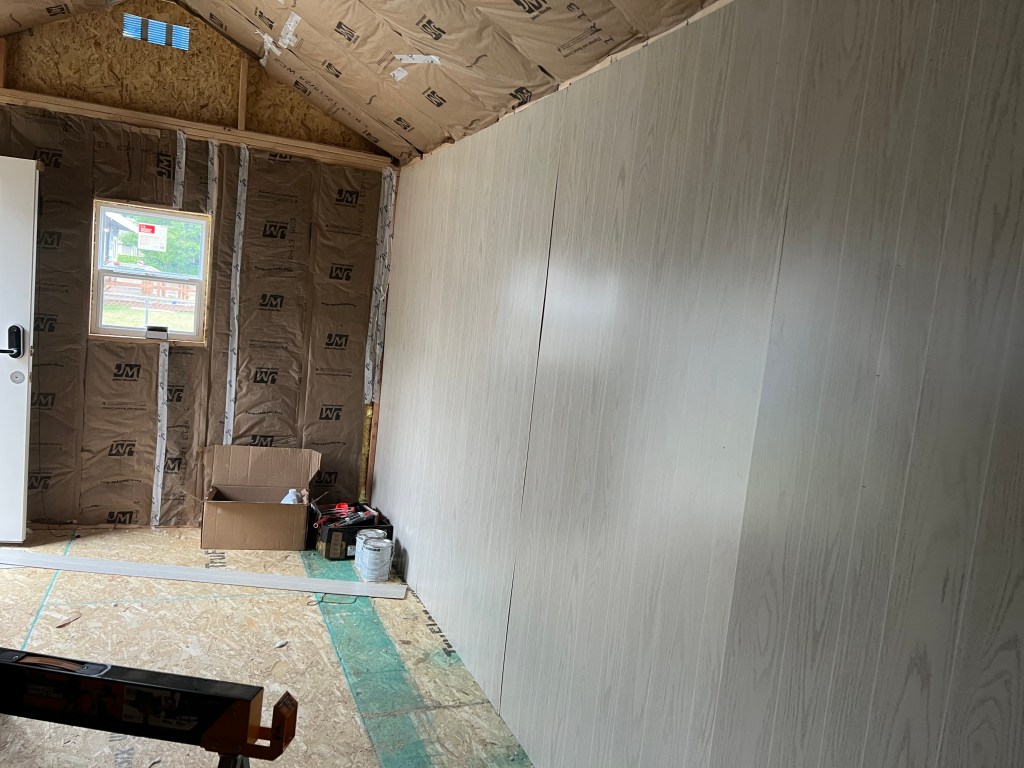
Turns out it was pretty easy if you have two people, and one of them is over 6 foot tall. I cut the panels to size, and we positioned it in place, and my wife staple gunned the top and I did the bottom.
I had to cut a few inches off each panel because the walls are just a hair below 8 feet tall. I cut the top off one, and used the off cut as a template to cut the rest. These super thin paneling sheets could not support their own weight on the saw horses so I had to cannibalize some of my spare wood bits from the other shed to make it work.
You will notice the seams are visible. I didn’t buy any H channels for the joins, as I didn’t realize I needed them? I had never done this before. I should have, but nope. I did not. I am still working out the joins and will probably use a self sticking 7/8″ edge band if I can get it to work. I am waiting for that to come in.
One thing that really did help was a rotozip tool. I bought a Dewalt rotozip tool (No links here are affiliate links. Just what I used.) and a ten pack of paneling cutting bits. That was amazing. I was able to just put the paneling over the window, and use the rotozip to just cut around the outside. Same for the door. I just put the paneling up, and put the rotozip on the outsize molding of the door, and boom! I was able to just cut it like butter. Highly recommended if you are going to use paneling for anything. Also, get the H channel molding for between panels. Don’t be me.
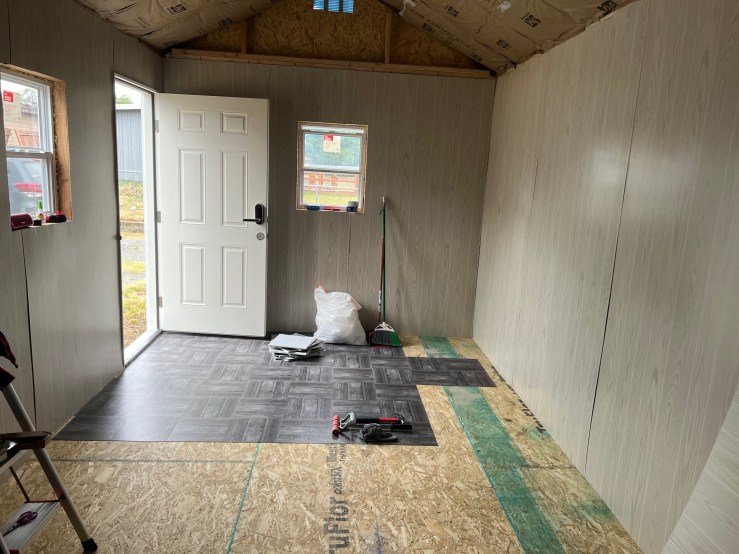
Next step is the flooring. I am just using Floor Pop brand self sticking vinyl tiles. I know these are cheap, but it’s literally just a shed. I used to live in a double wide trailer and we did this across the interior because the 1960s shag carpeting was a disaster and we were poor. They actually did a great job, and held up really well. Better than my current house vinyl floor that is slowly failing, that cost the previous home owner more.
To do this right, I first rolled on a clear coat of pre installation primer adhesive. I was worried the chip board would not be a good surface to stick to. I used Henry Liquid indoor primer. I have never used that before, but you just roll it on. It is white and watery, but dries clear in a couple hours. Very recommended. It didn’t feel sticky or weird, but it kind of sealed the wood and let the vinyl tiles stick very effectively.
I also used DAP Floor patch and leveler after watching a DIY Tiff YouTube video where she uses it on her floor when she redoes it. They are the cutest tiny DIY couple ever. I love watching her progress on her house.
The green boards in the picture above had some big chunks missing from the install that would have made the thin vinyl tiles funky, so filling it worked well. It takes 6 hours to dry, so I started the rest of the flooring and that took all my working ability for the day.
To do these vinyl self stick tiles right, you have to be on top of the dust issue. I swept every few rows, and then kept a dish rag with me, and before I placed a tile, I would sweep it of any possible debris of dust with the dish rag. Then I would really wedge the edges together and kind of roll the tile into place. Then I used a floor roller to really make it adhere. The floor roller is cheap and worth your money. I also kept a hammer to pound down nails that stuck up a bit too much.

I chose to do kind of a basket weave with these stick-it’s because if you run the tiles in the same direction, it doesn’t quite line up, and looks cheaper than if you do it as a basket weave.
I do plan to fix the tall end corner bits on the wall with the vents, but I don’t have any 2×4’s on hand. I’ll just wait on that bit until the second shed is in, and I order supplies for it, so I can pay the Lowe’s deliver fee just a single time. I have to create a 16 on center 2×4 situation up there so I can insulate that as well.
Overall, I feel like this is really starting to come together. I still need a ramp to the door, and to do the gravel around the outside as a boarder, and the panel joins and corner molding bits. However, this is coming to a close and I can see the project’s finish in sight.
Philosophically, this is a different kind of house project from what I am used to. When I was much younger, I’d have had this done in a couple of weeks. I’d have spent 12-16 hour days just plugging along, but now my body doesn’t let me.
That is kind of forcing me to accept my limitations. Like yesterday I started the flooring, and I didn’t feel like I did much, but boy howdy did I feel being on the floor that long. I’ll just keep plugging along and eventually it will be done.
